
Change your Smilecloud email in a few simple steps
You can change the email address associated with your Smilecloud account directly from your account settings.
Smilecloud will verify both your current and new email addresses before updating your account.
Before you start
Make sure you can access both:
Your current Smilecloud email address
Your new email address
You’ll receive a verification code at each address during the process.
1. Open your profile
Sign in to Smilecloud.
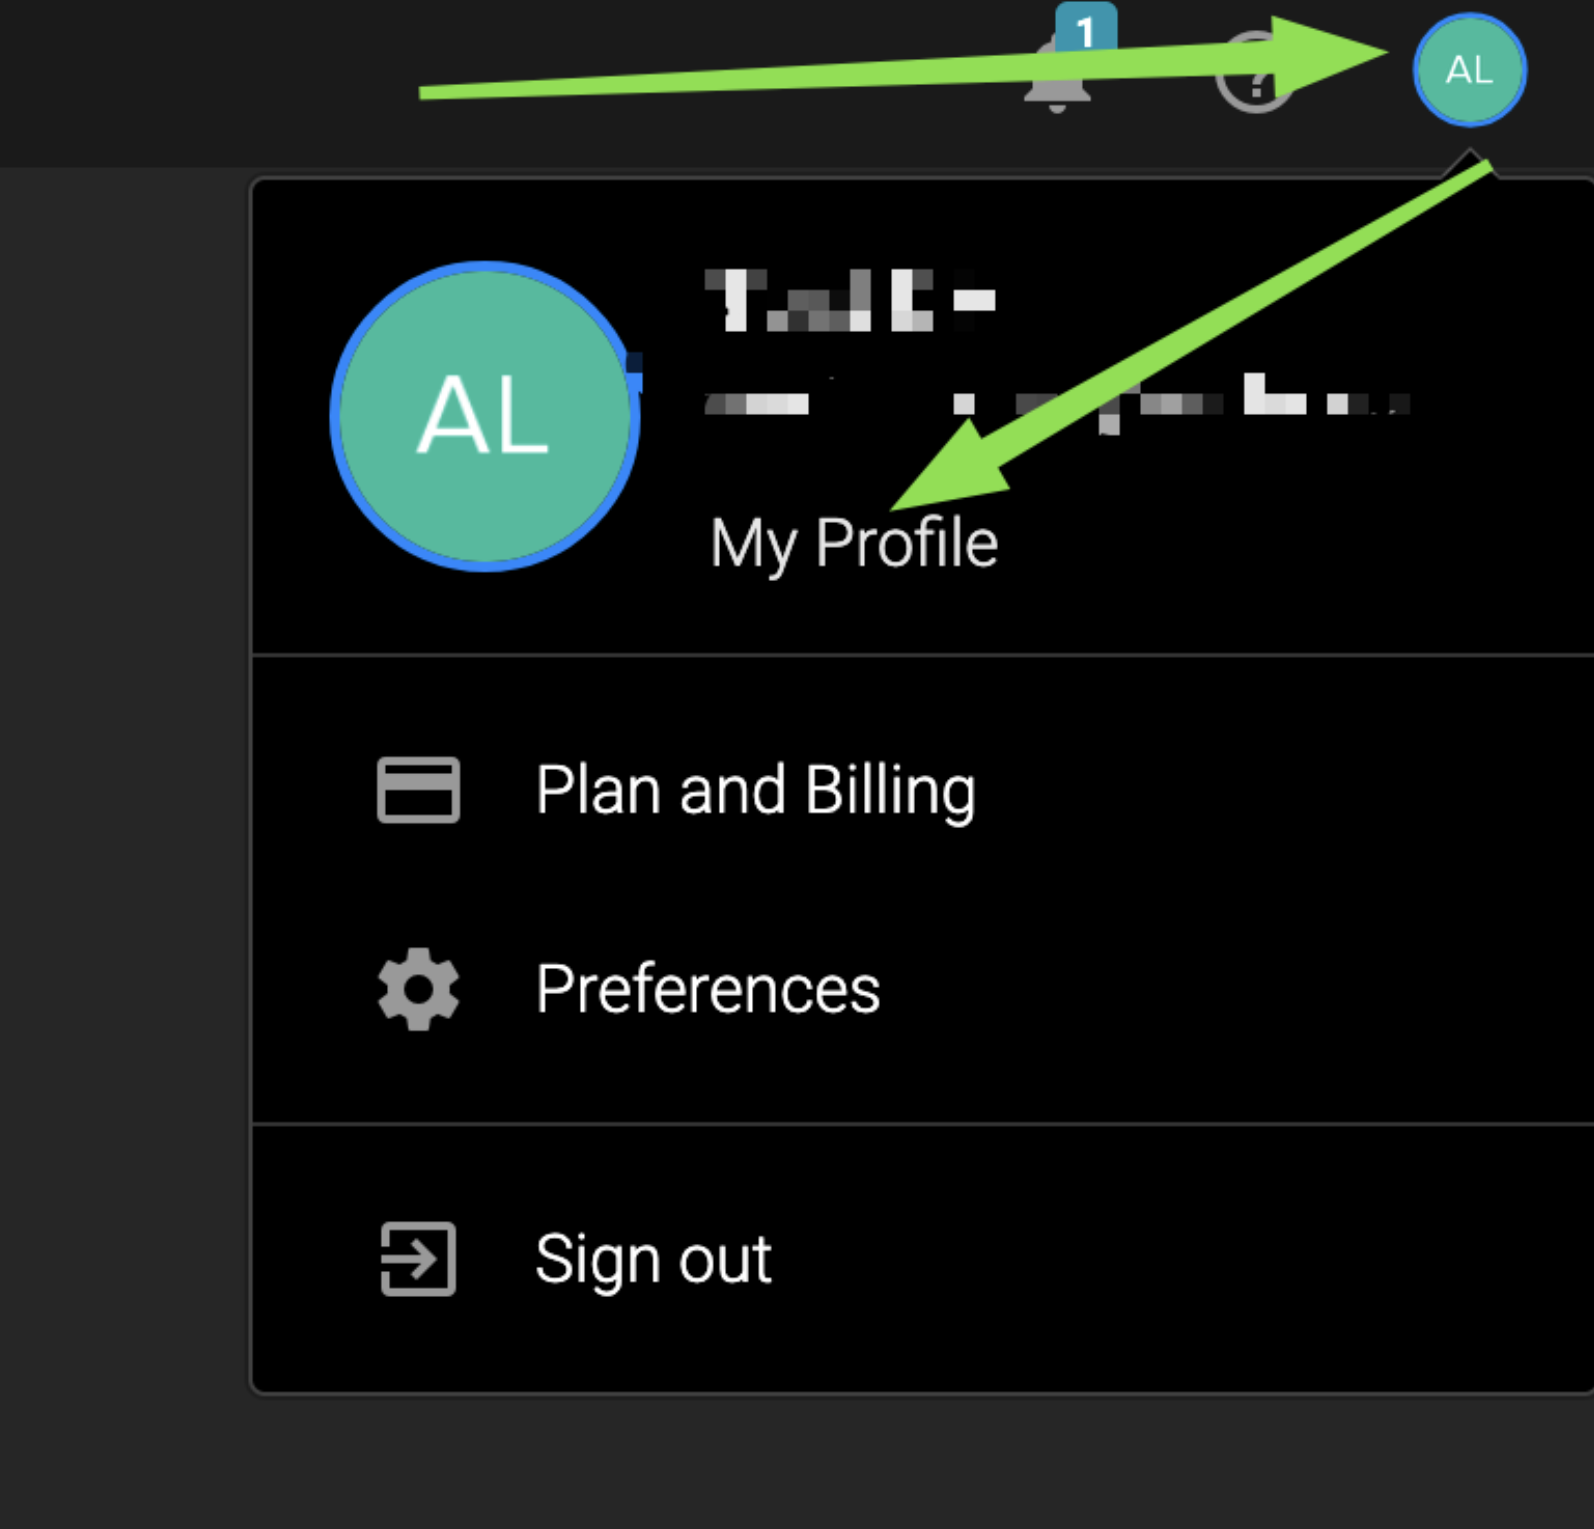
Select your profile icon in the upper-right corner, then choose My Profile.
2. Open Security
From the menu on the left, select Security.
Under Signed in with email, select Change email.
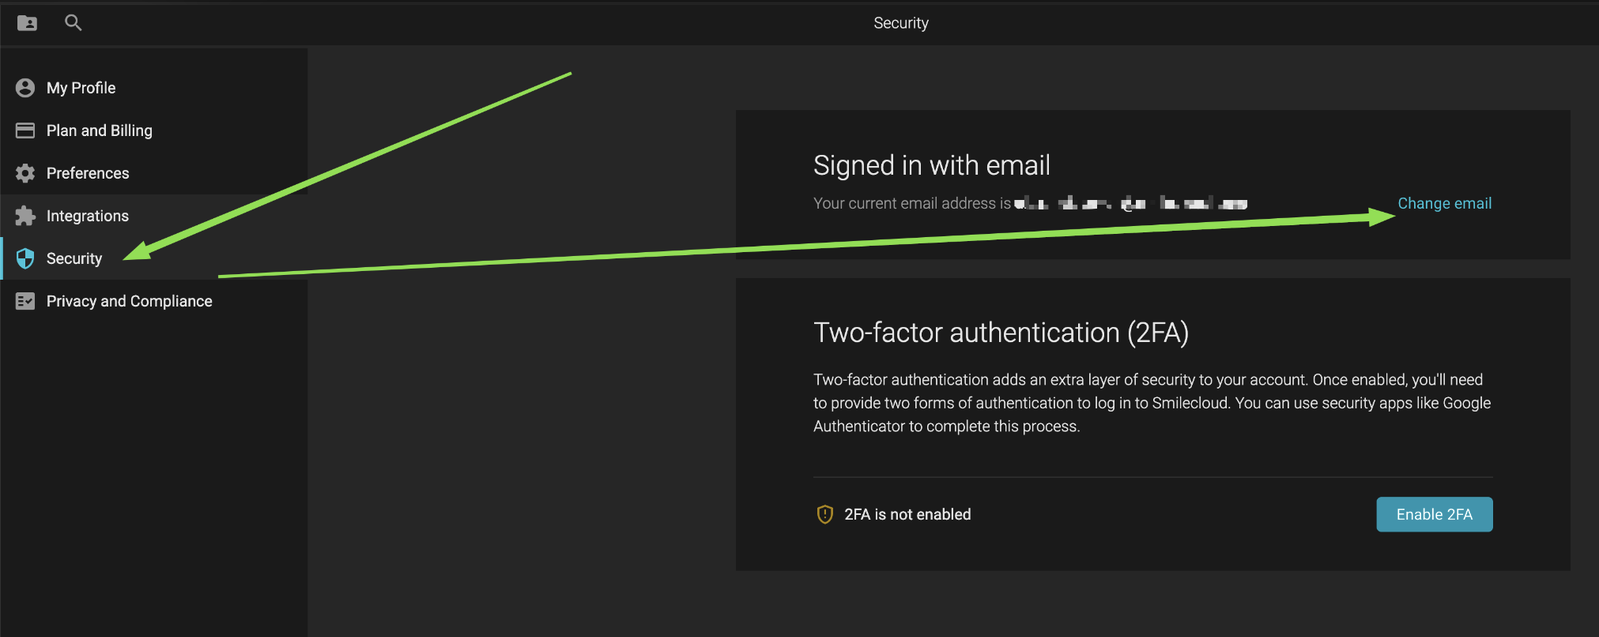
As soon as you select Change email, Smilecloud automatically sends a verification code to the email address currently associated with your account.
3. Verify your current email
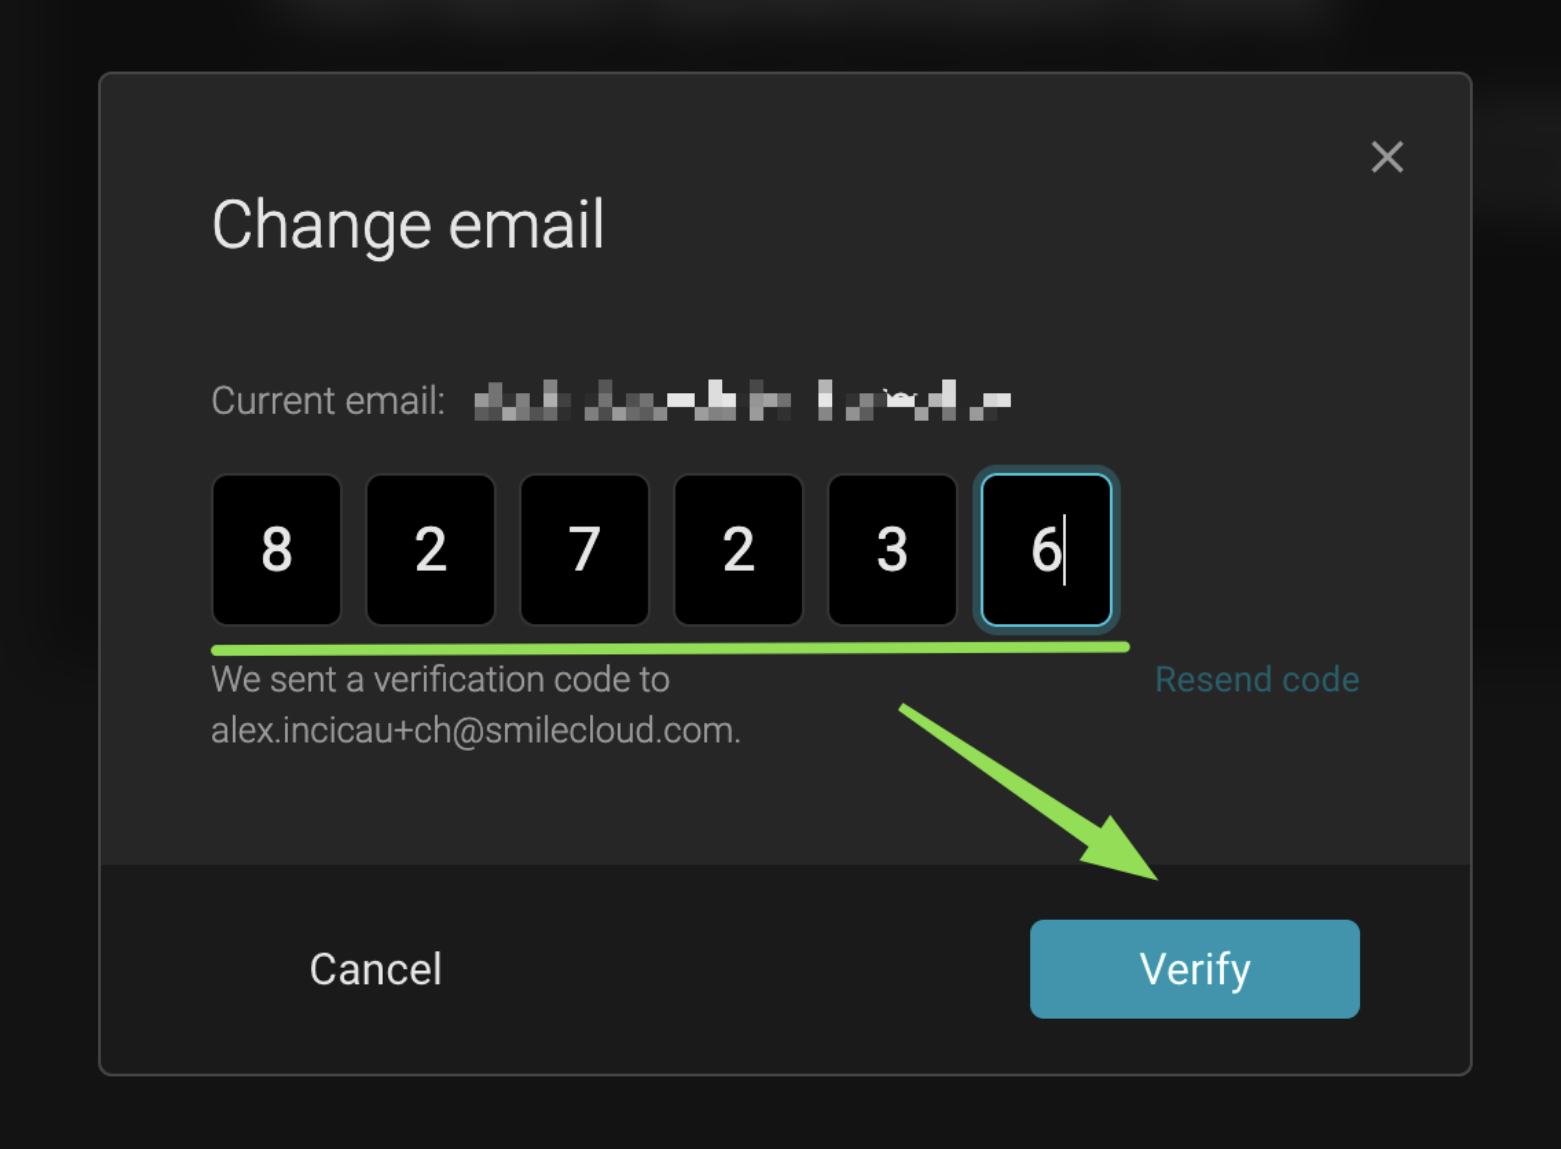
Check your current email inbox for the six-digit verification code.
Enter the code in Smilecloud, then select Verify.
Keep the verification window open
Do not close the verification window while you check your email.
If you close the window and start the email-change process again, Smilecloud generates a new verification code and the previous code may no longer work.
If you receive more than one verification email, always use the most recent code.
You can check your email in another browser tab, another window, or on another device while keeping the Smilecloud verification window open.
4. Enter your new email
After your current email has been verified, enter the new email address you want to use with your Smilecloud account.
Select Send verification code.
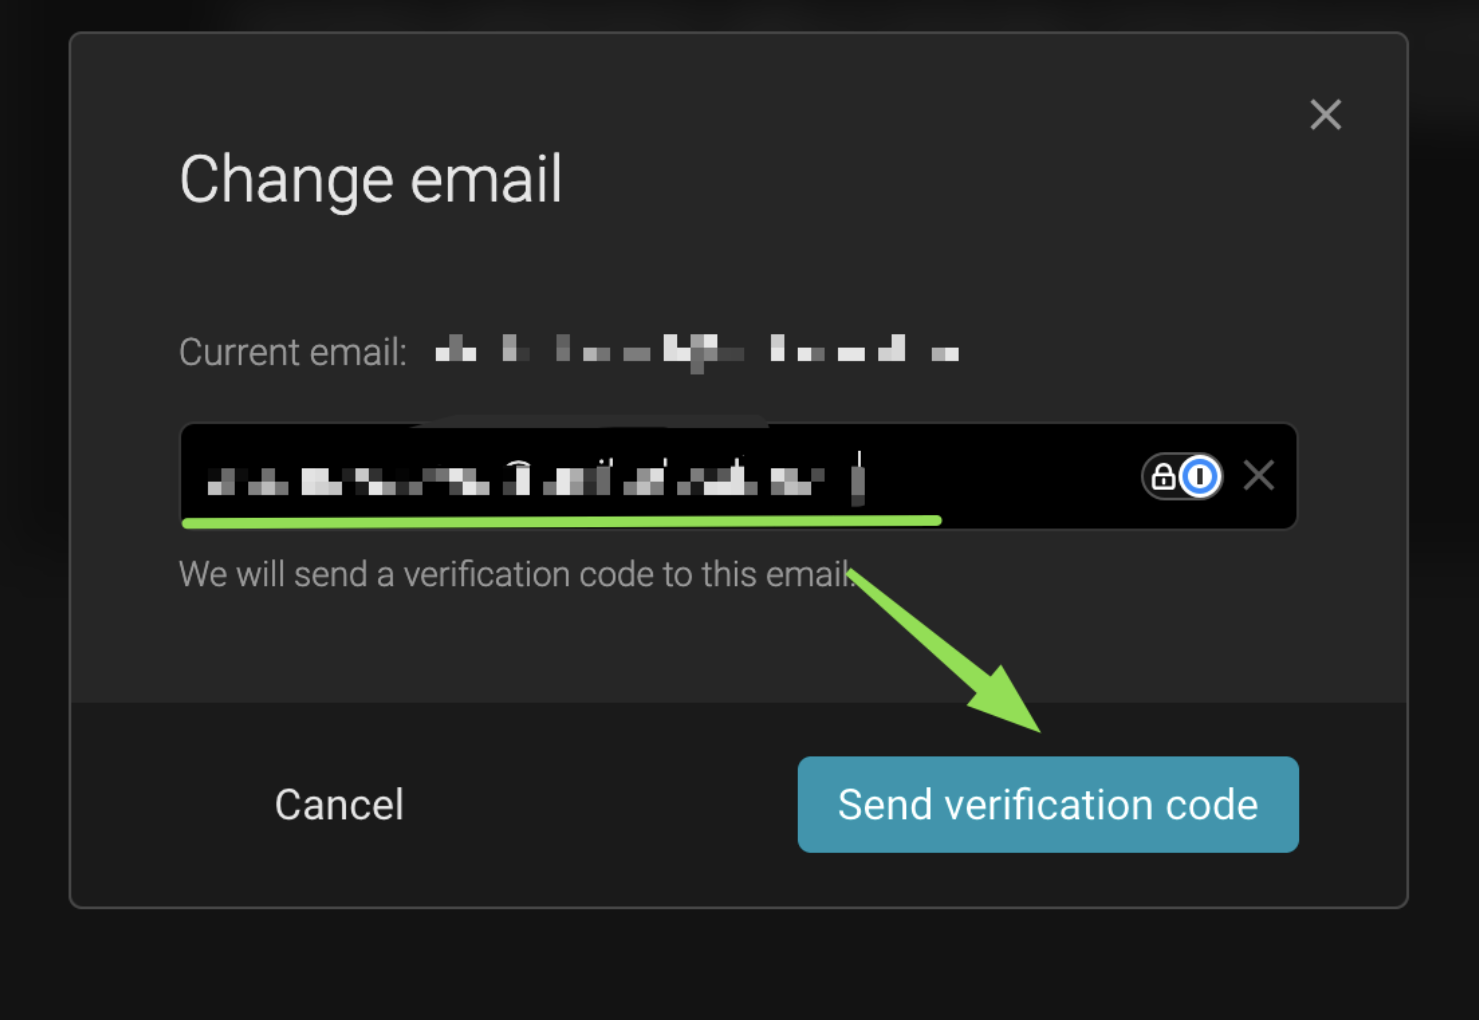
Smilecloud will send a new verification code to your new email address.
5. Verify your new email
Open the verification email sent to your new address.
Enter the six-digit code in Smilecloud, then select Verify.
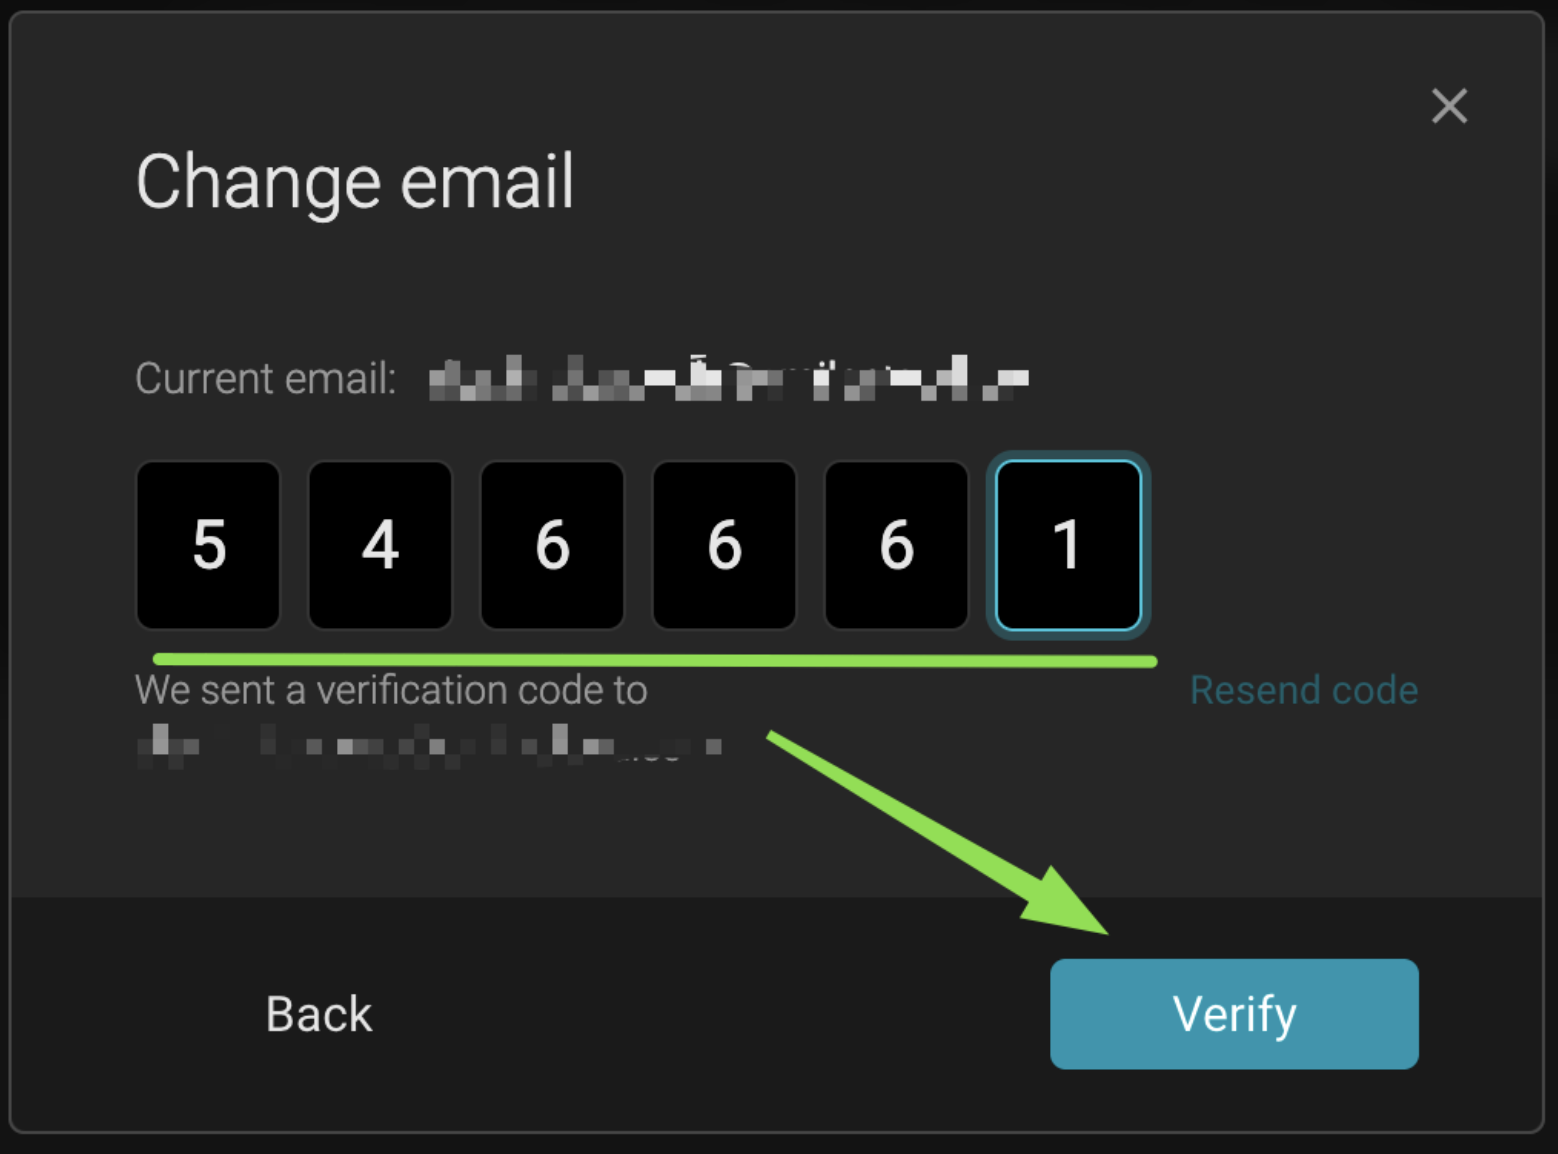
Keep the verification window open until the code has been accepted.
If you request another code, use the most recent one you receive.
6. Finish the update
When both email addresses have been verified, Smilecloud confirms that your email has been updated successfully.
Select Done.
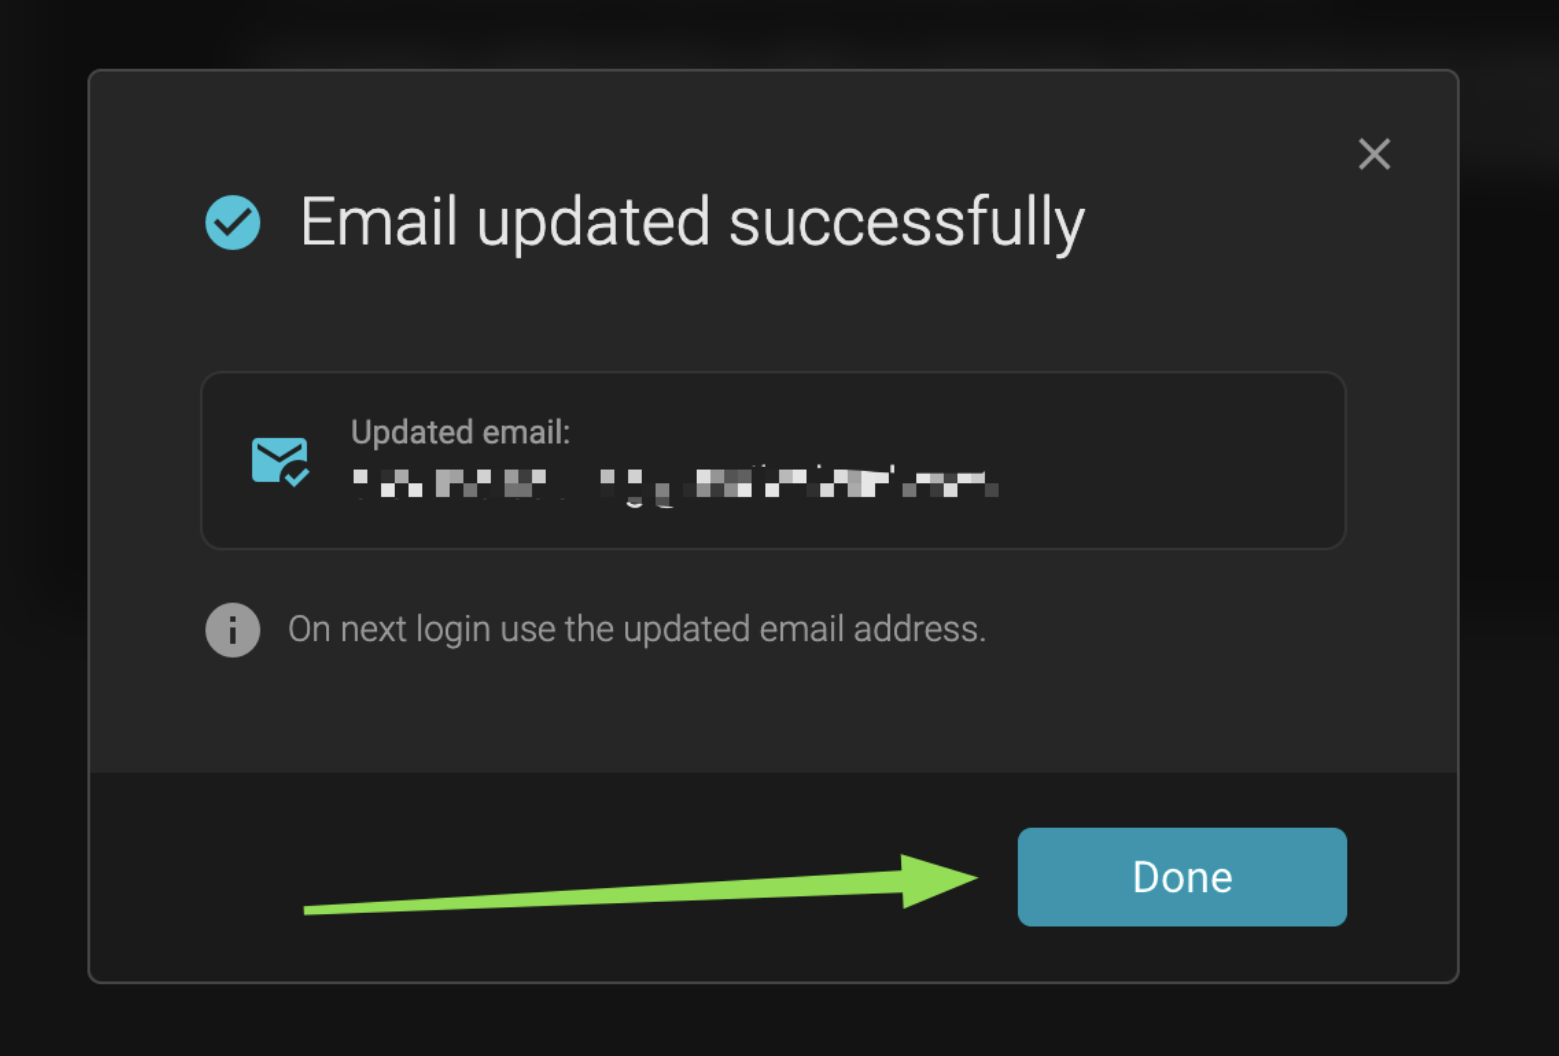
The next time you sign in to Smilecloud, use your new email address.
If you don’t receive a verification code
Check your Spam or Junk folder.
Make sure you’re checking the correct email address.
If you request another verification code, use only the most recent one.
If the process still doesn’t work, contact Smilecloud Support and include a screenshot or screen recording showing where the process stops.
If you no longer have access to your current email
If you can’t access the email address currently associated with your Smilecloud account, you won’t be able to complete the self-service verification process.
In this case, contact Smilecloud Support.
For security reasons, we’ll first need to verify your identity and confirm ownership of the account. Once the required security checks have been completed successfully, the email address can be updated manually.