Create a Signature Design
Applicability:
You want to visualize a wax-up or setup created in any specialized software, on the patient's face, and make a photo or video before-and-after rendering.
Flow:
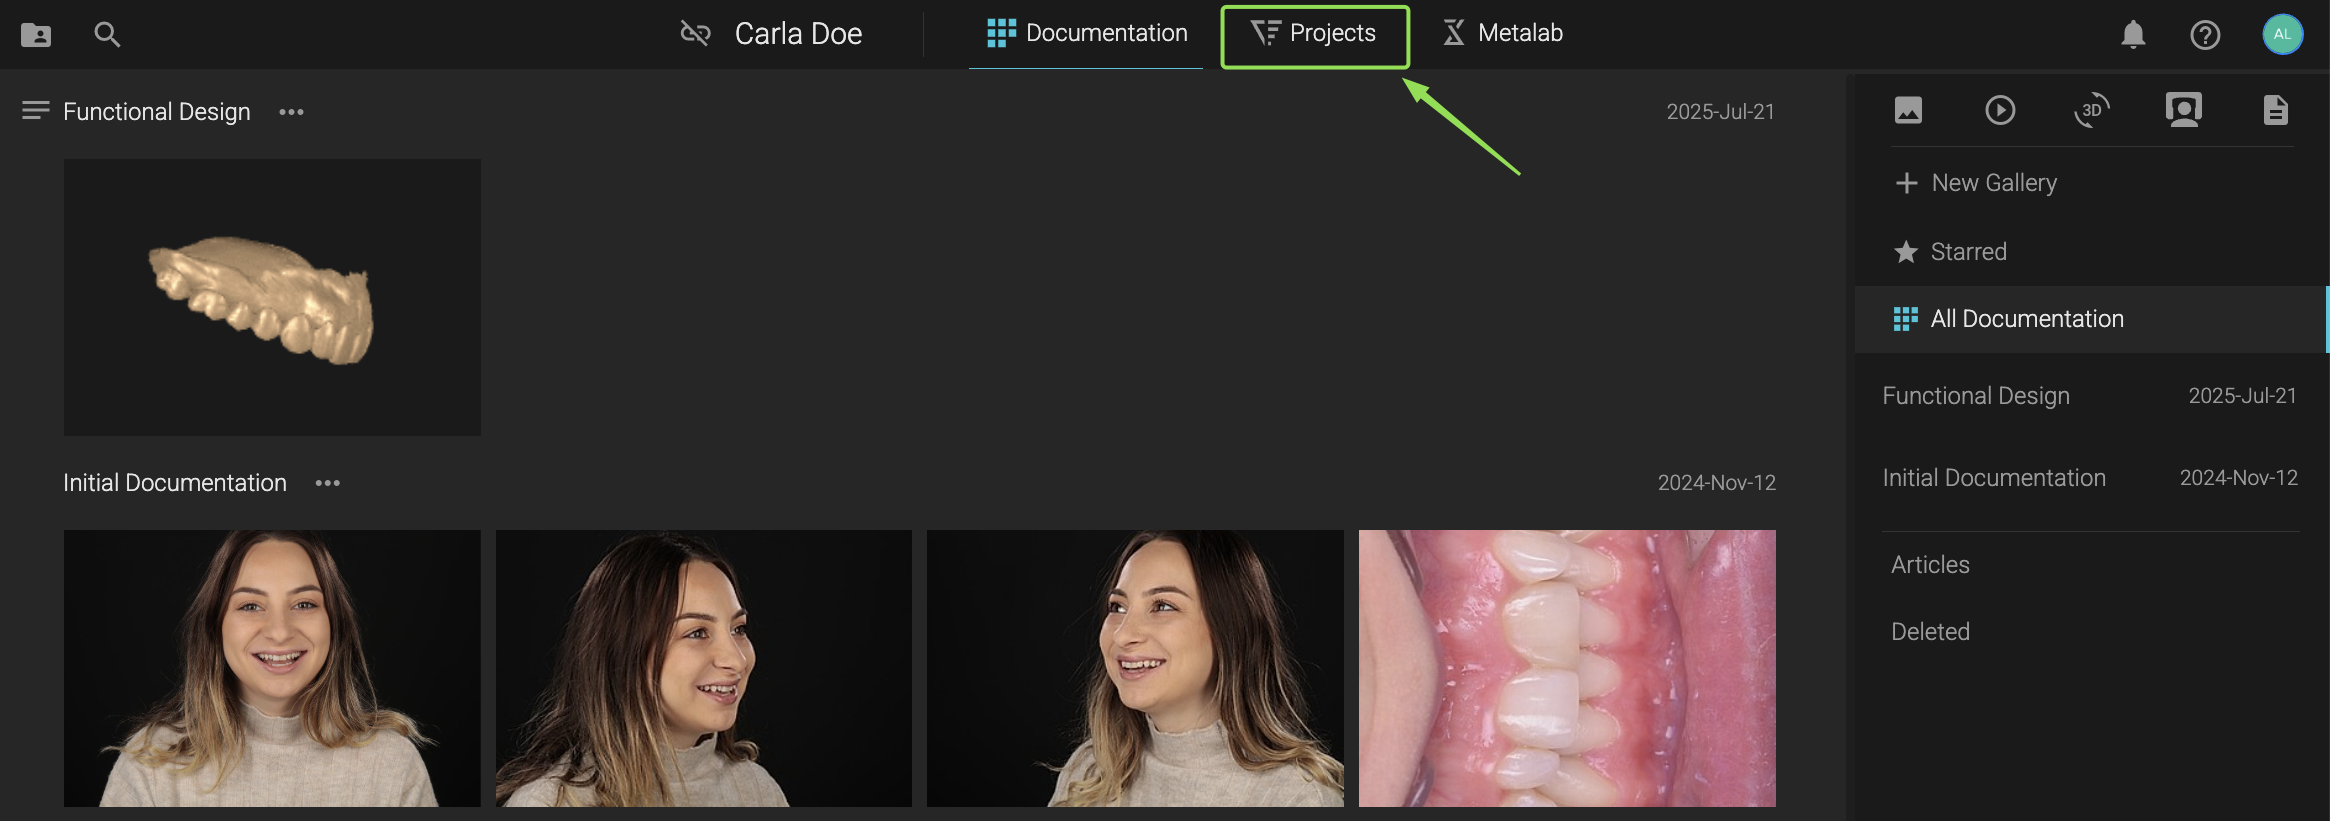
1. Start from Your Dashboard
Click on Projects to begin.
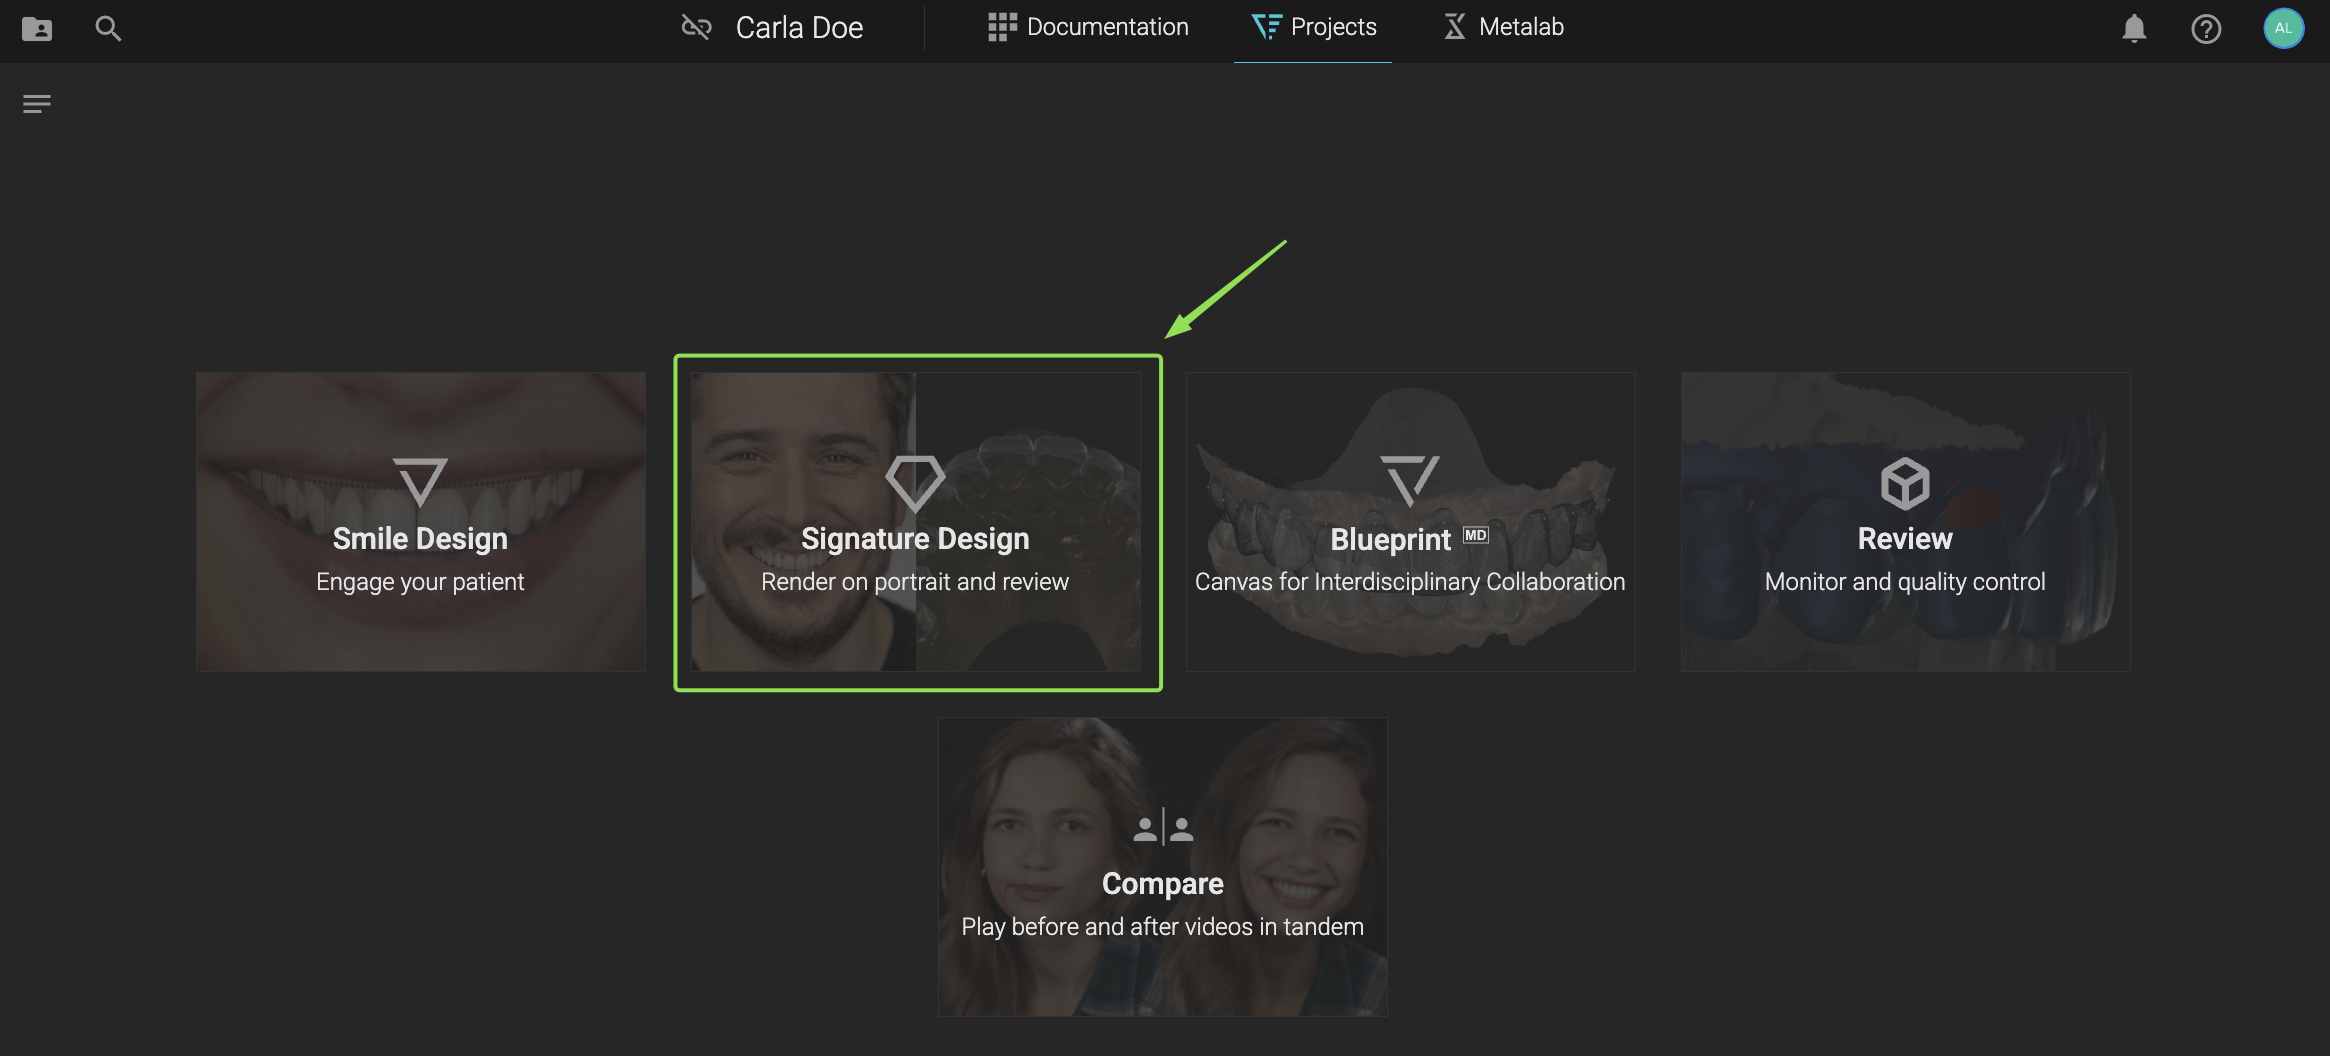
2. Select Signature Design
In your Projects view, select Signature Design from the available workflows.
3. Add the Portrait to the Stack
From the right-hand panel, upload a front-face portrait that will be used to overlay your smile design -> click Continue
 4. Add Initial Upper
Select your Initial Upper scan that matches the current situation of the portrait.
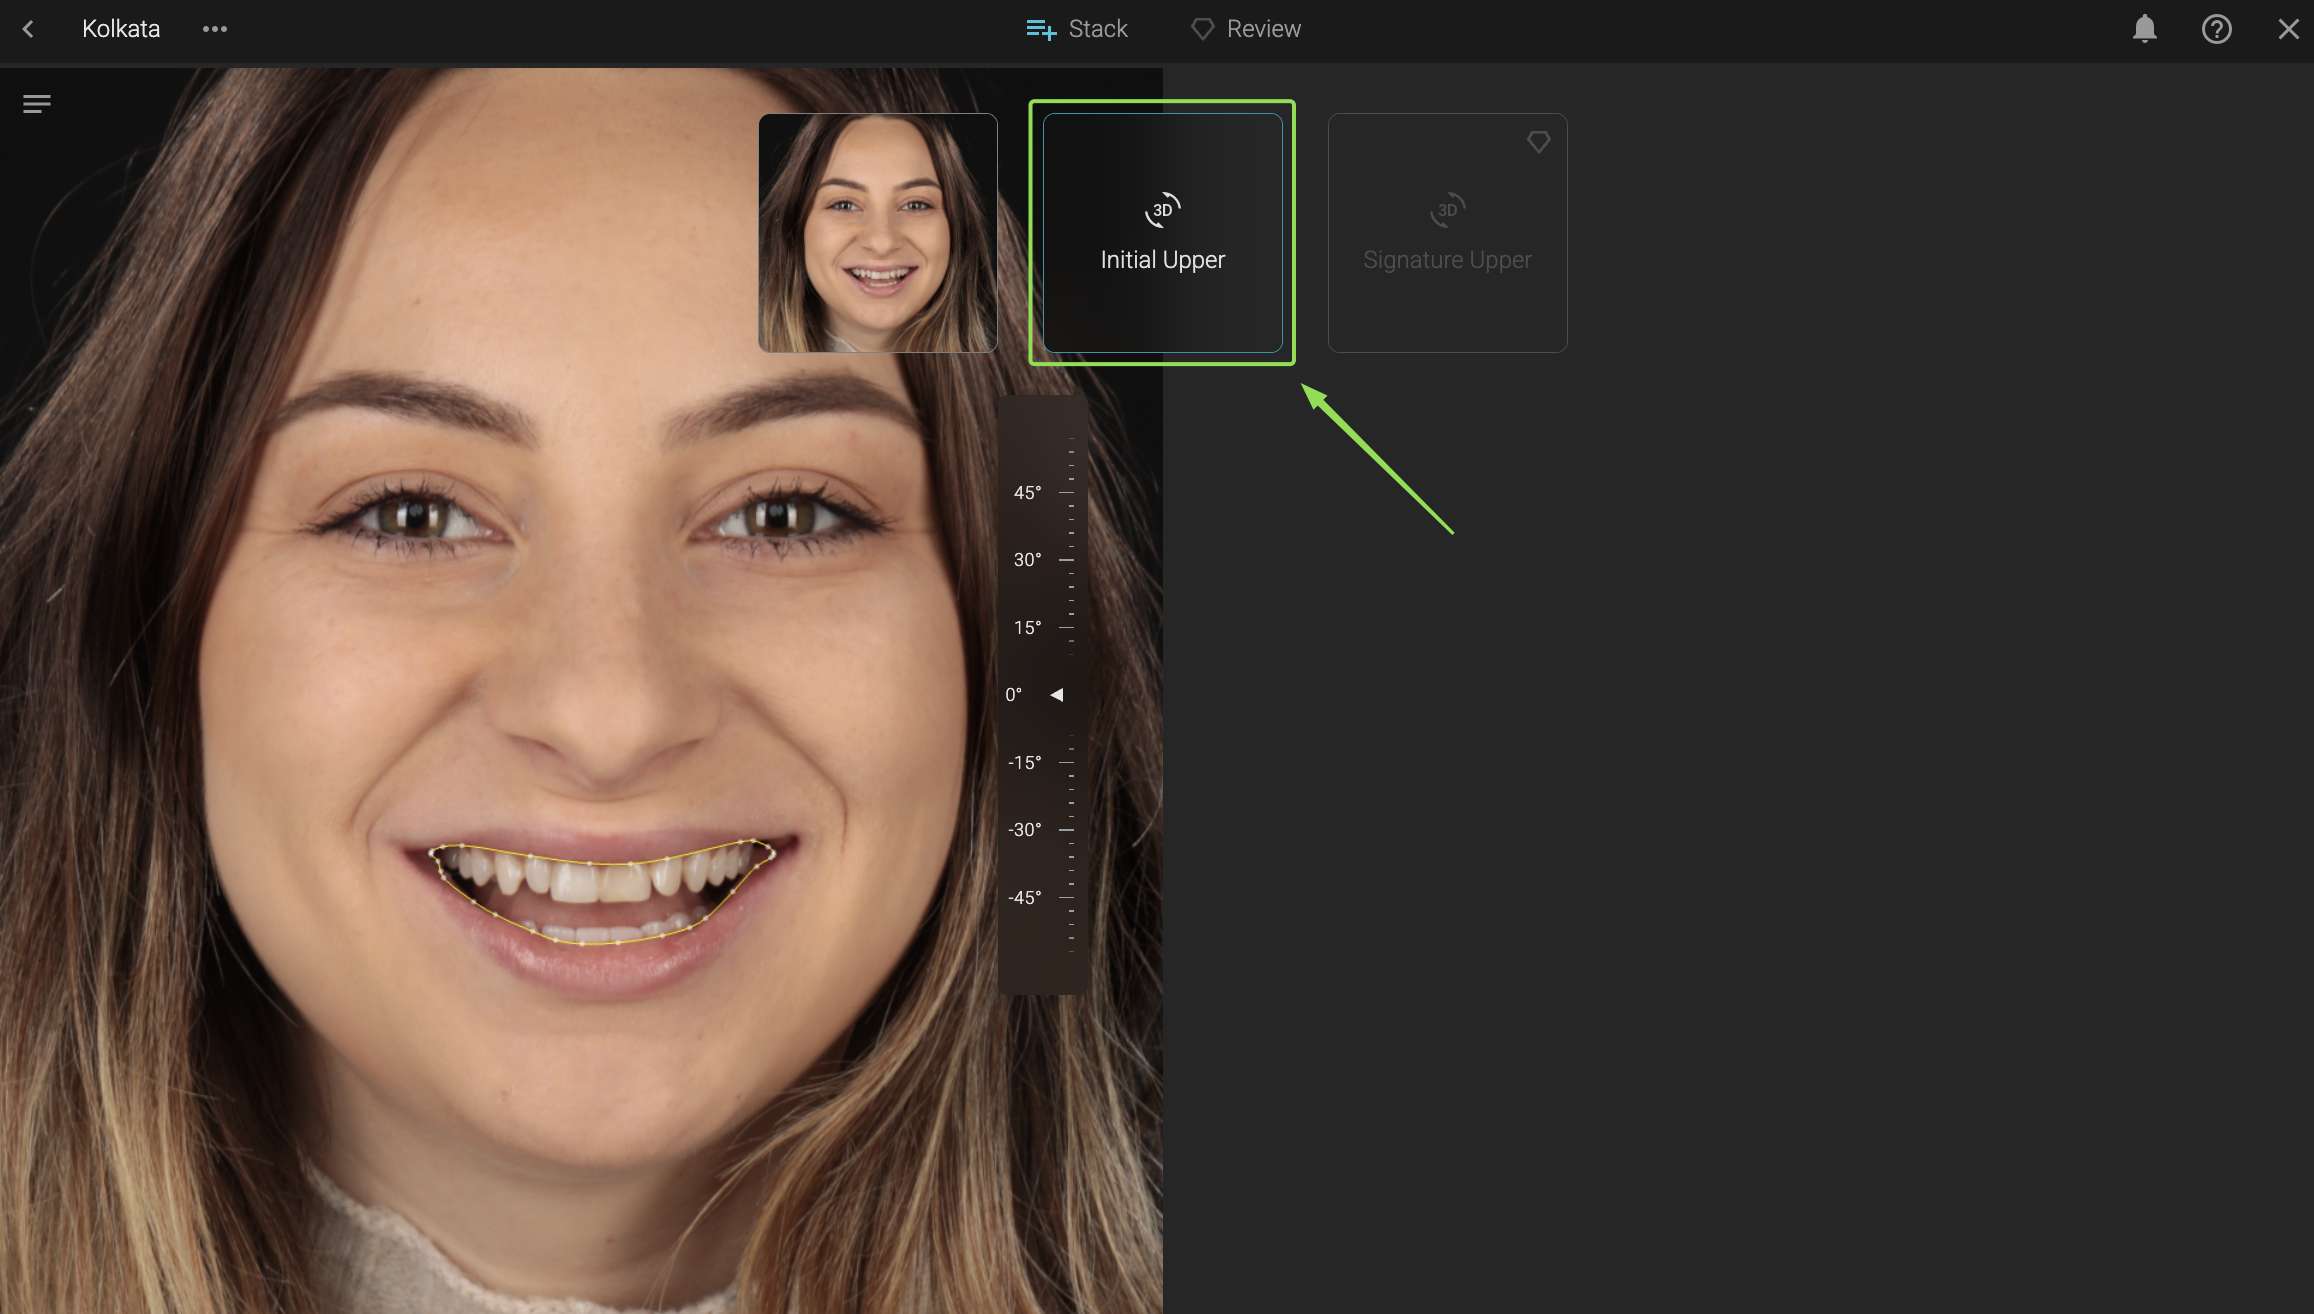
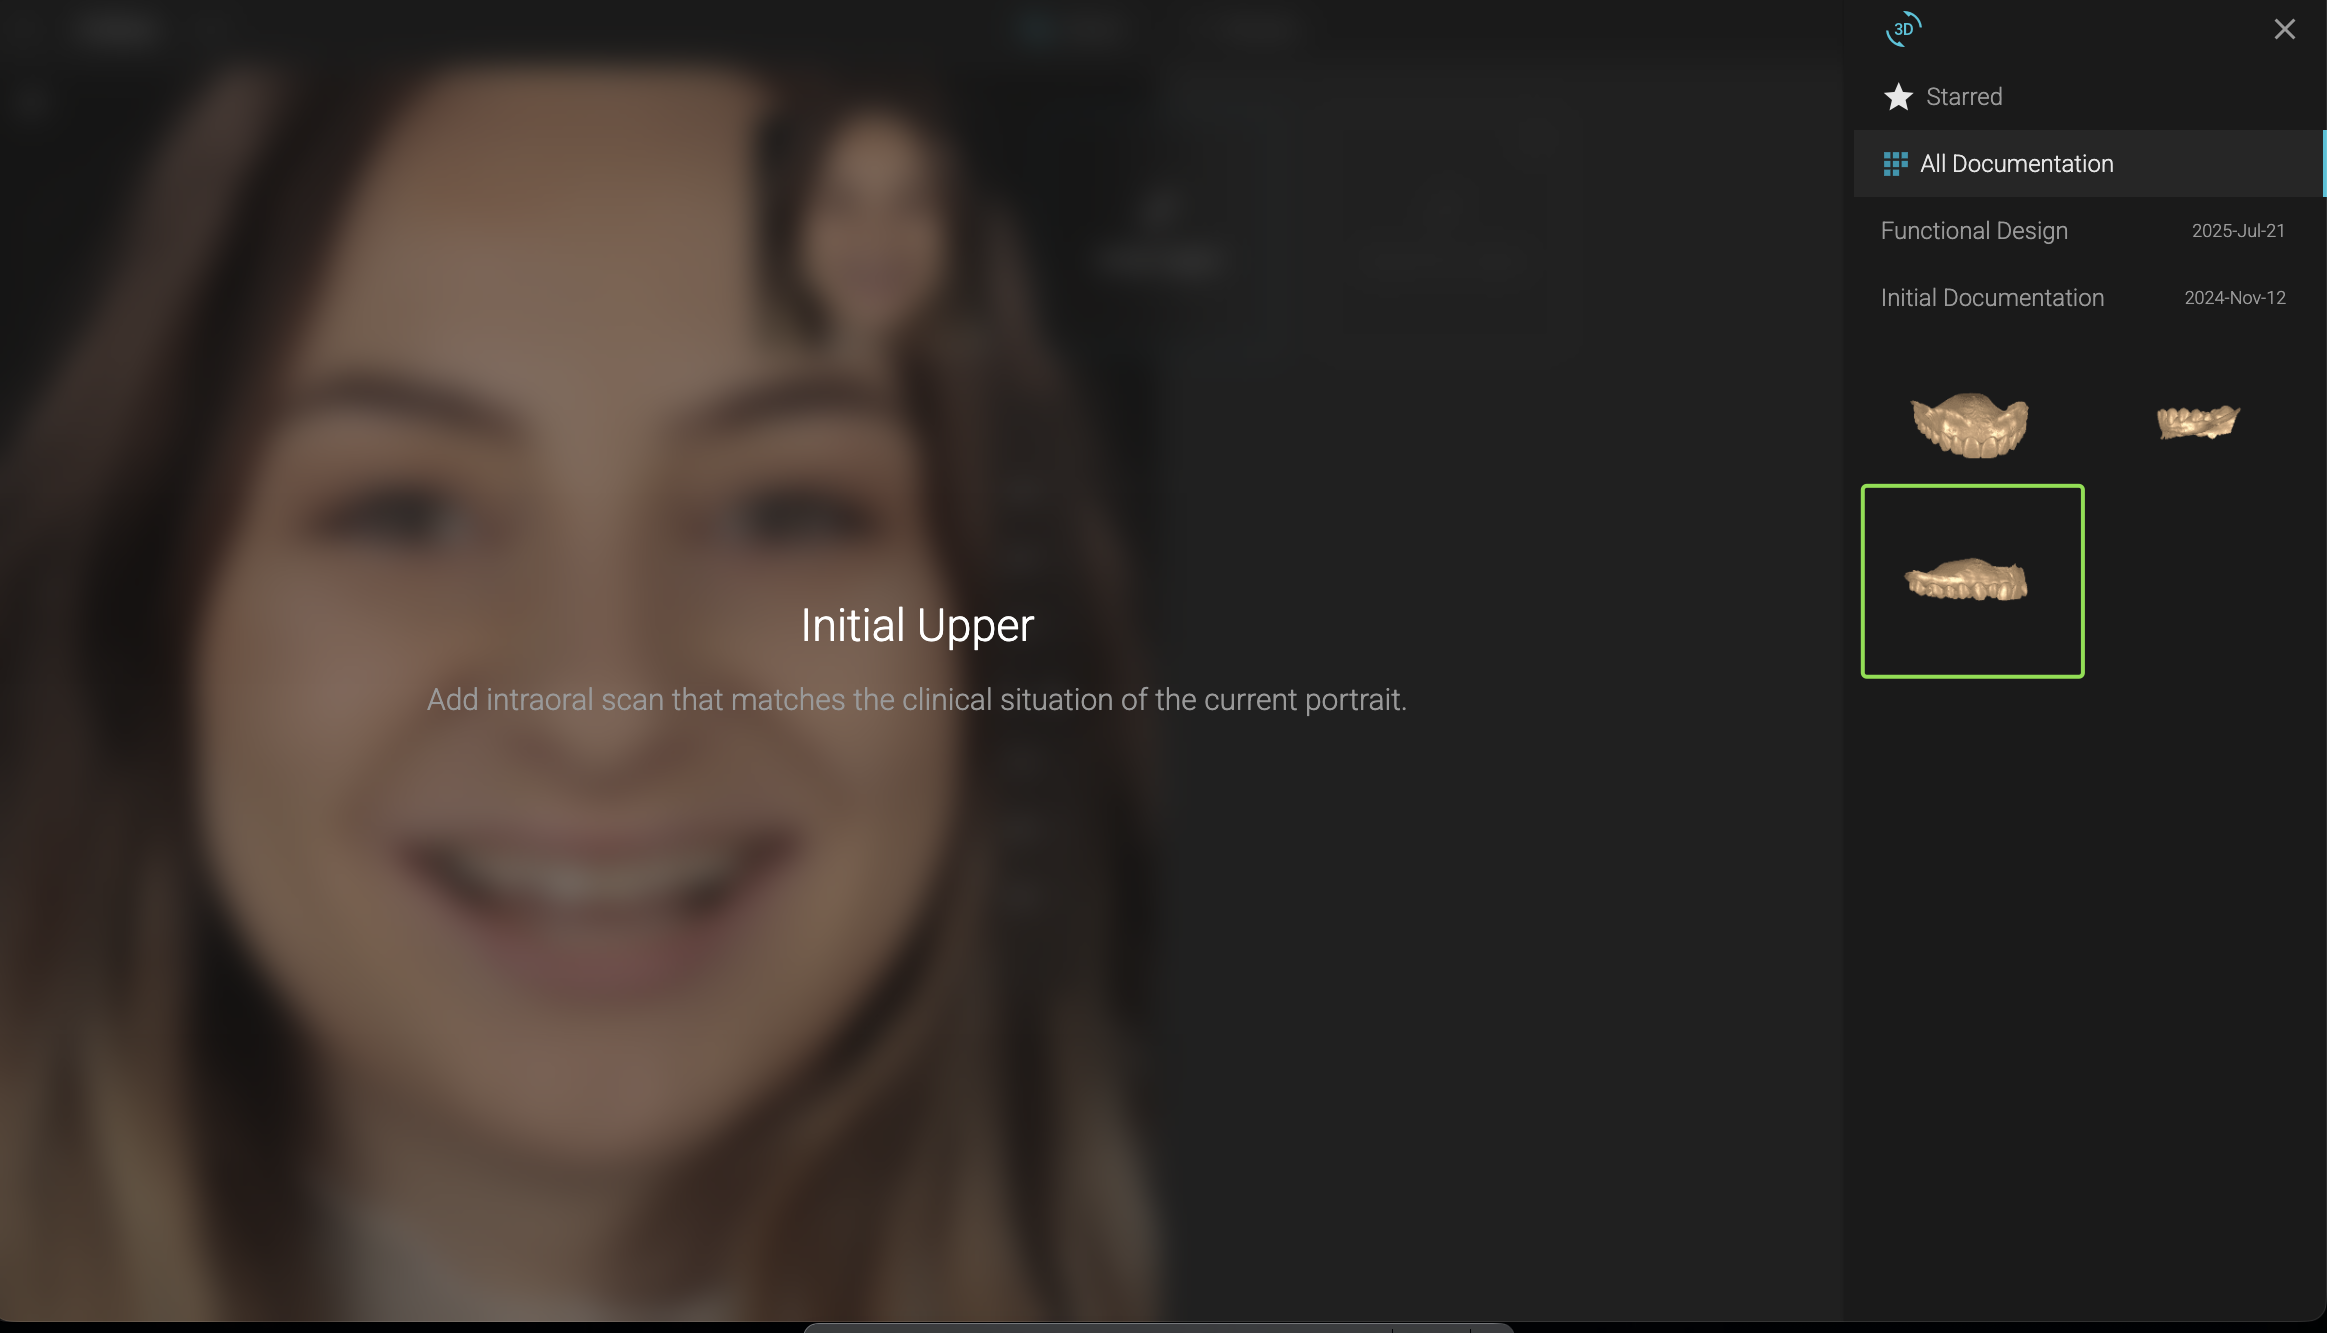
Signature design will automatically align your Initial Upper with the portrait you've added to the case.
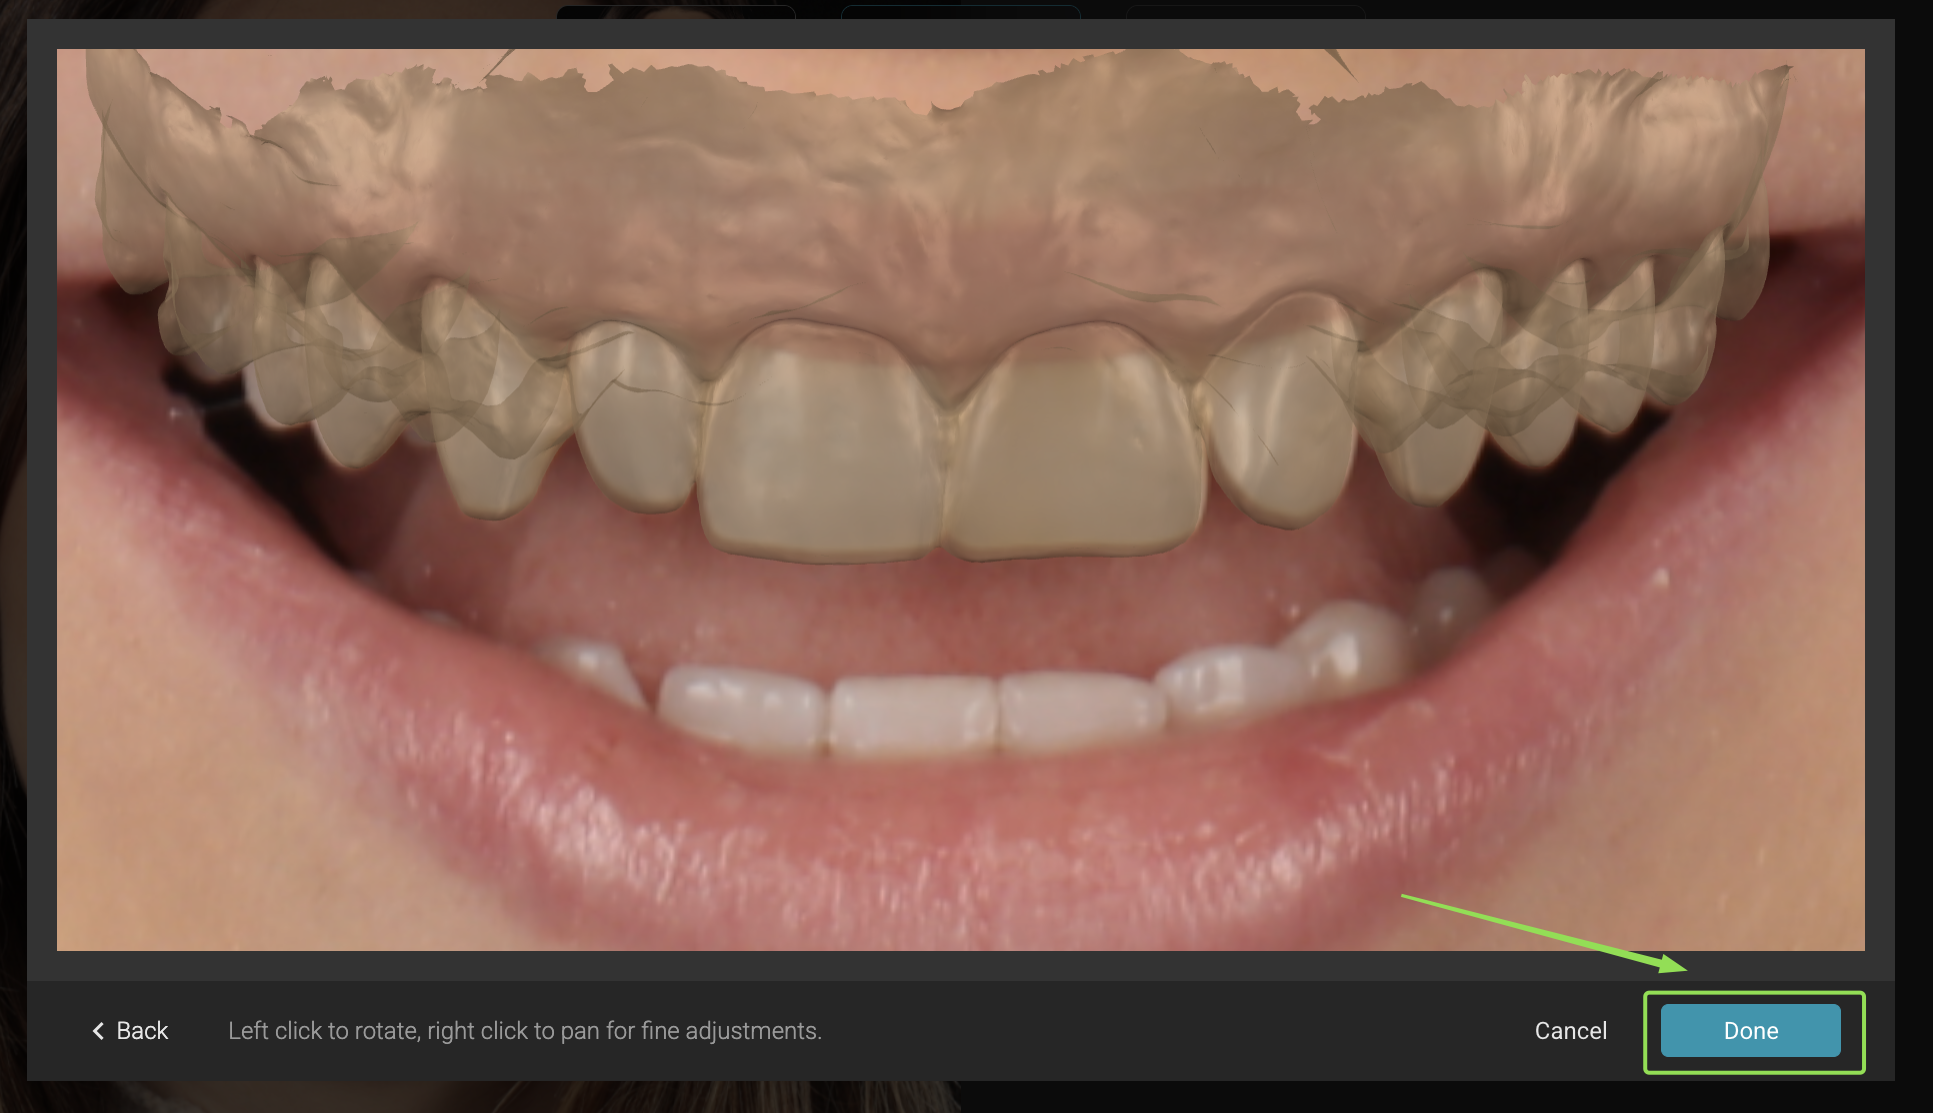
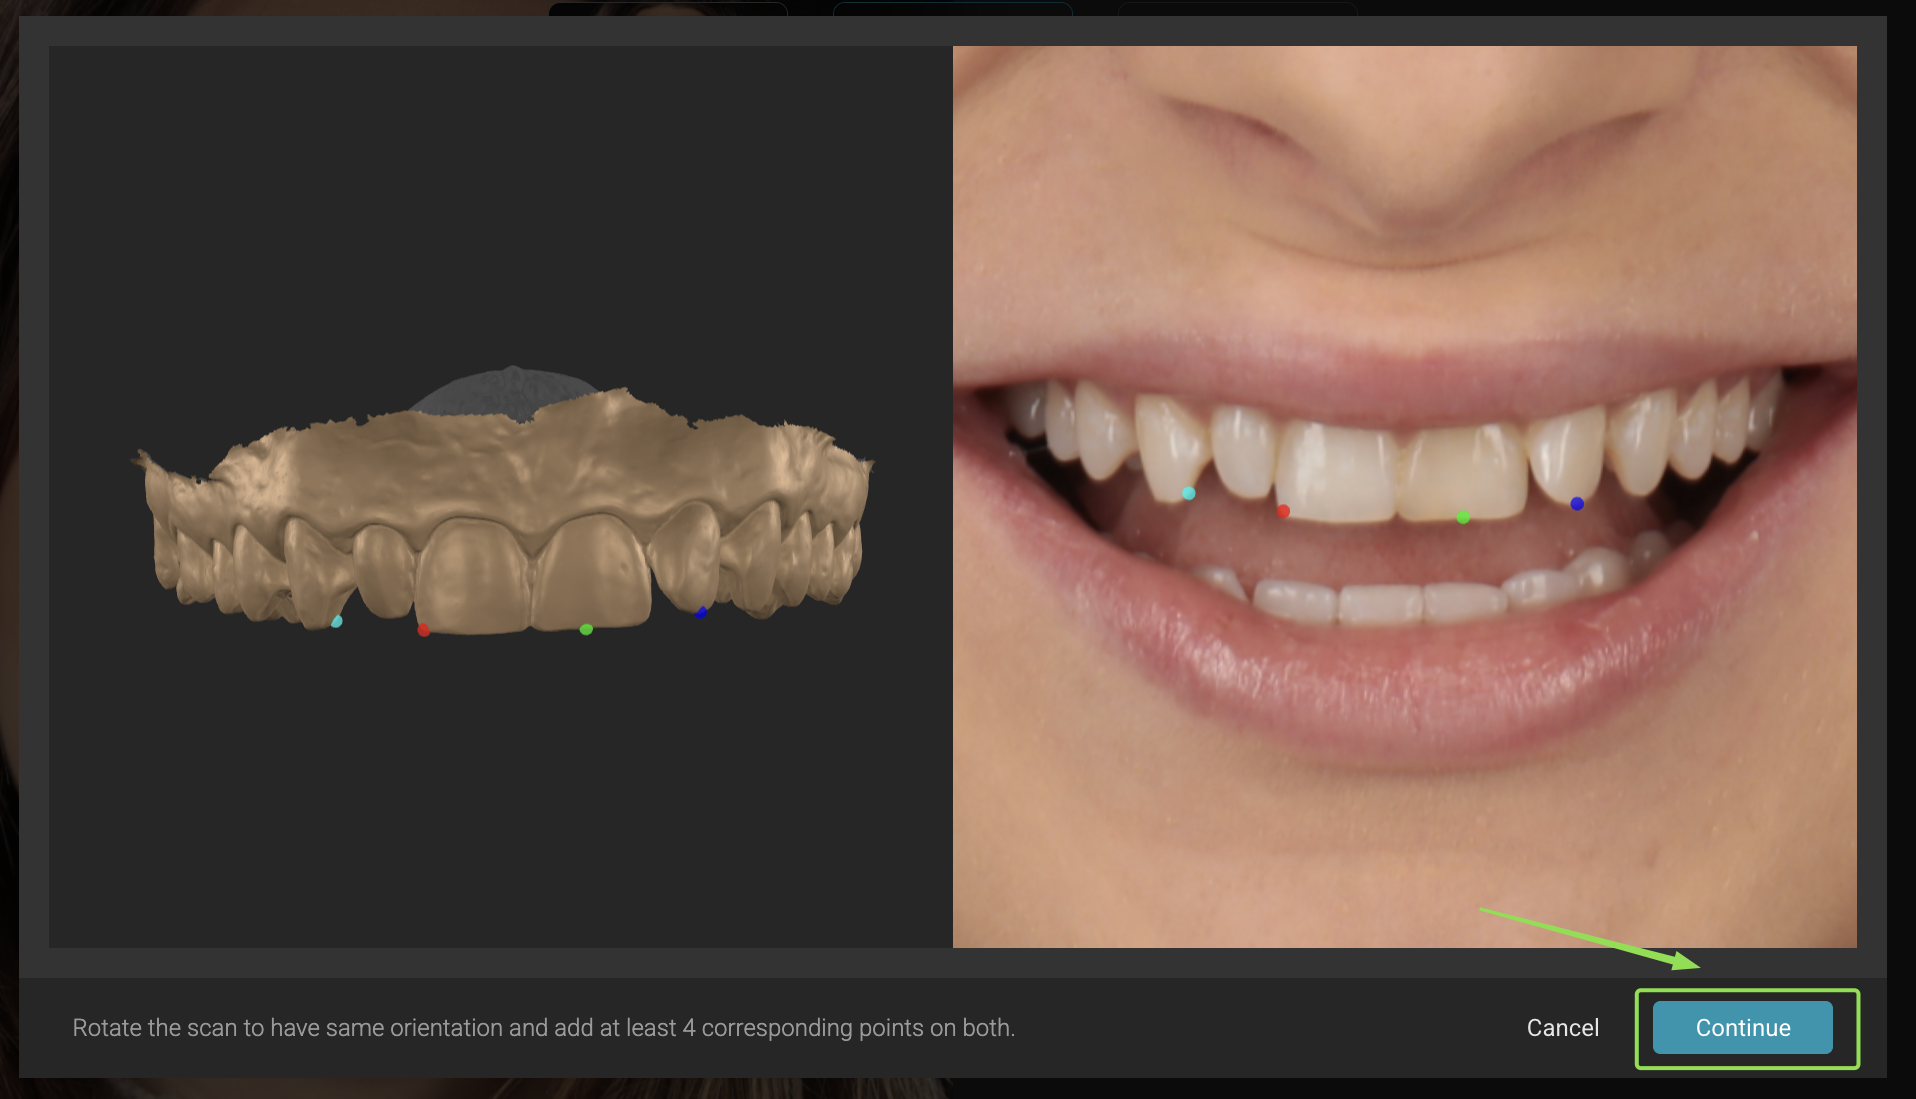
If you're not happy with the alignment, click back and manually align the Initial Upper with the portrait by providing 4 reference points. Once done click continue.
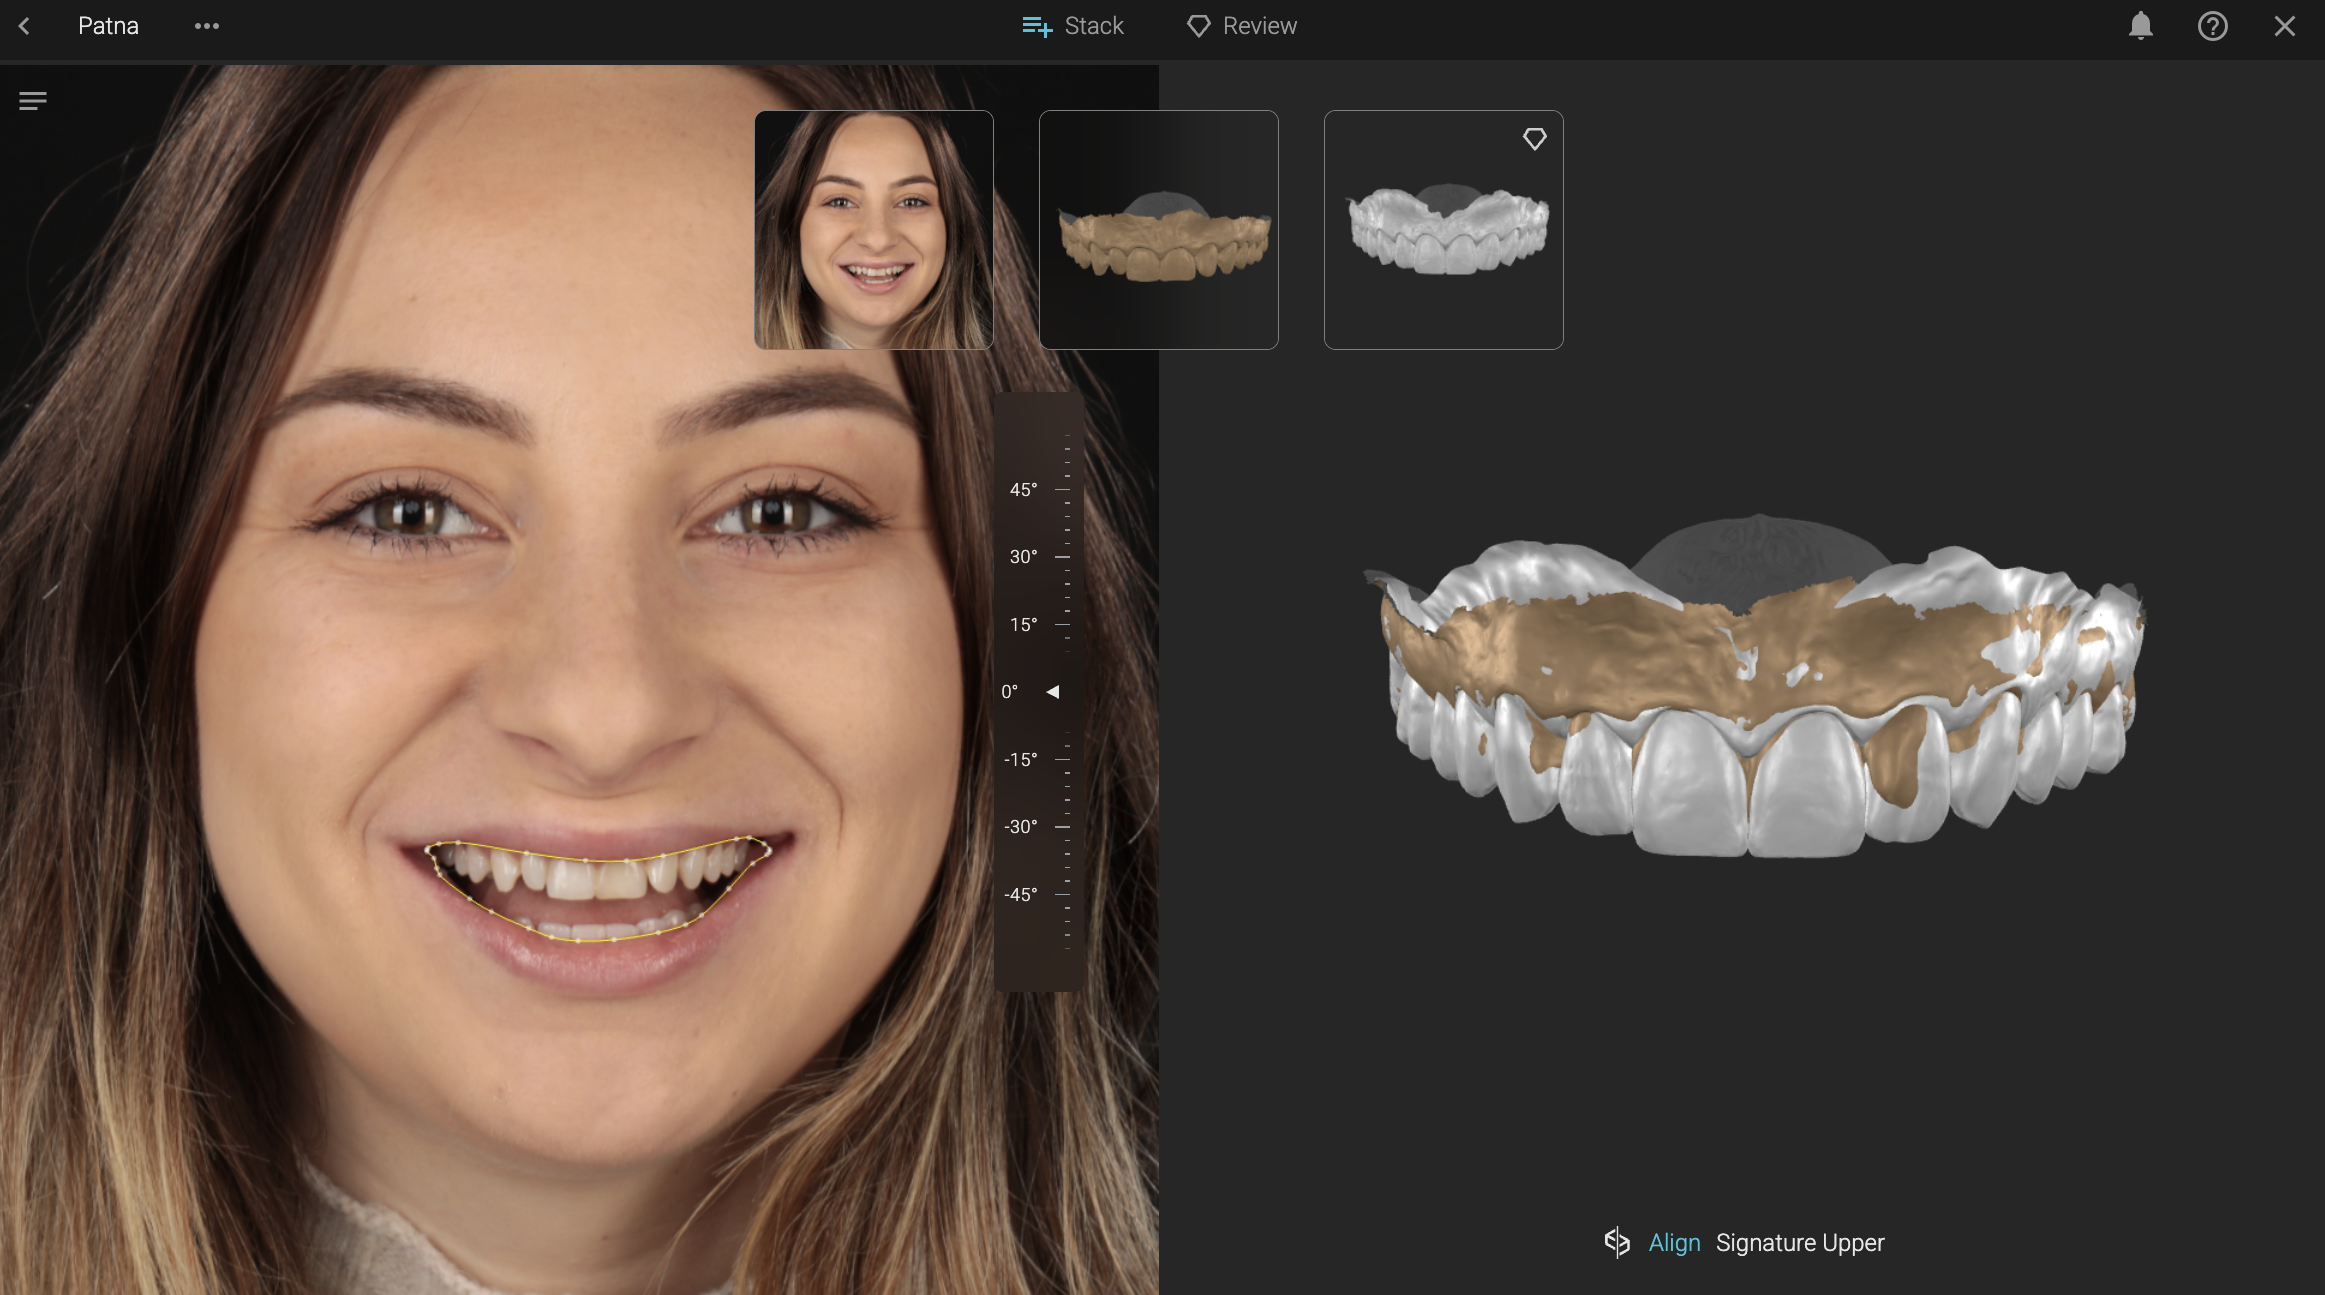
5. Add Signature Upper
Upload your Signature Upper design (wax-up or ortho setup from any other software) to review it in-face.
- If the wax-up was exported in the same position as your initial scan - Alignment is automatic.
- If not, you can align it manually