
How To Manually Allign An Initial Upper With The Signature Upper
Smilecloud is designed to automatically align your initial scans with both your portrait photos and Signature scans in just a few clicks. The process is fast, seamless, and built to feel effortless.
But every now and then, a case may benefit from a little extra refinement. When that happens, you can manually fine-tune the alignment to achieve even greater precision. Here’s how.
Let’s start with a portrait photo already added to your case. Once you upload your initial scan, Smilecloud will automatically begin aligning it with the portrait. Before tapping “Done,” you can click and drag the scan to make any additional adjustments if needed.
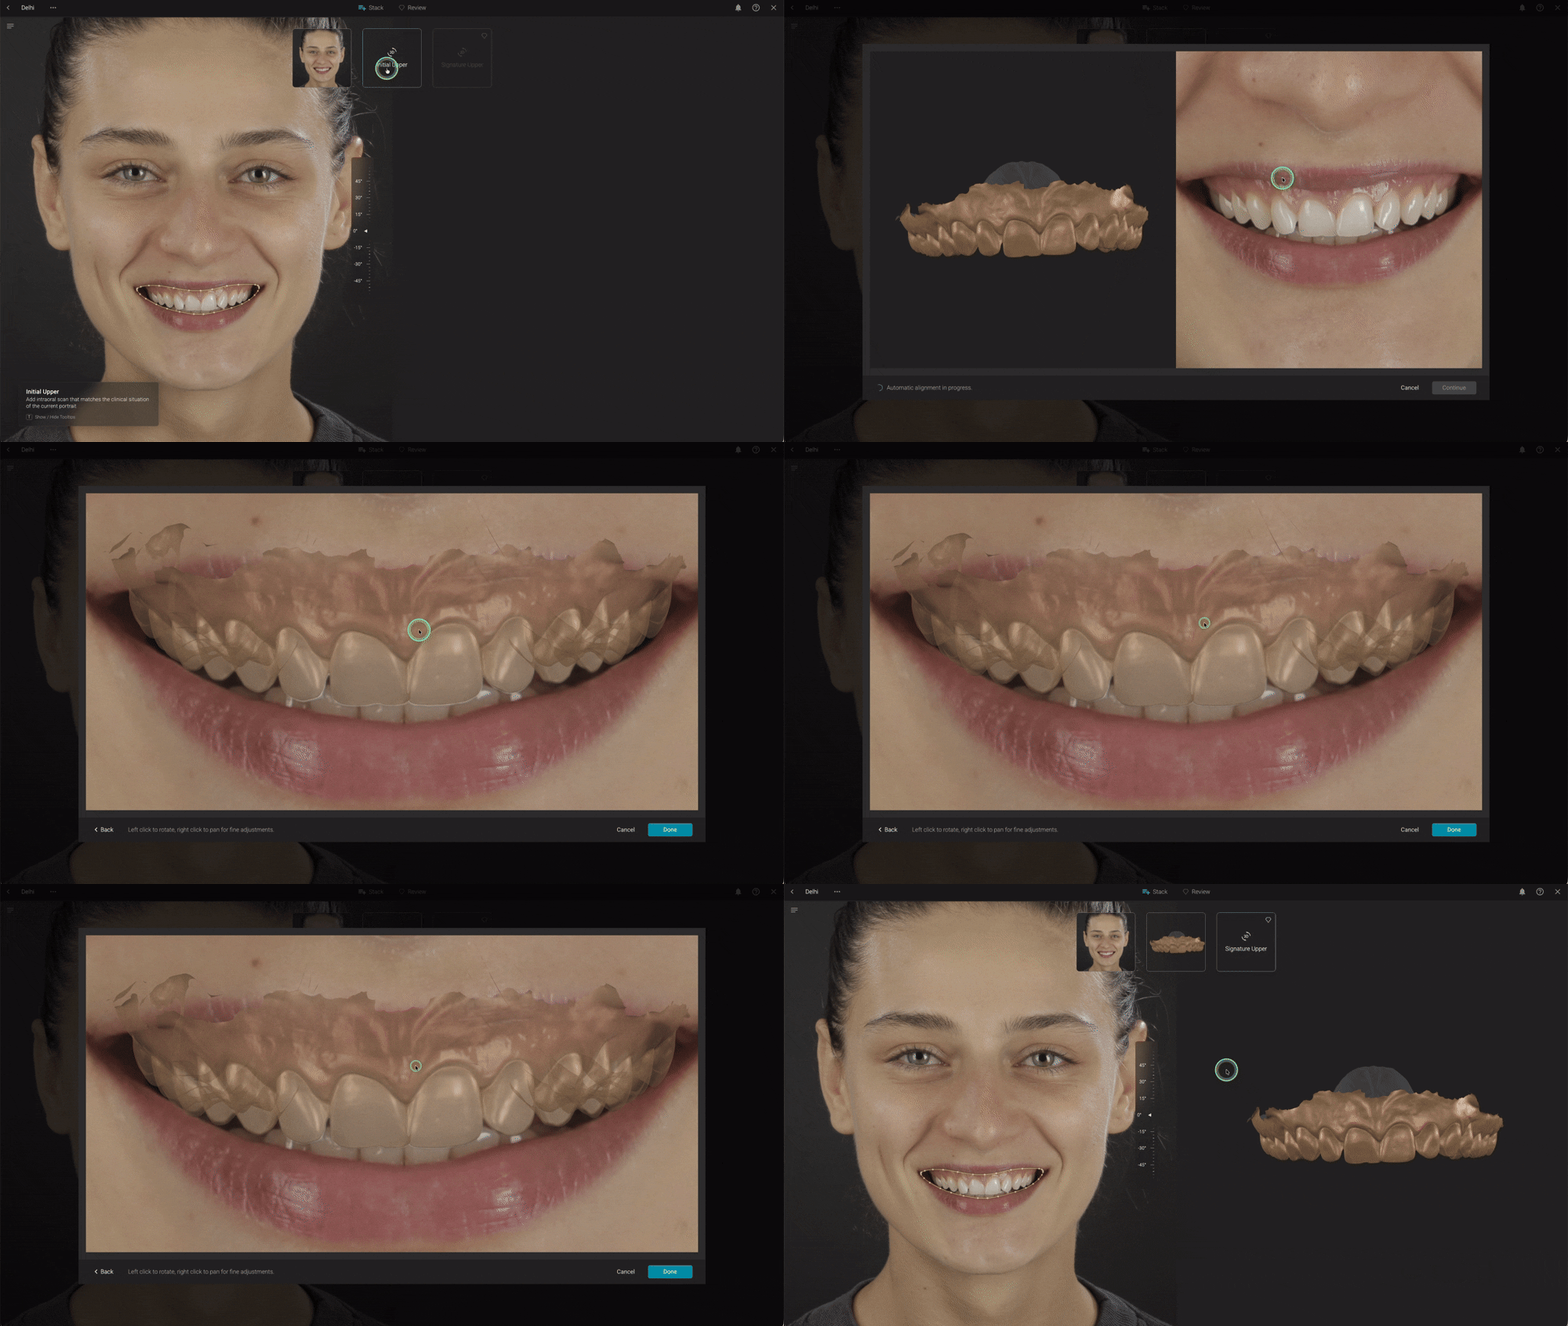
Now let’s add the Signature Upper scan.
In the stack, tap the “Signature Upper” button and upload the scan as shown below.
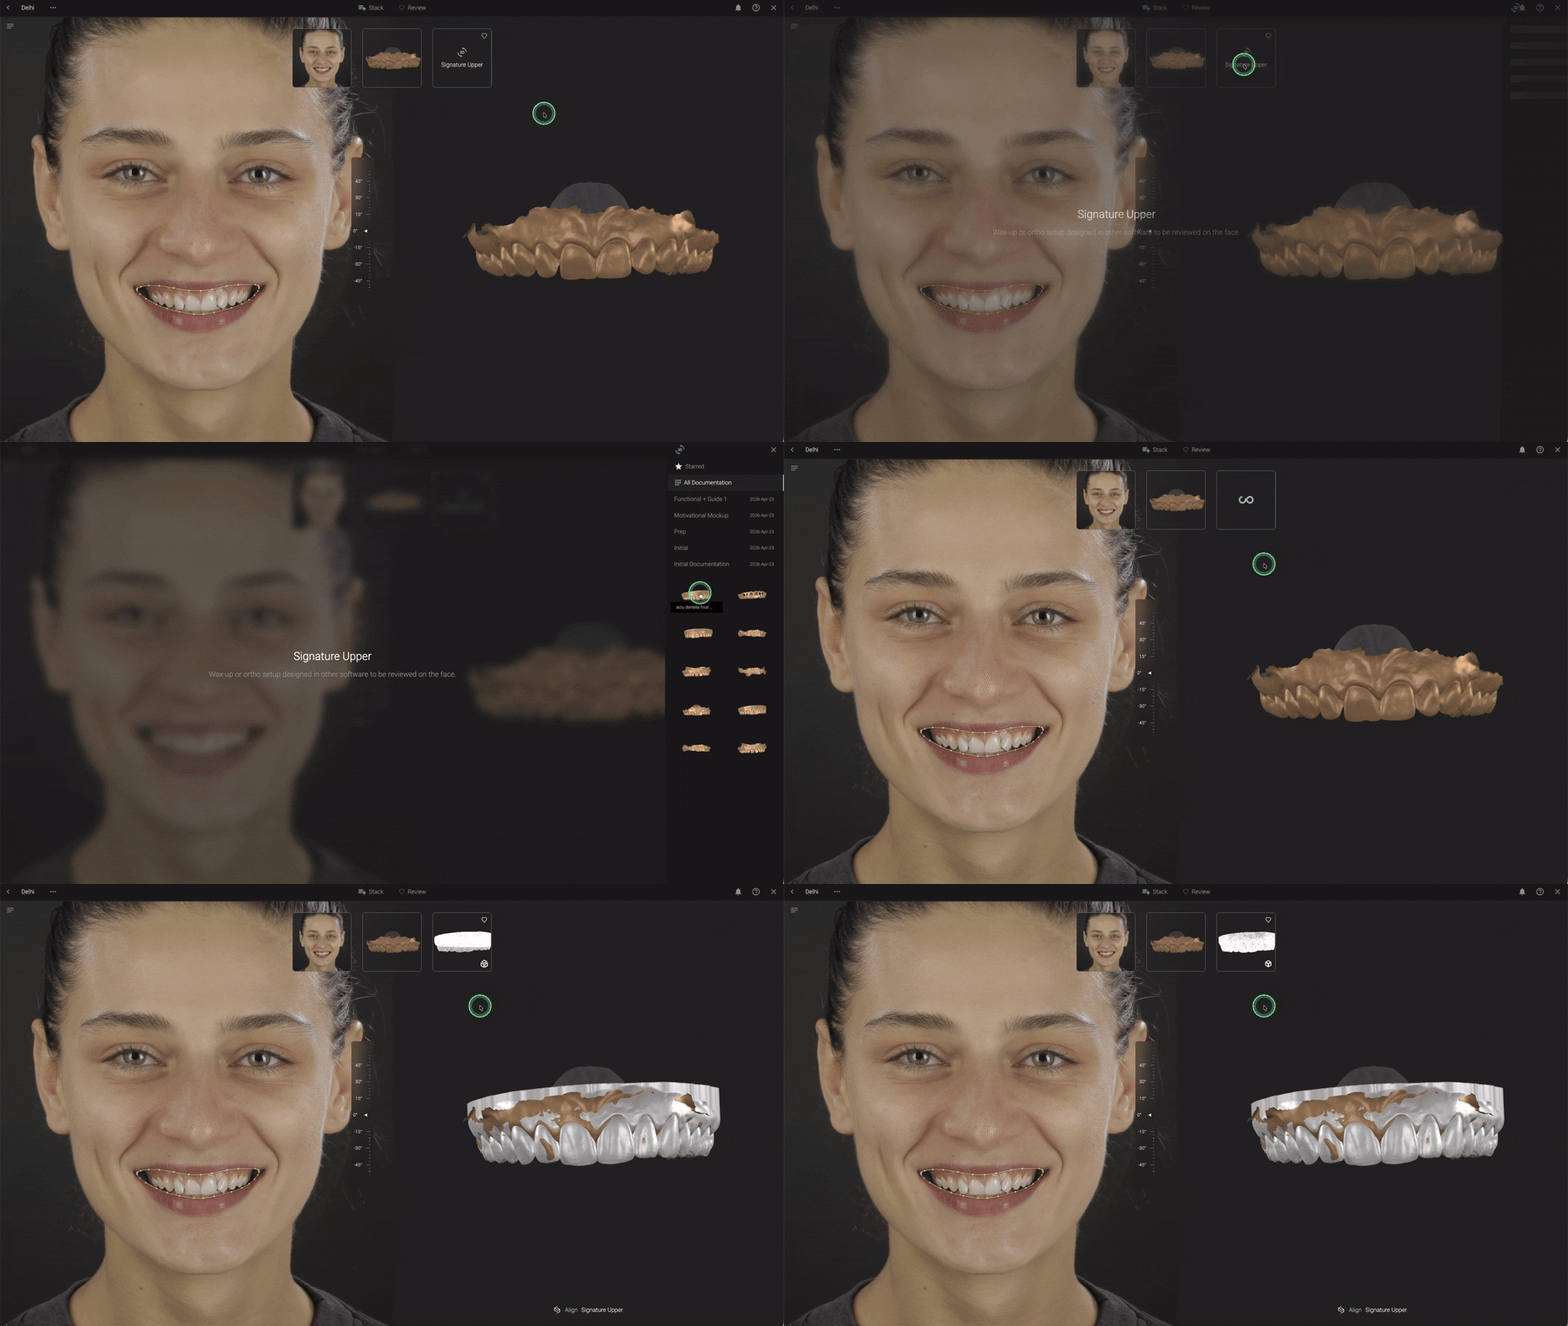
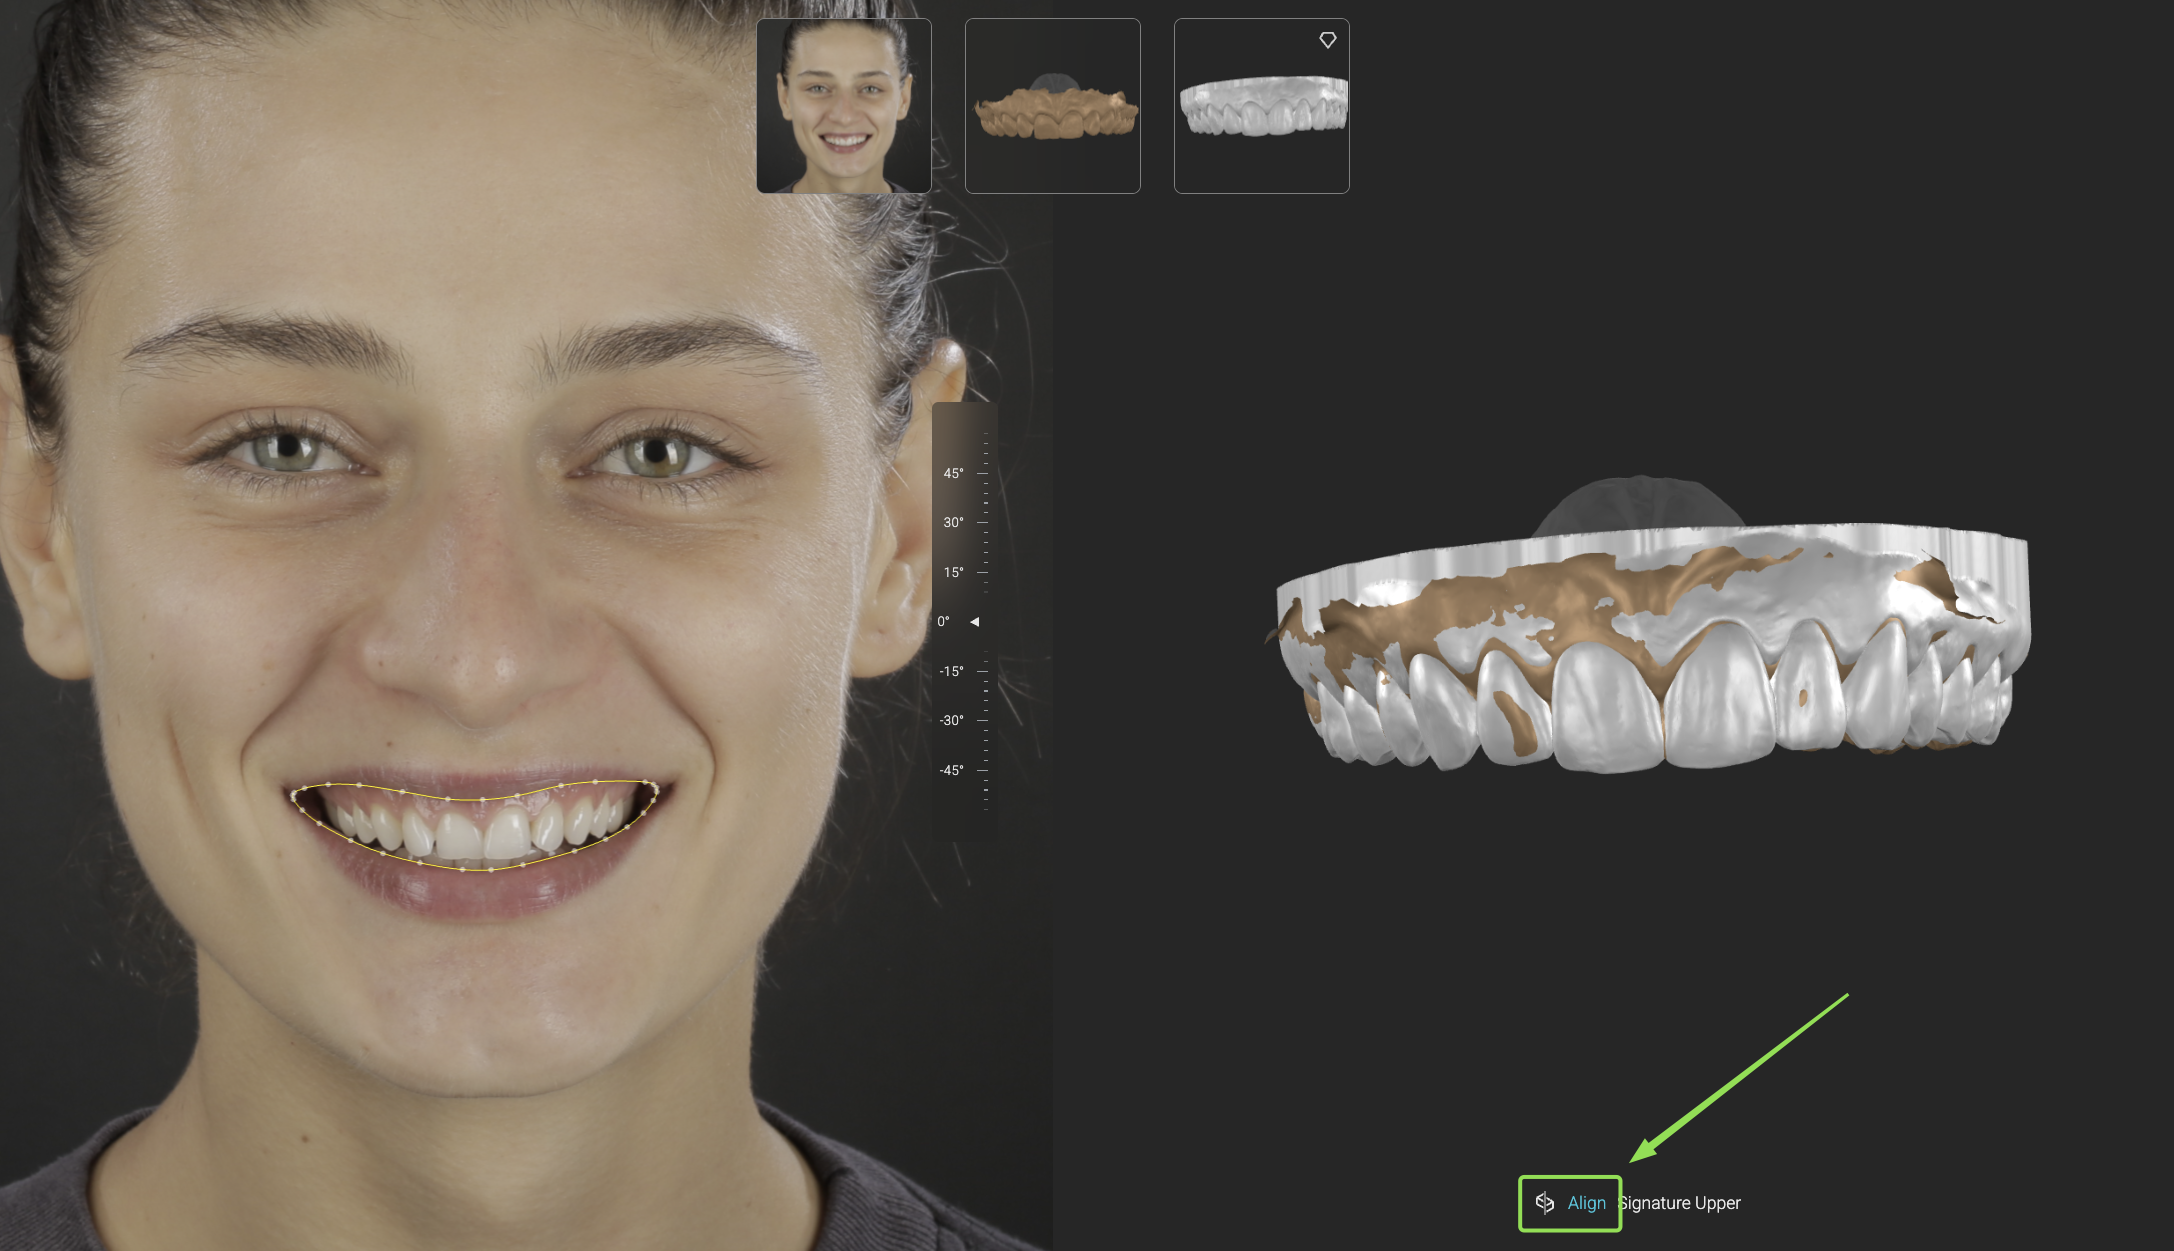
As you’ll notice, the alignment process is quick and intuitive. But if you’d like to refine the positioning further, simply tap the “Align” button located at the bottom of the screen. This will open the manual alignment window.
Once the pop-up appears, place four corresponding anchor points between the initial scan and the Signature scan. For the best accuracy, you can freely rotate and reposition the scans while setting your points.
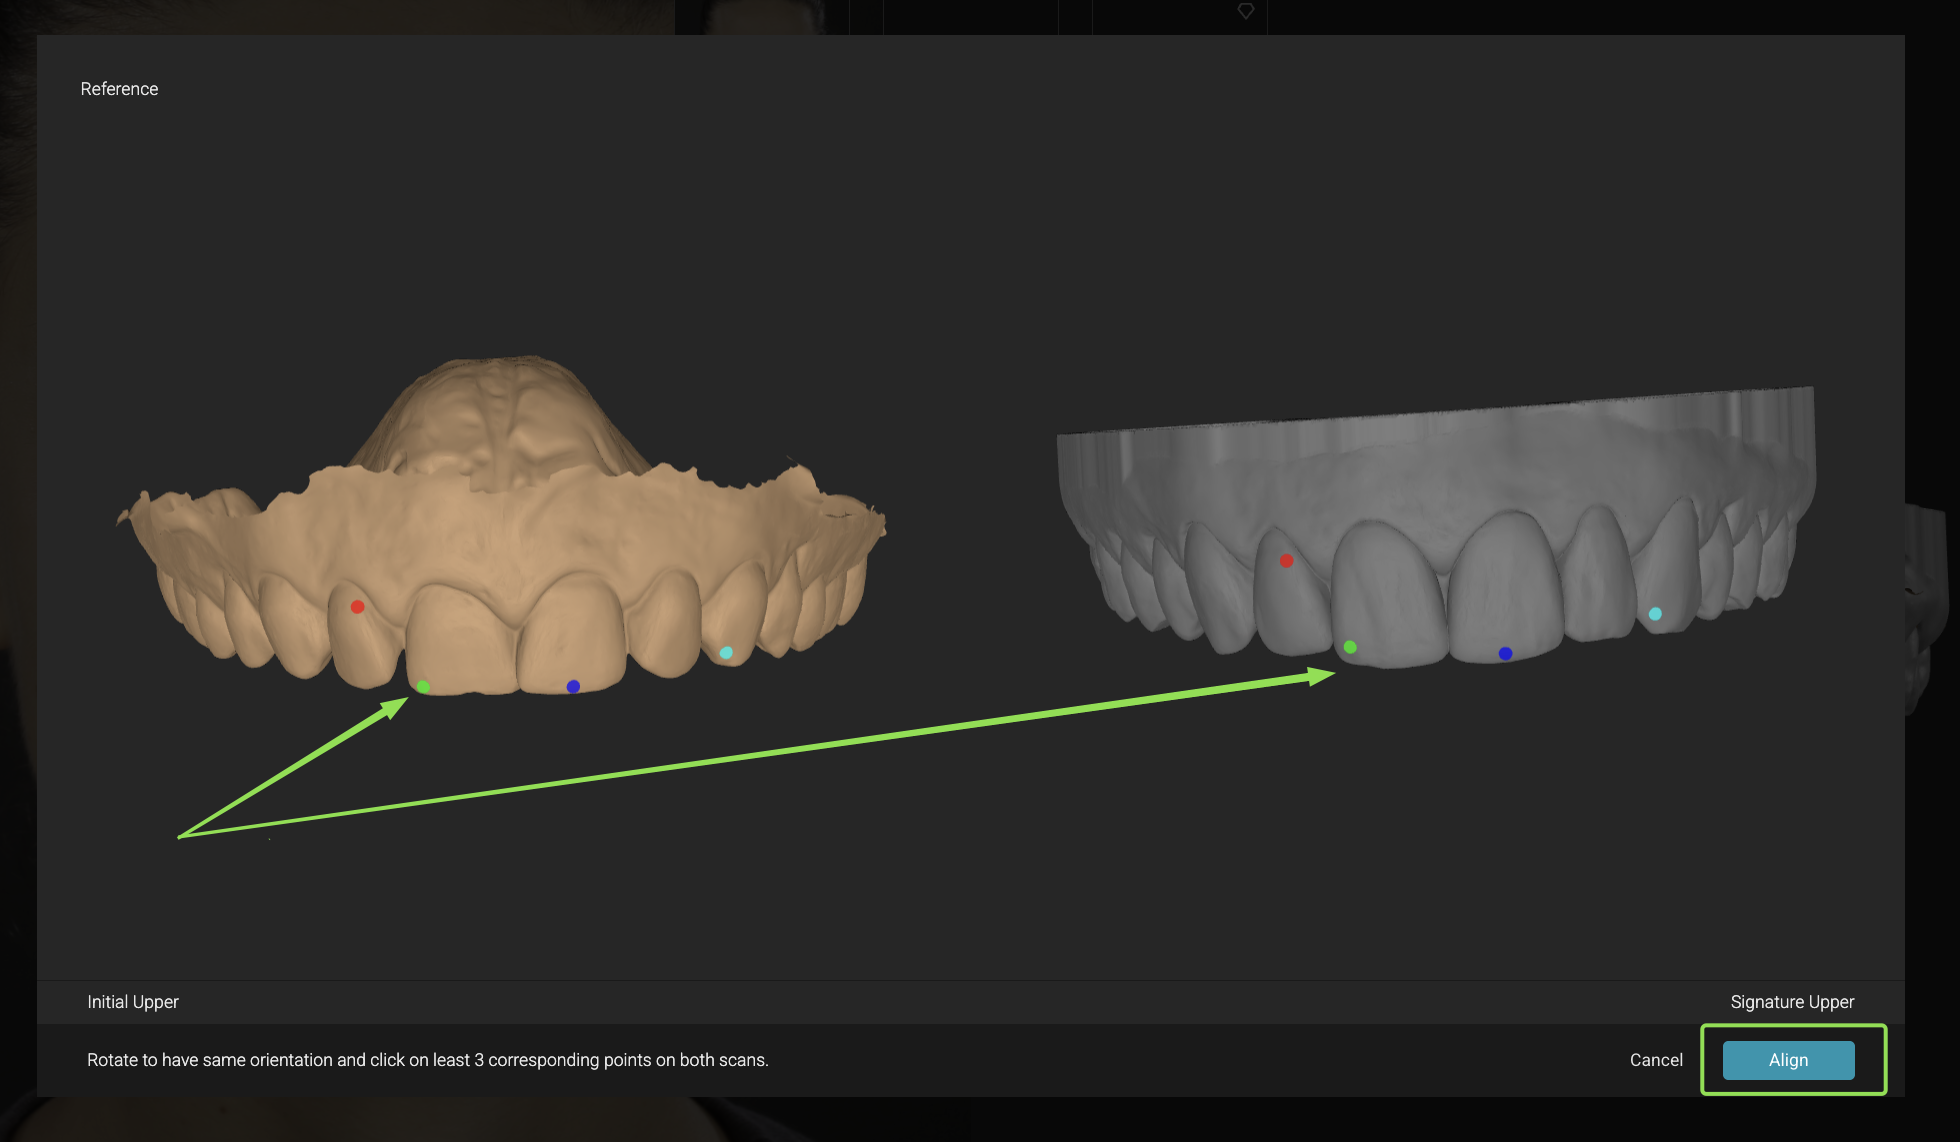
When you’re satisfied with the alignment, tap “Align.”
And that’s it. Your scans are now manually aligned and ready for the next step in your Smilecloud workflow.