
Importing Smilecloud Libraries into Exocad
You or your dentist created a beautiful smile design in Smilecloud, and now it’s time to bring that vision into 3D using Exocad. This guide walks you through the process of importing your custom, Patient-specific library and setting it up for further dental CAD design.
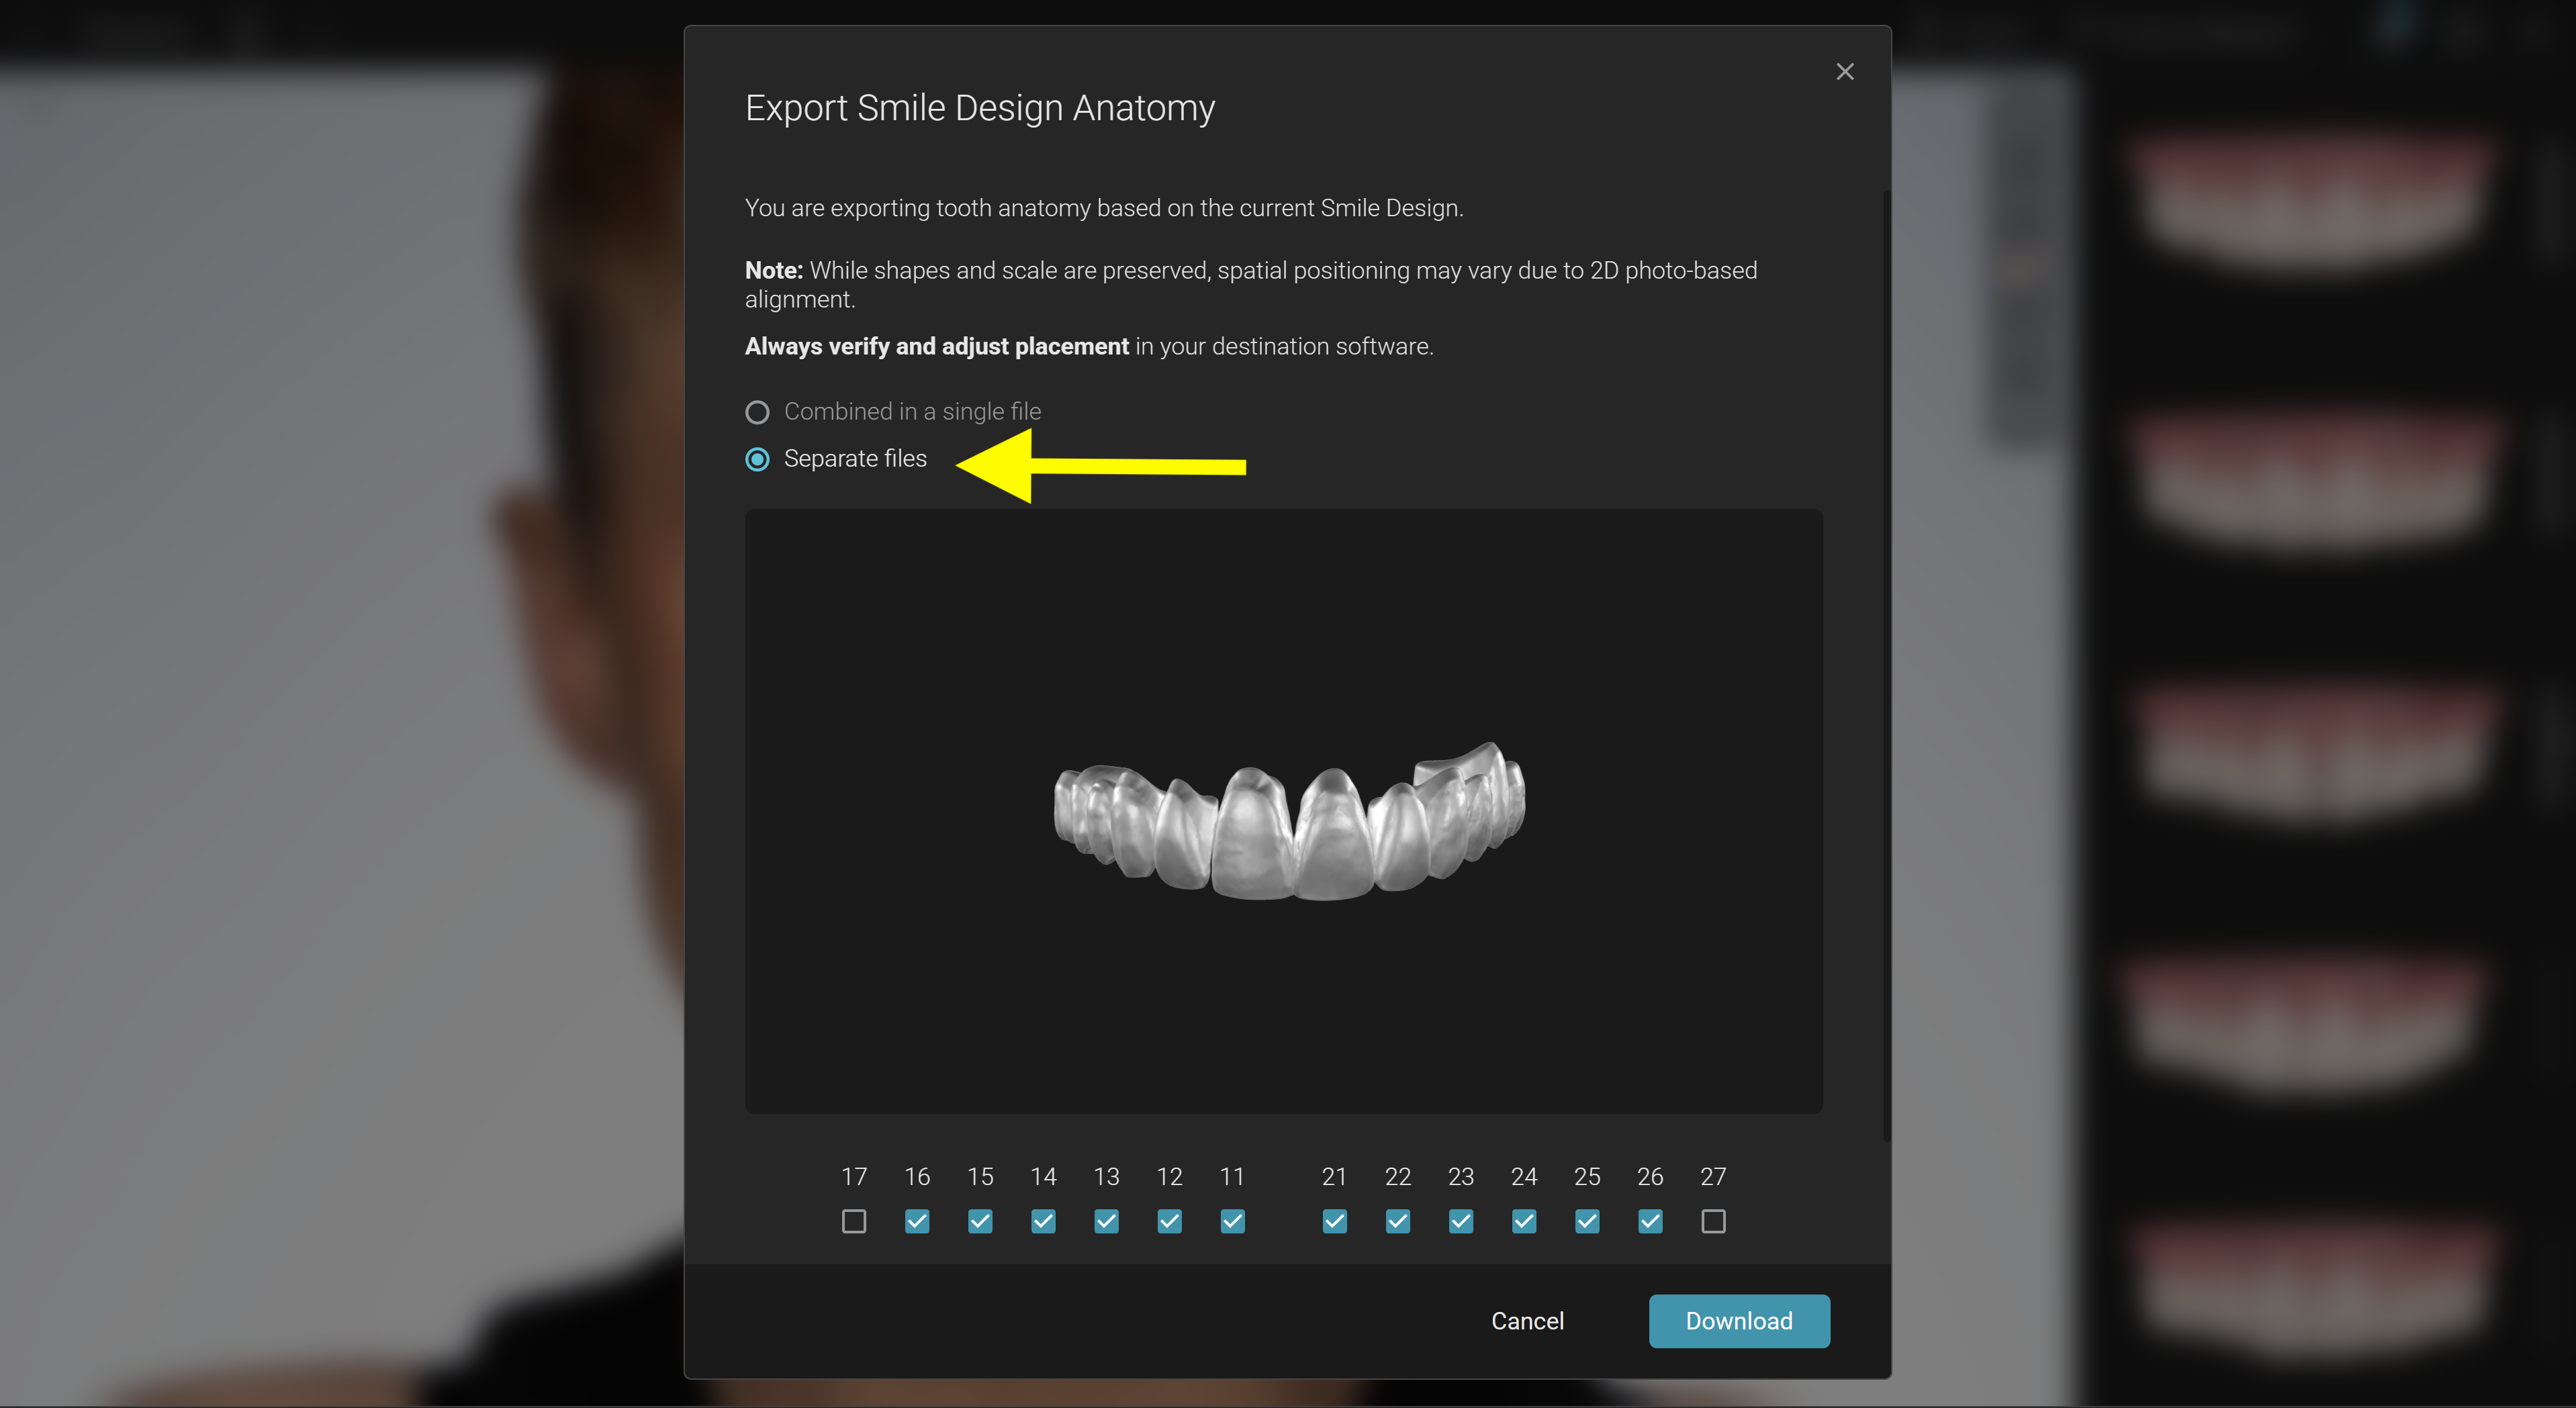
✅ Step 1: Download Your Smilecloud Library
After completing your smile design on Smilecloud:
- Click on Export.
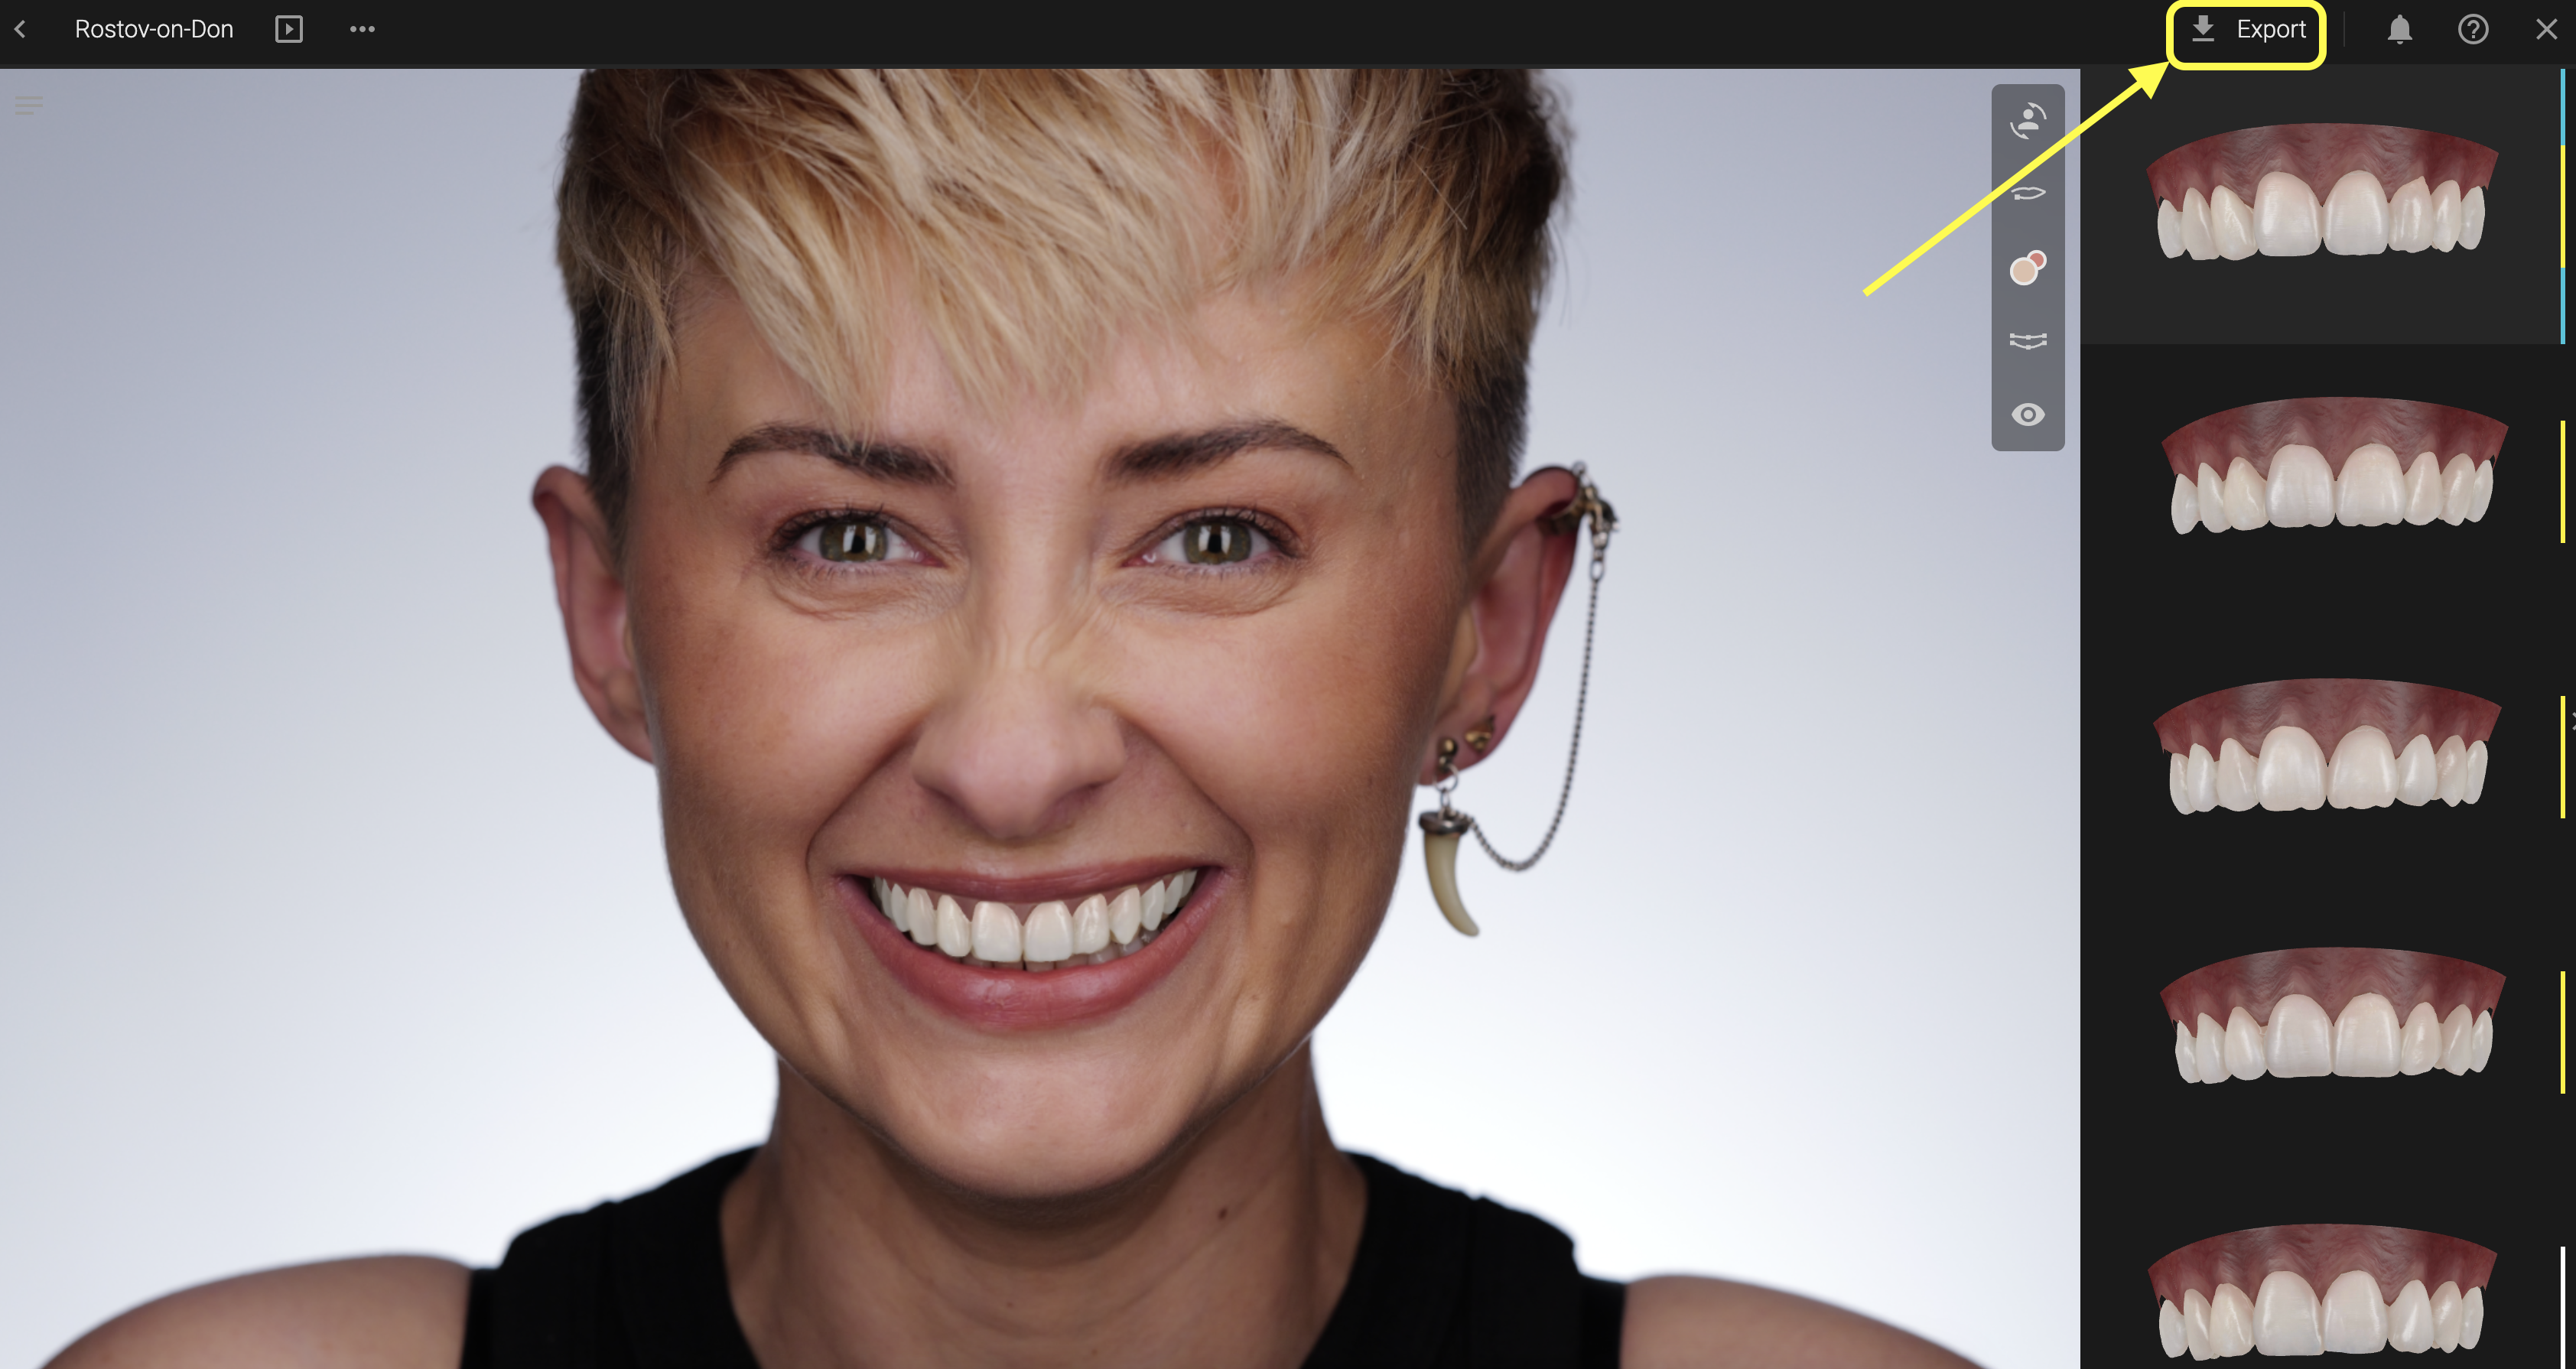
- Choose the "Separate Files" option and Download (this will download a ZIP file containing STL models of the designed teeth).
- Save the file to a location where you can easily find it, such as your Desktop or a project folder.
💡 Important: The file is a
.ziparchive — make sure to extract it (right-click → "Extract All" or use your preferred unarchiving tool) before using it in Exocad.
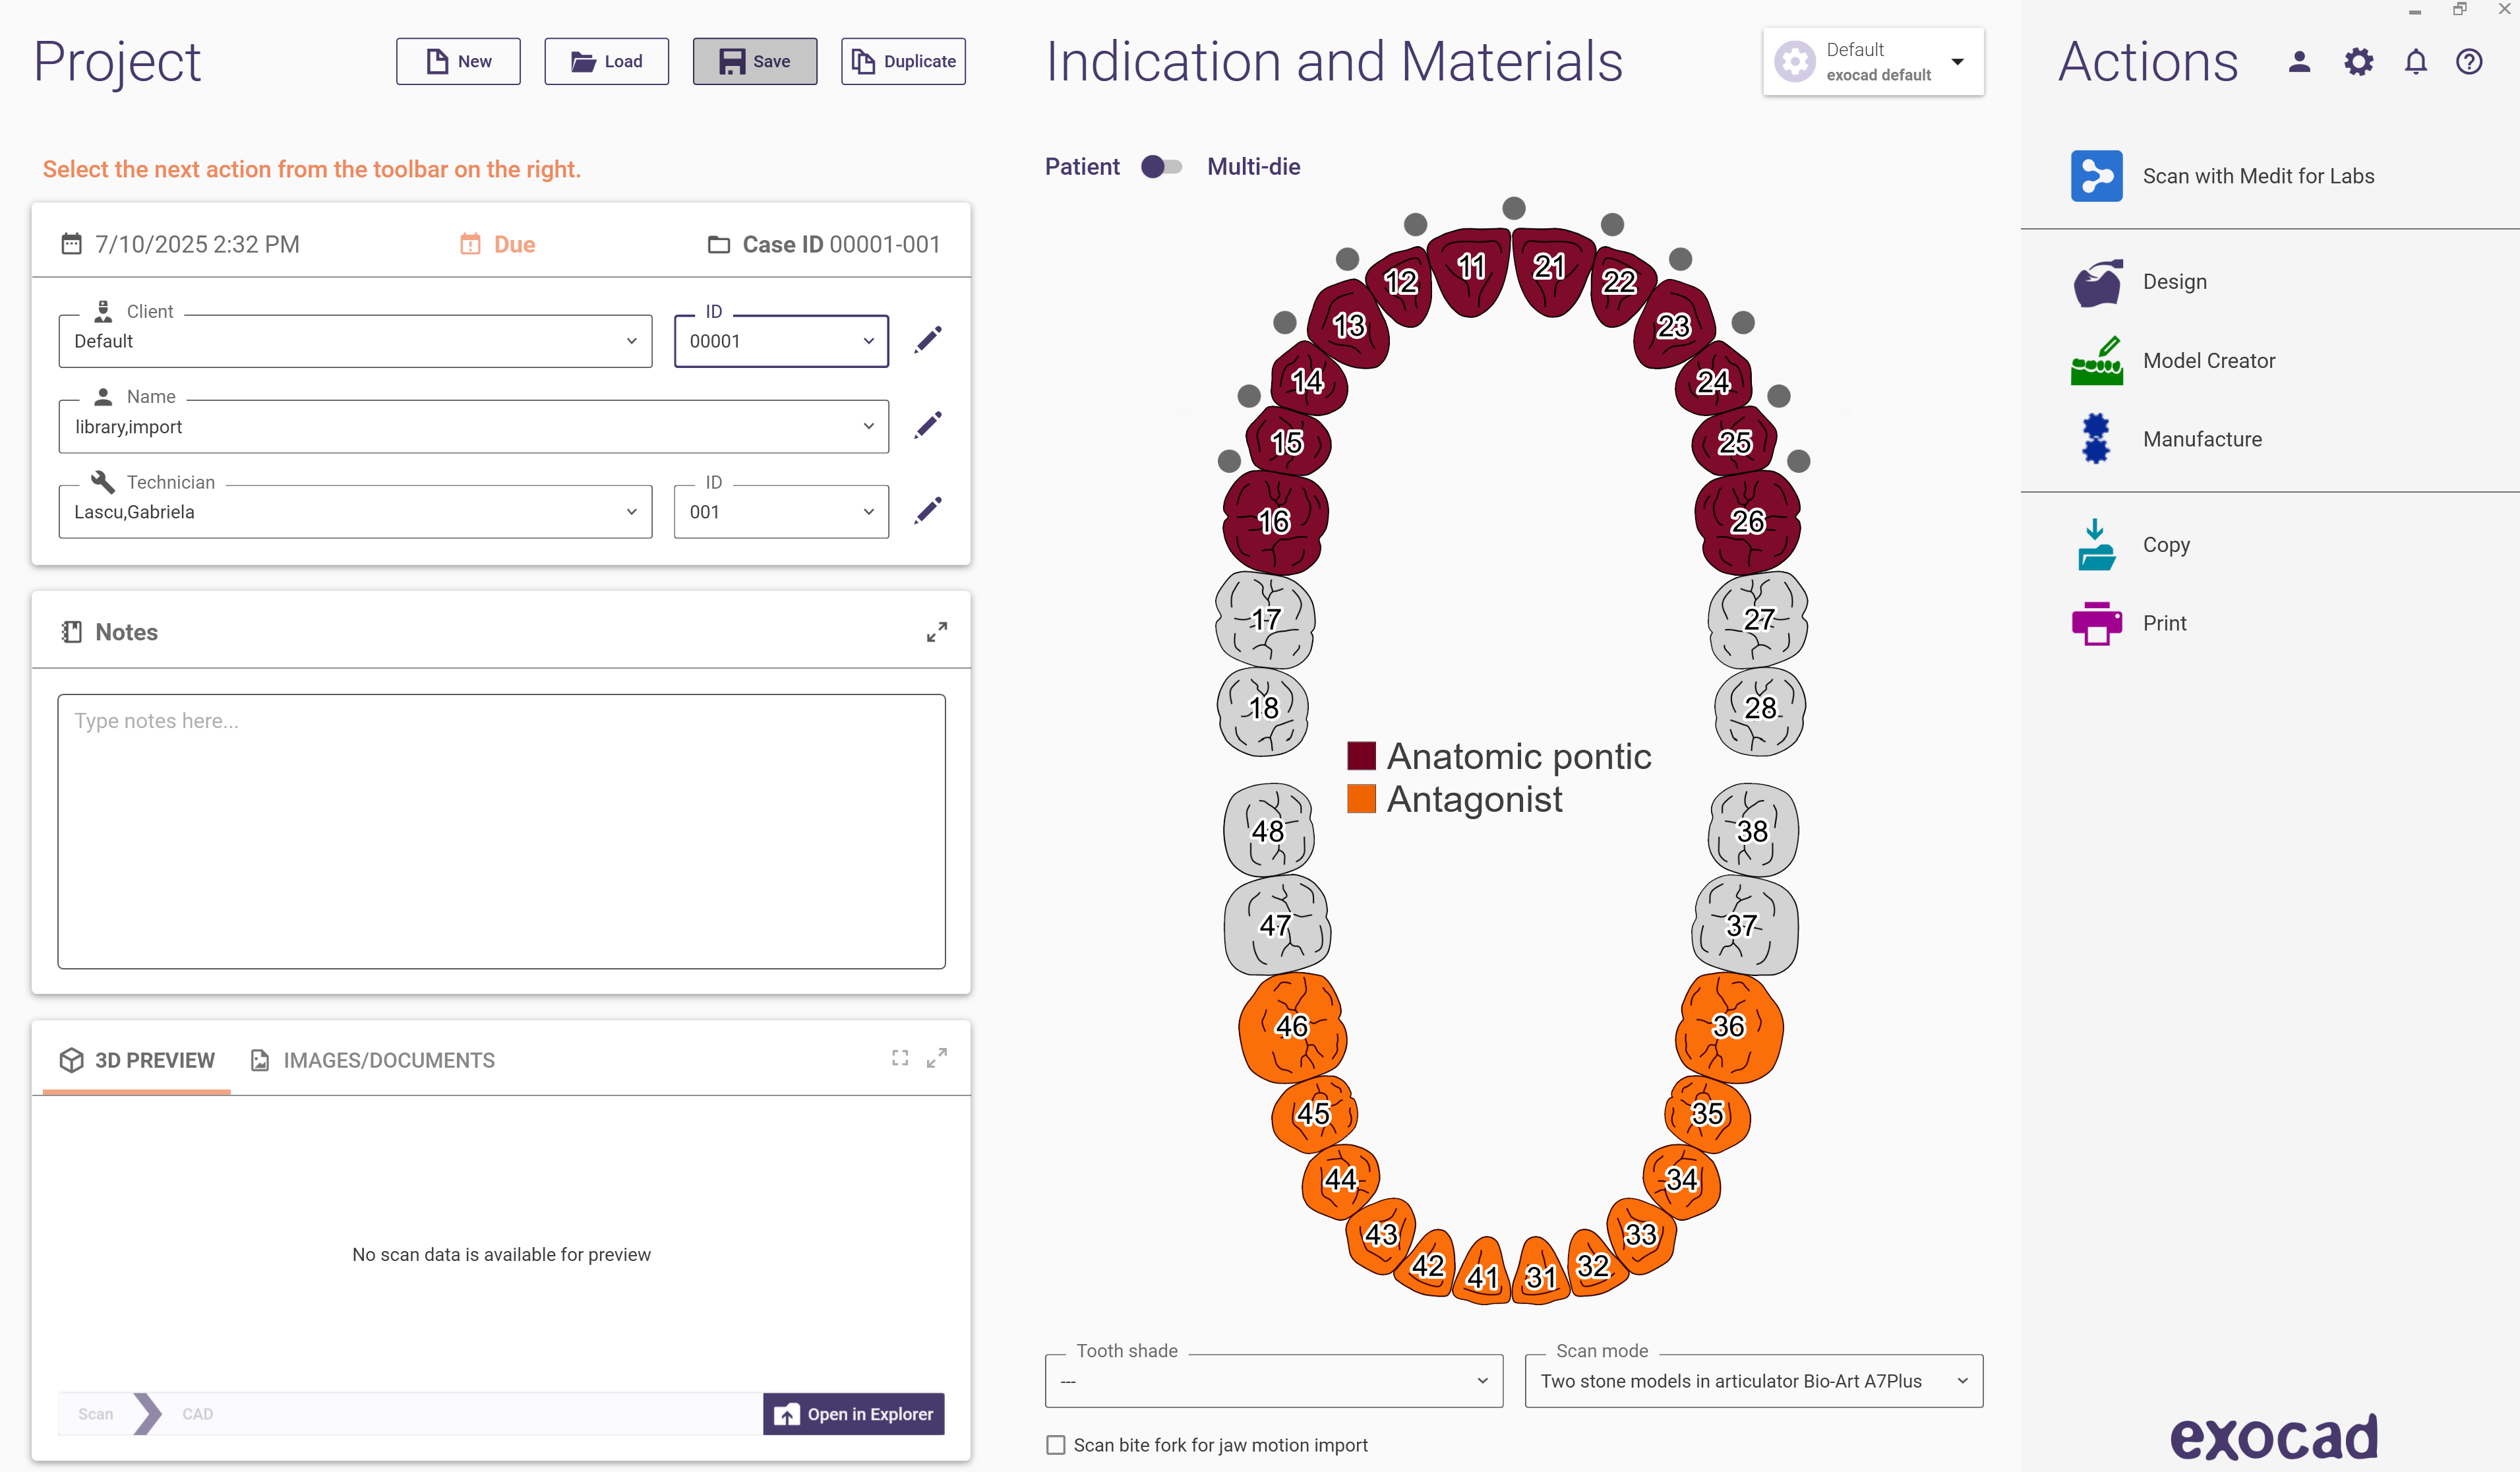
✅Step 2: Create a New Exocad Order
Set up your order as usual, selecting the arch and restoration types -> then, import the upper and lower scans.
✅Step 3: Place a Generic Library First
Before loading the Smilecloud library:
- Choose any generic Exocad library tooth and place it on the arch.
- This initializes the arch and makes it ready for custom teeth to be loaded.
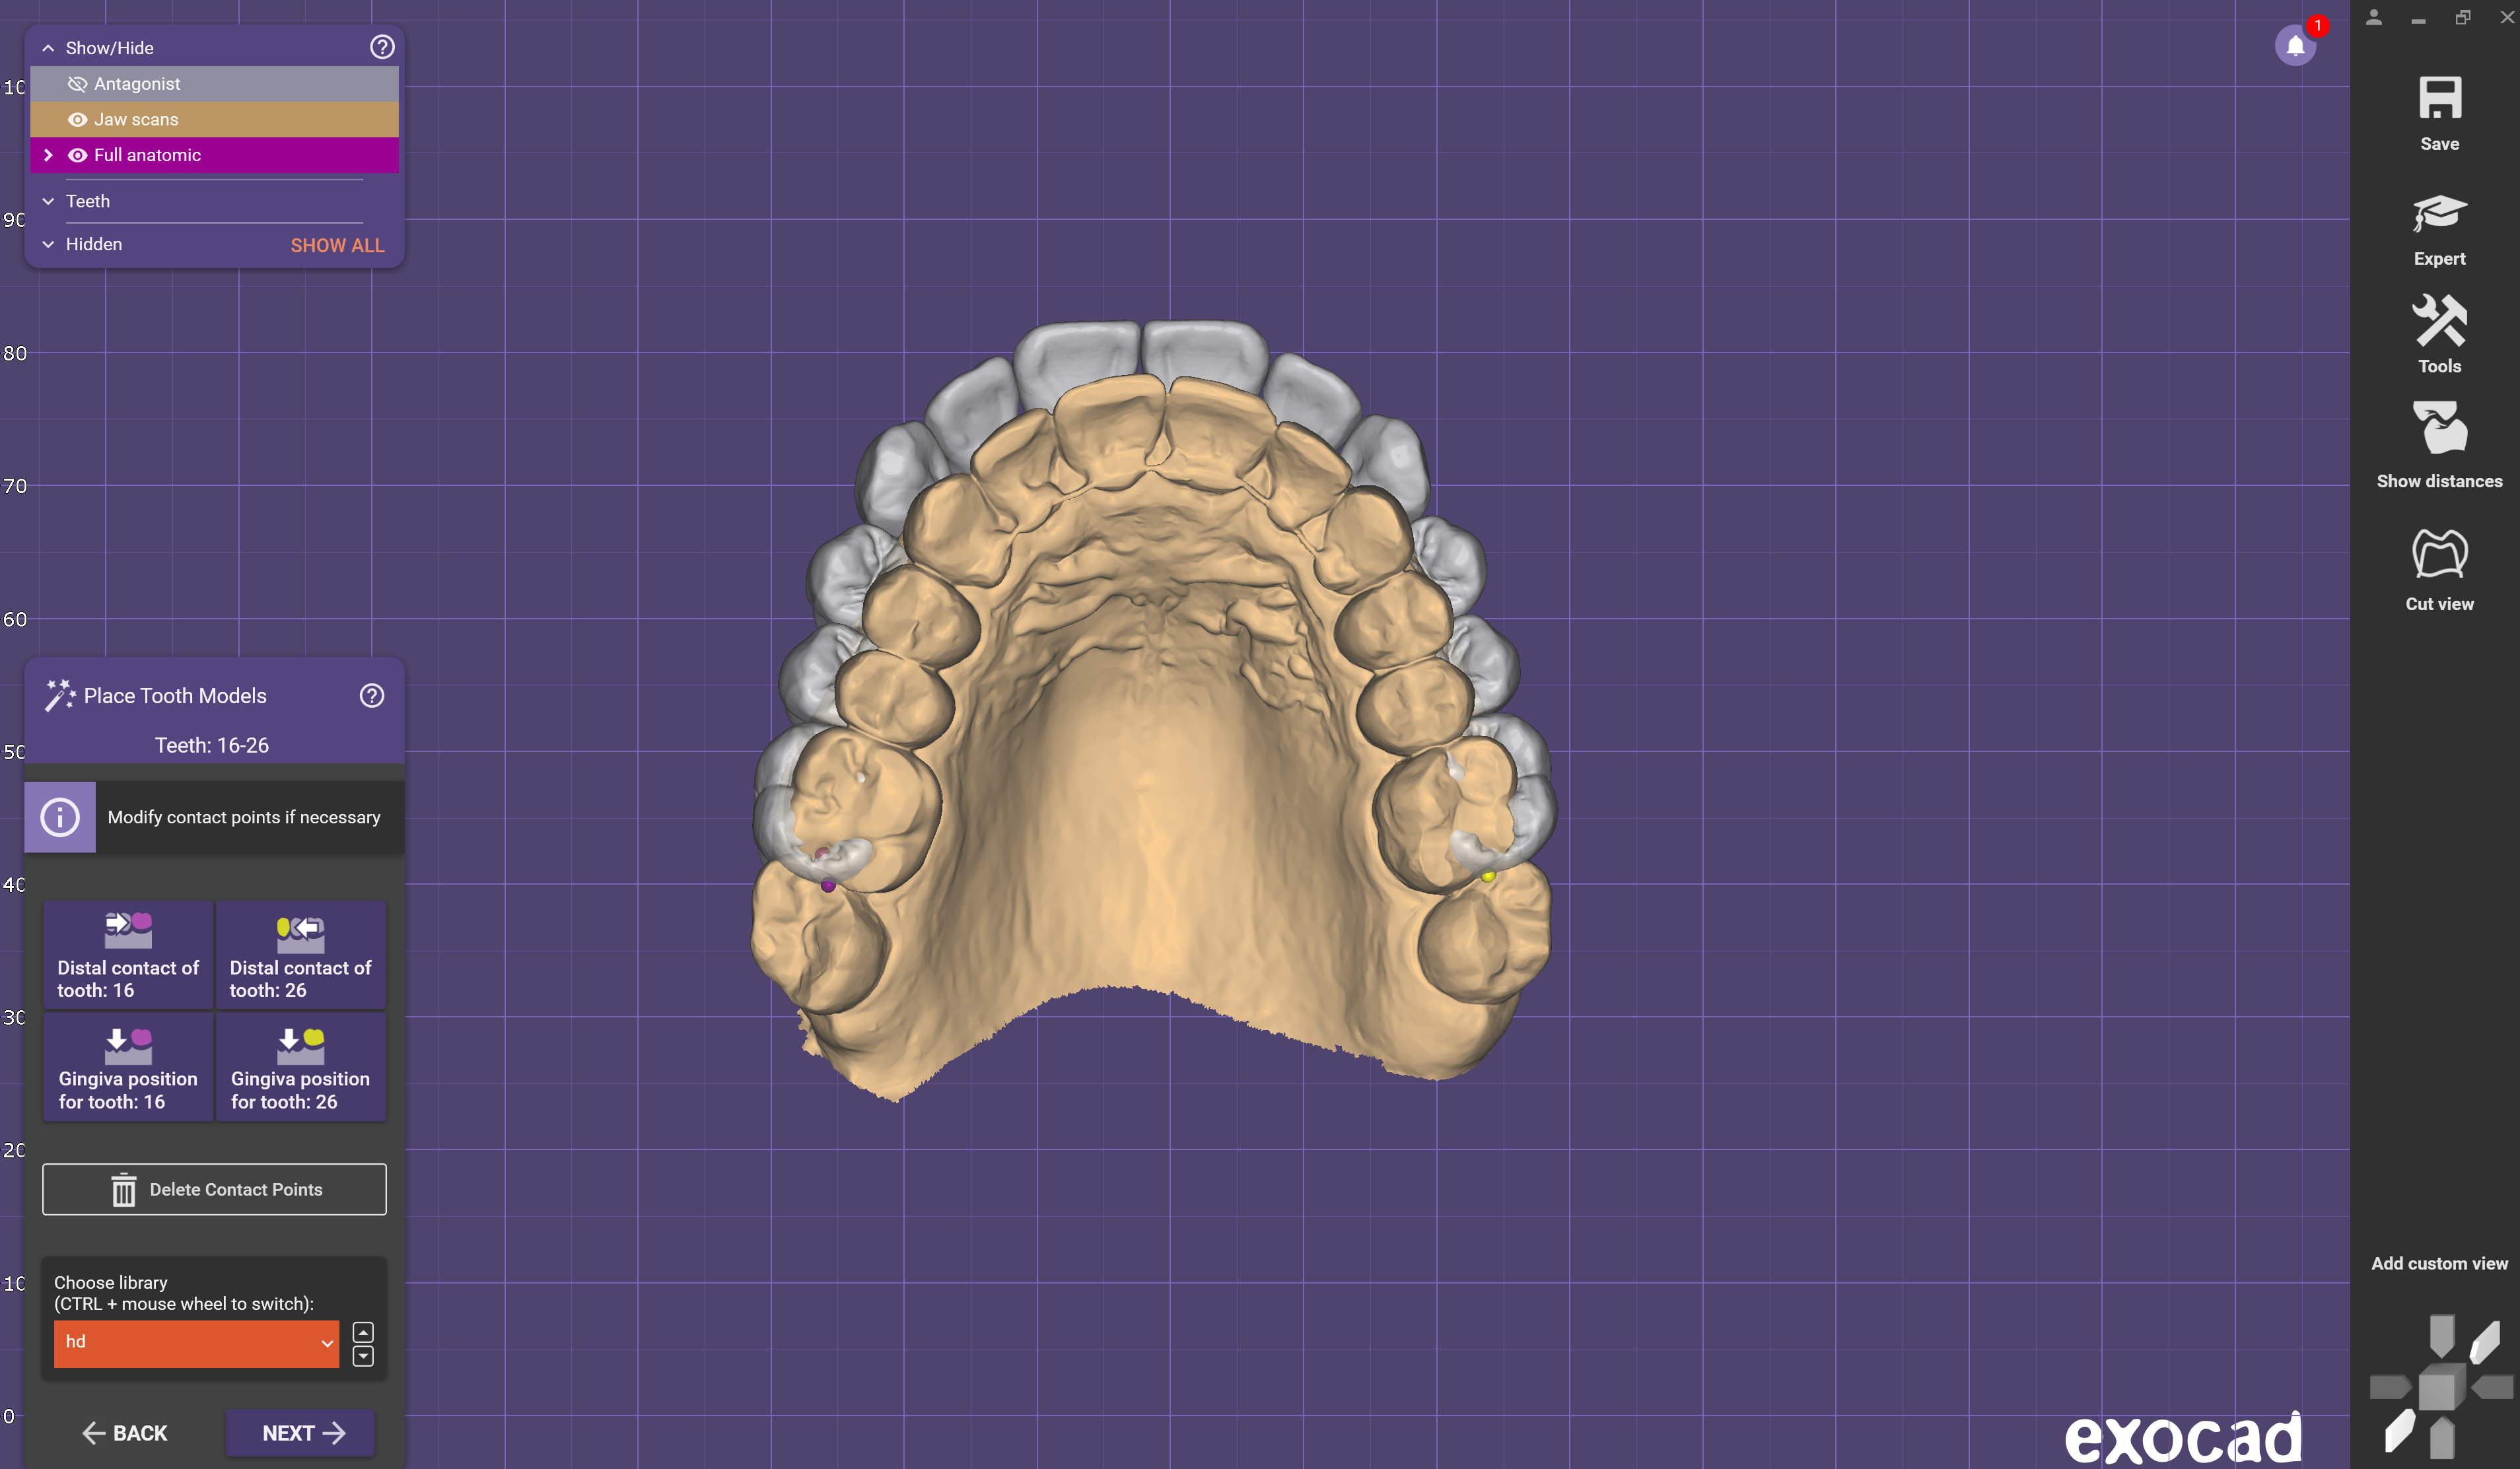
✅Step 4: Switch to Expert Mode
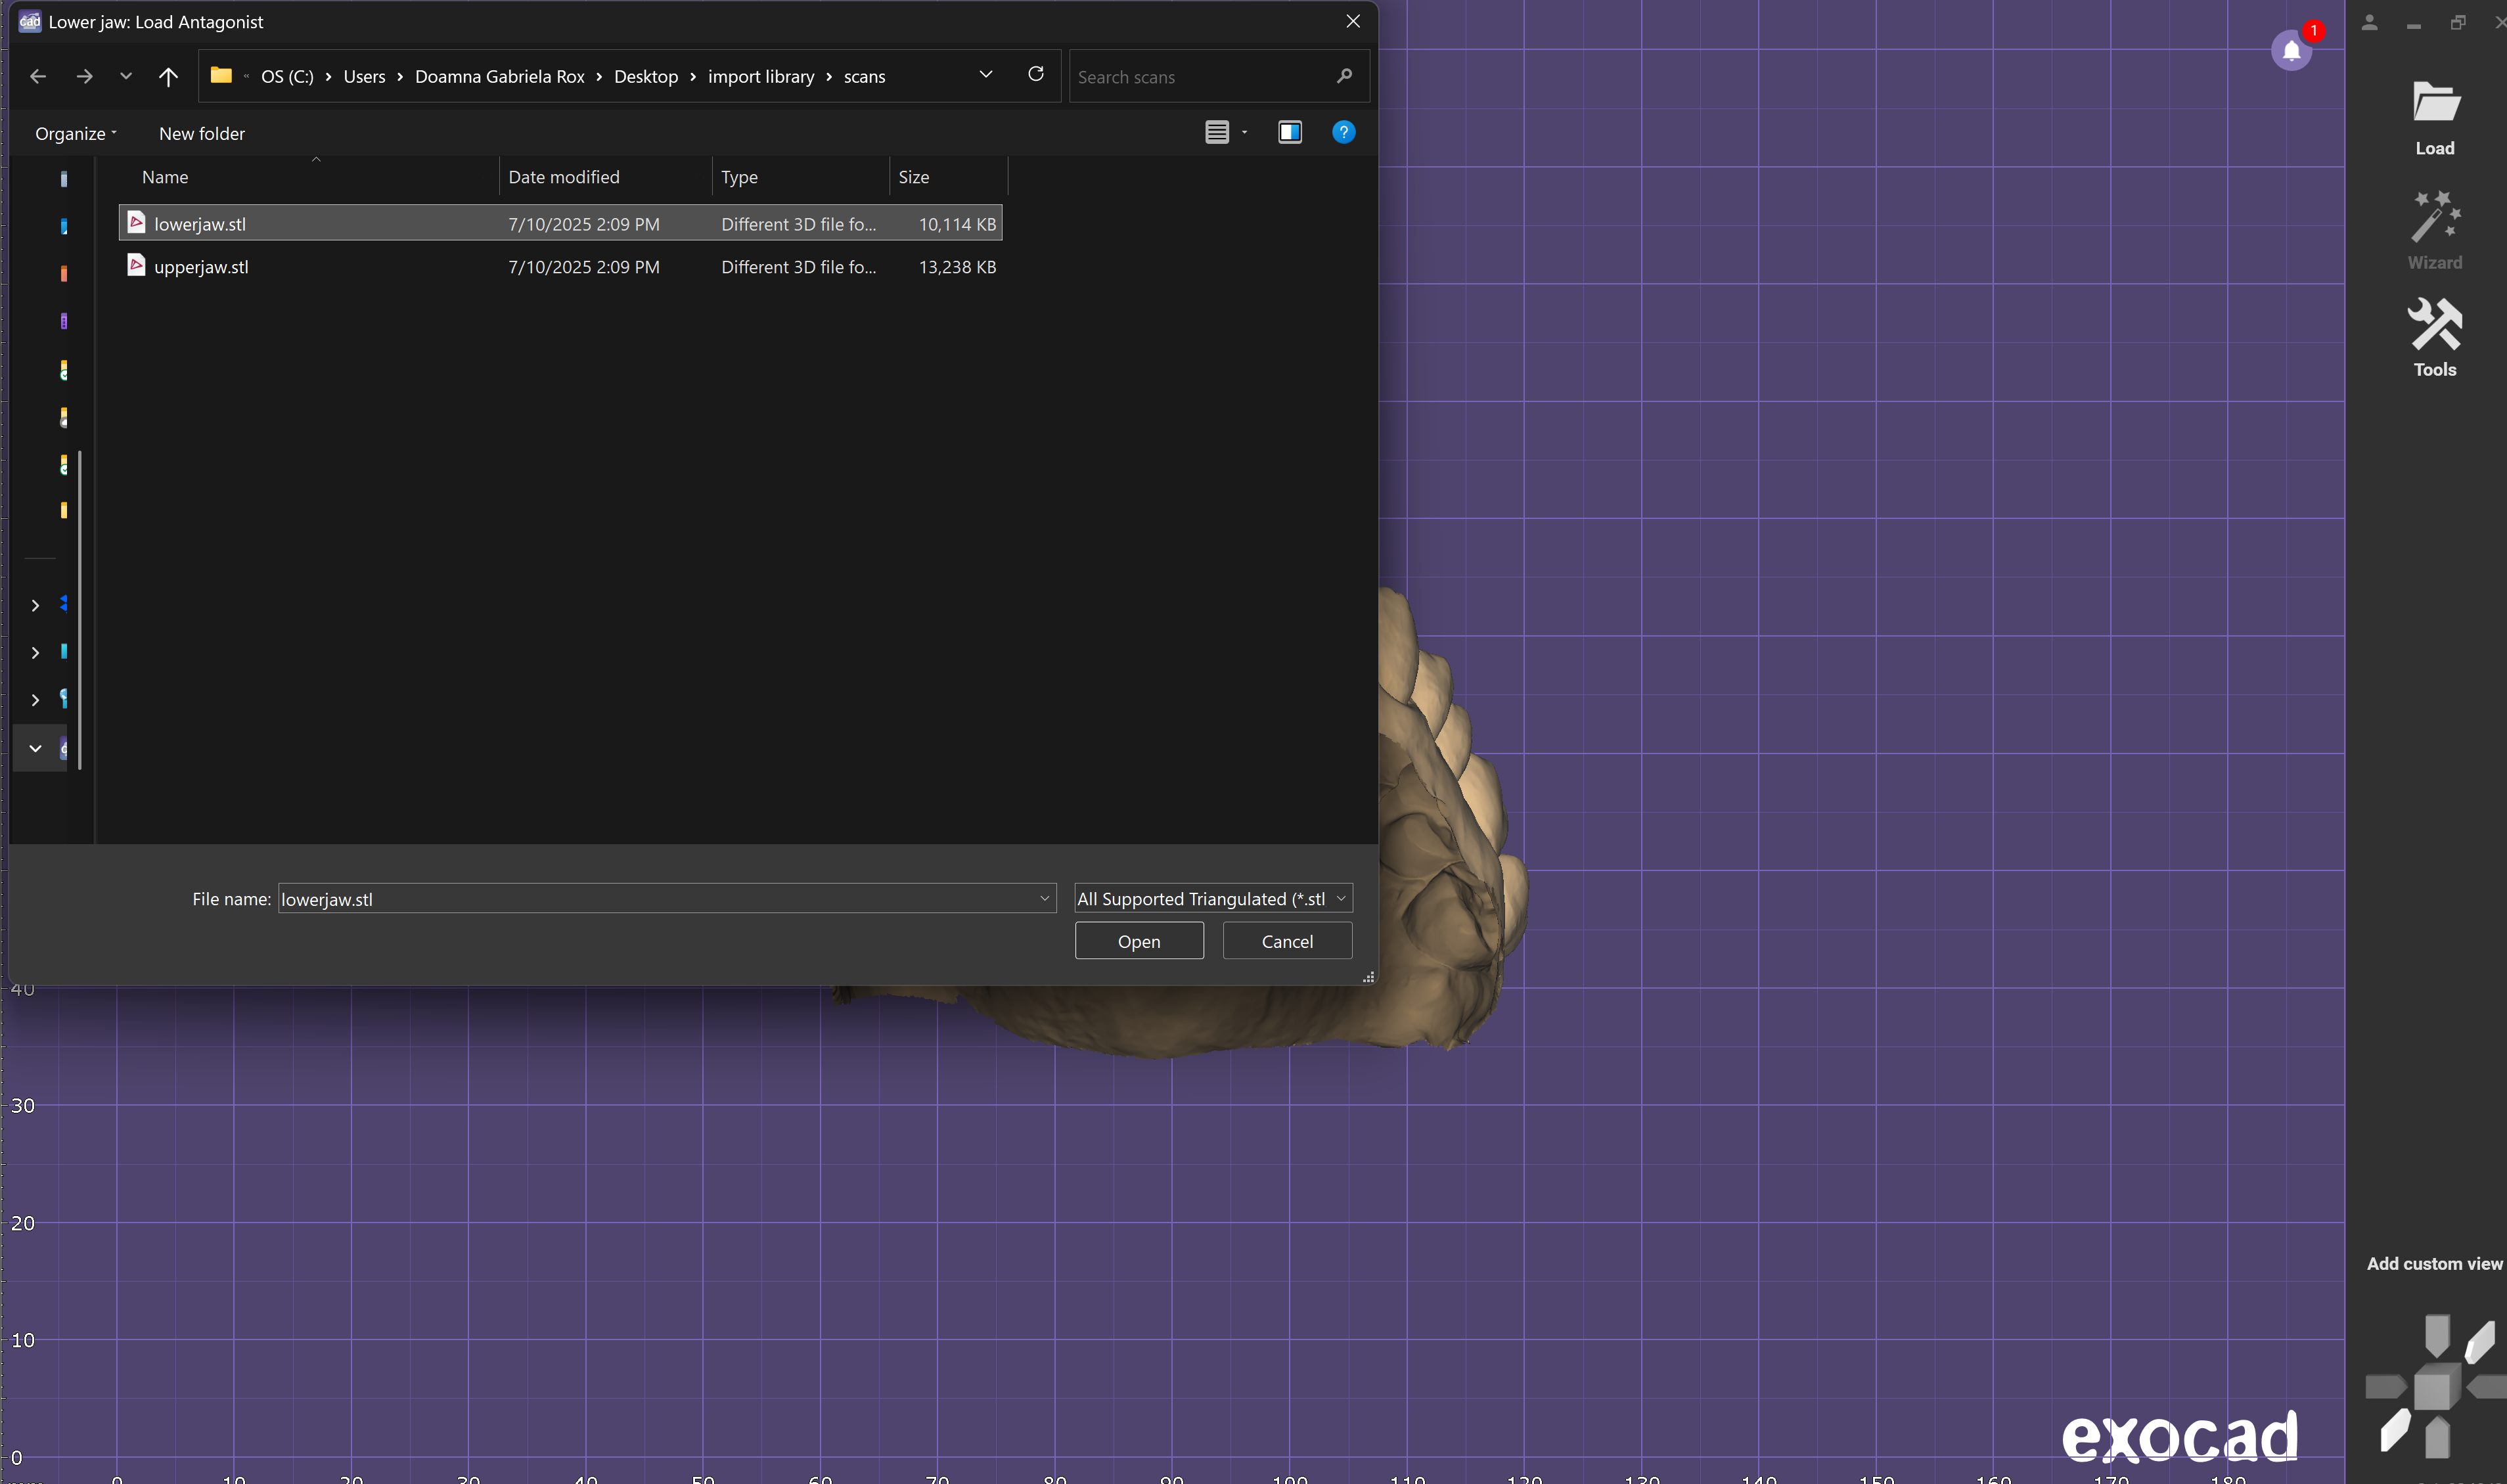
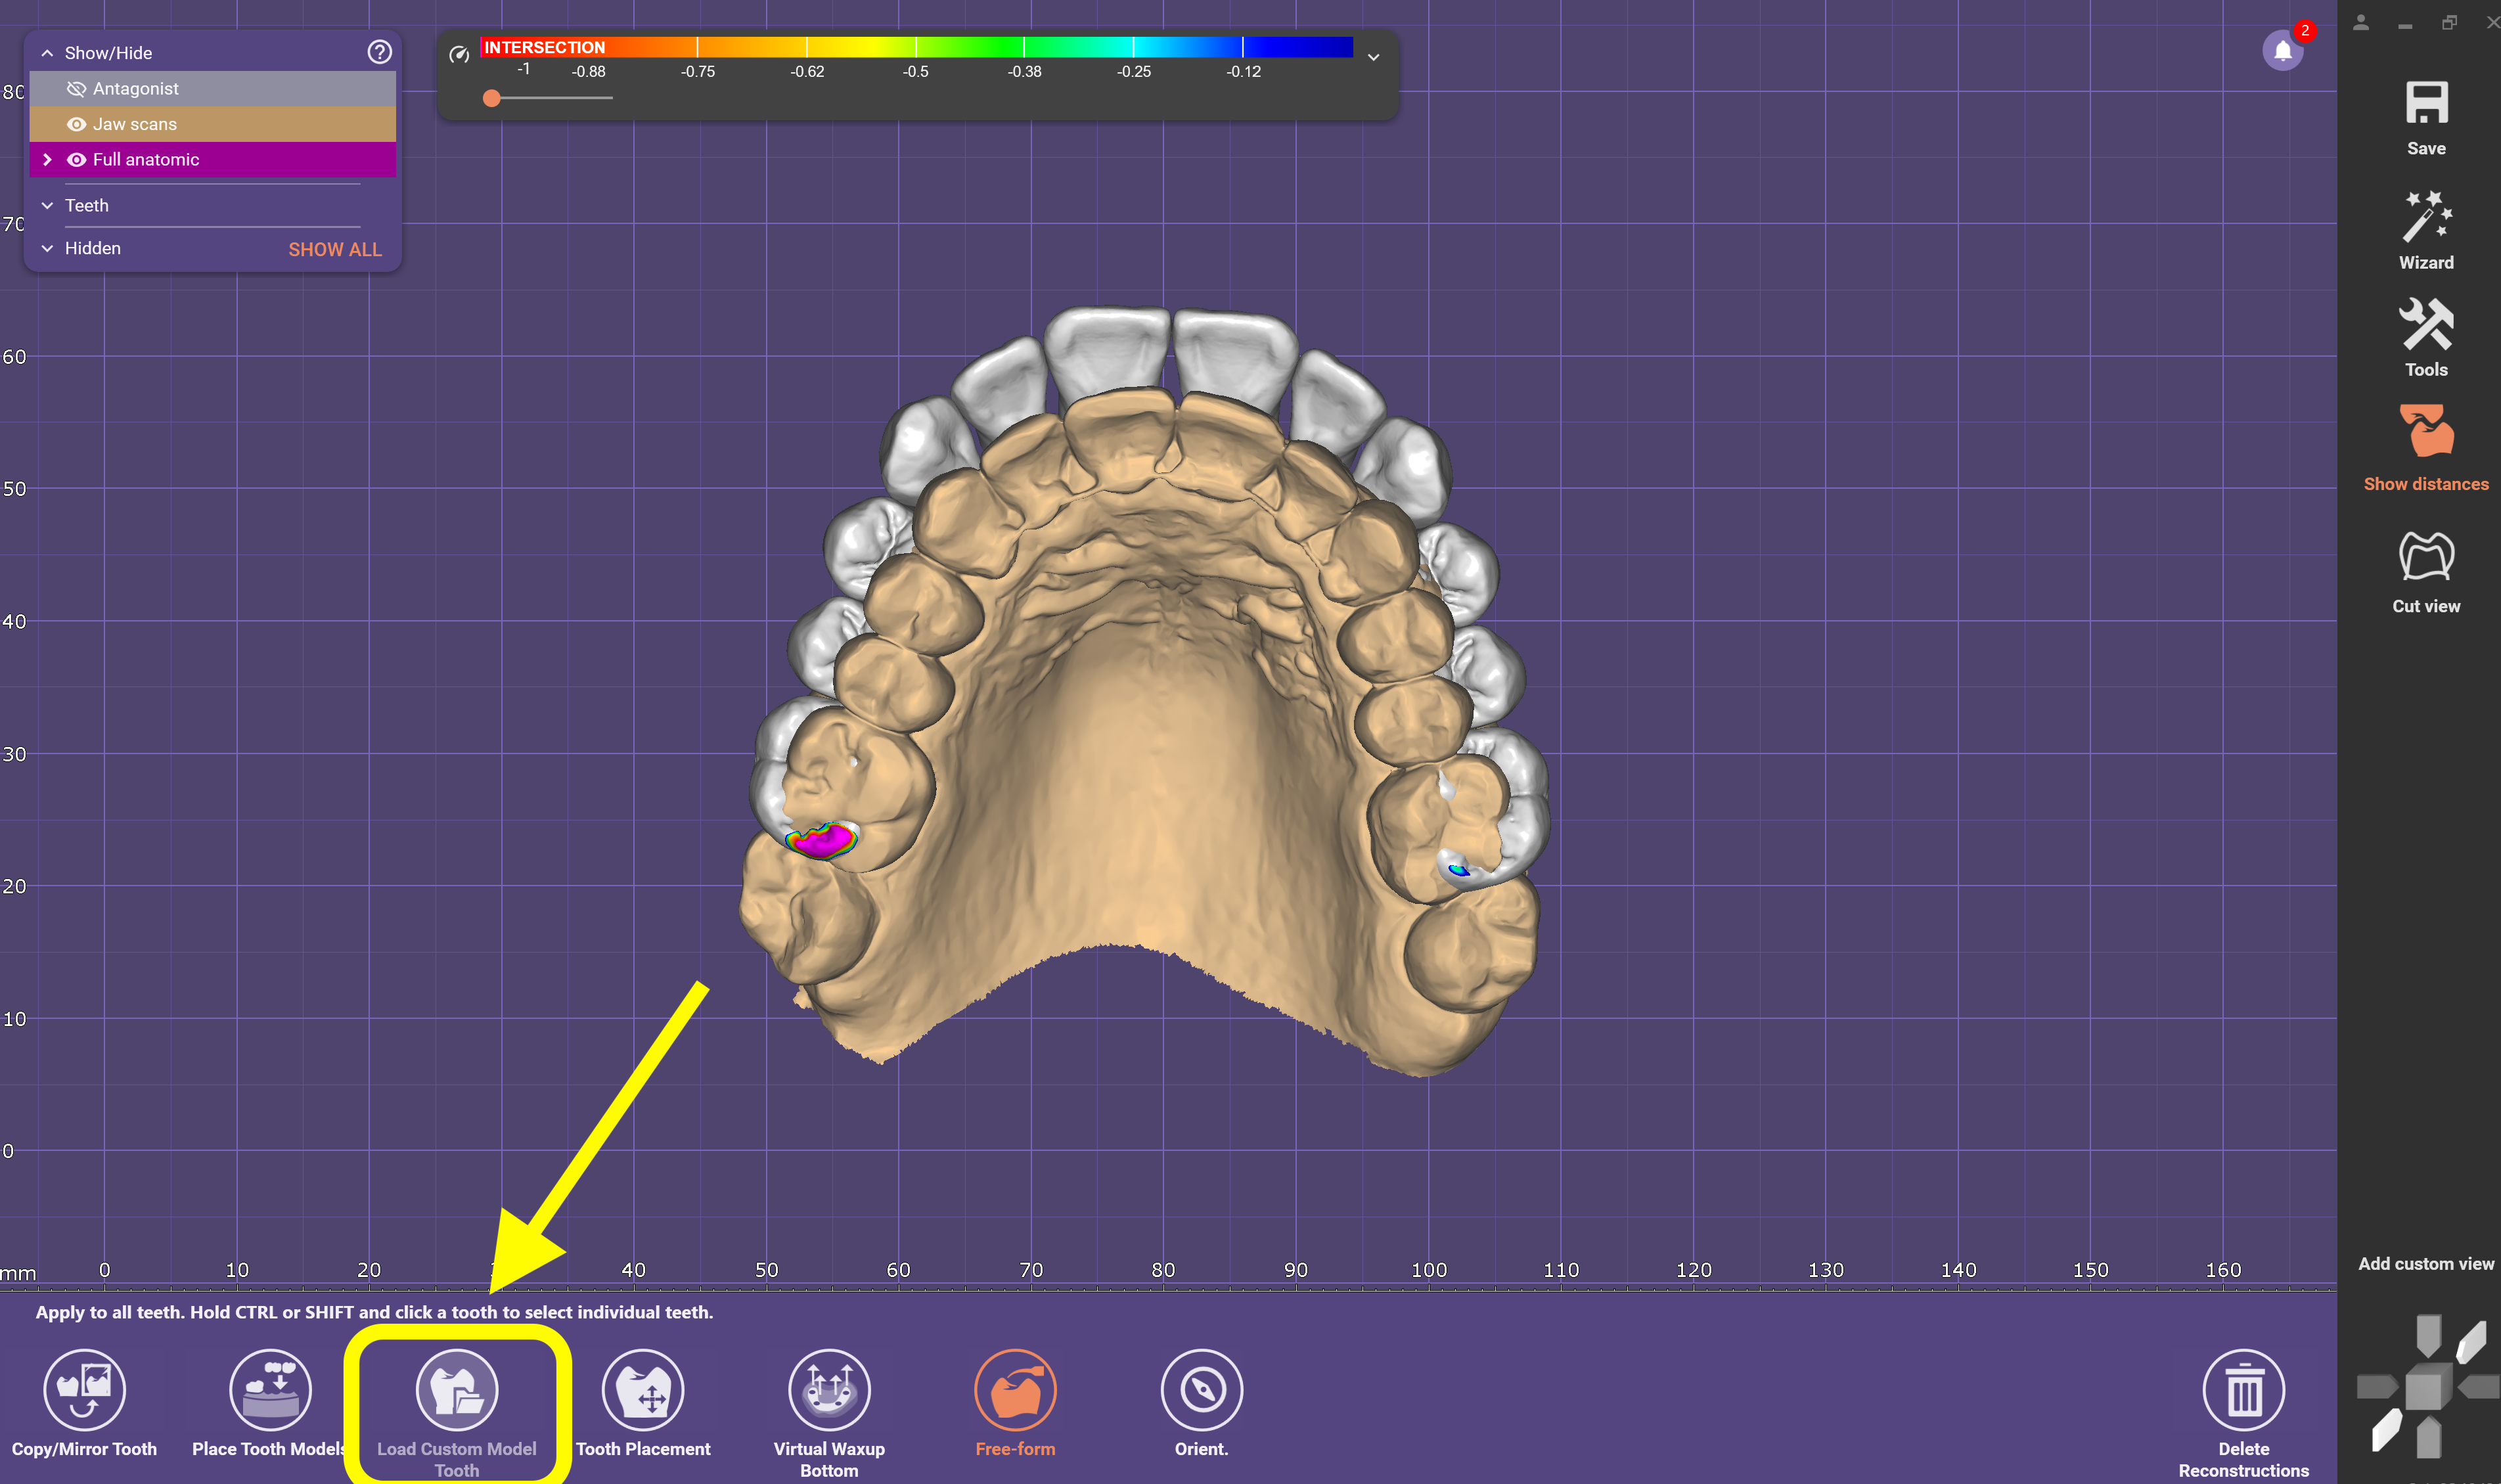
✅Step 5: Load the Custom Smilecloud Library
- From Expert mode on the bottom bar
- Select “Load custom model teeth” from the context menu.
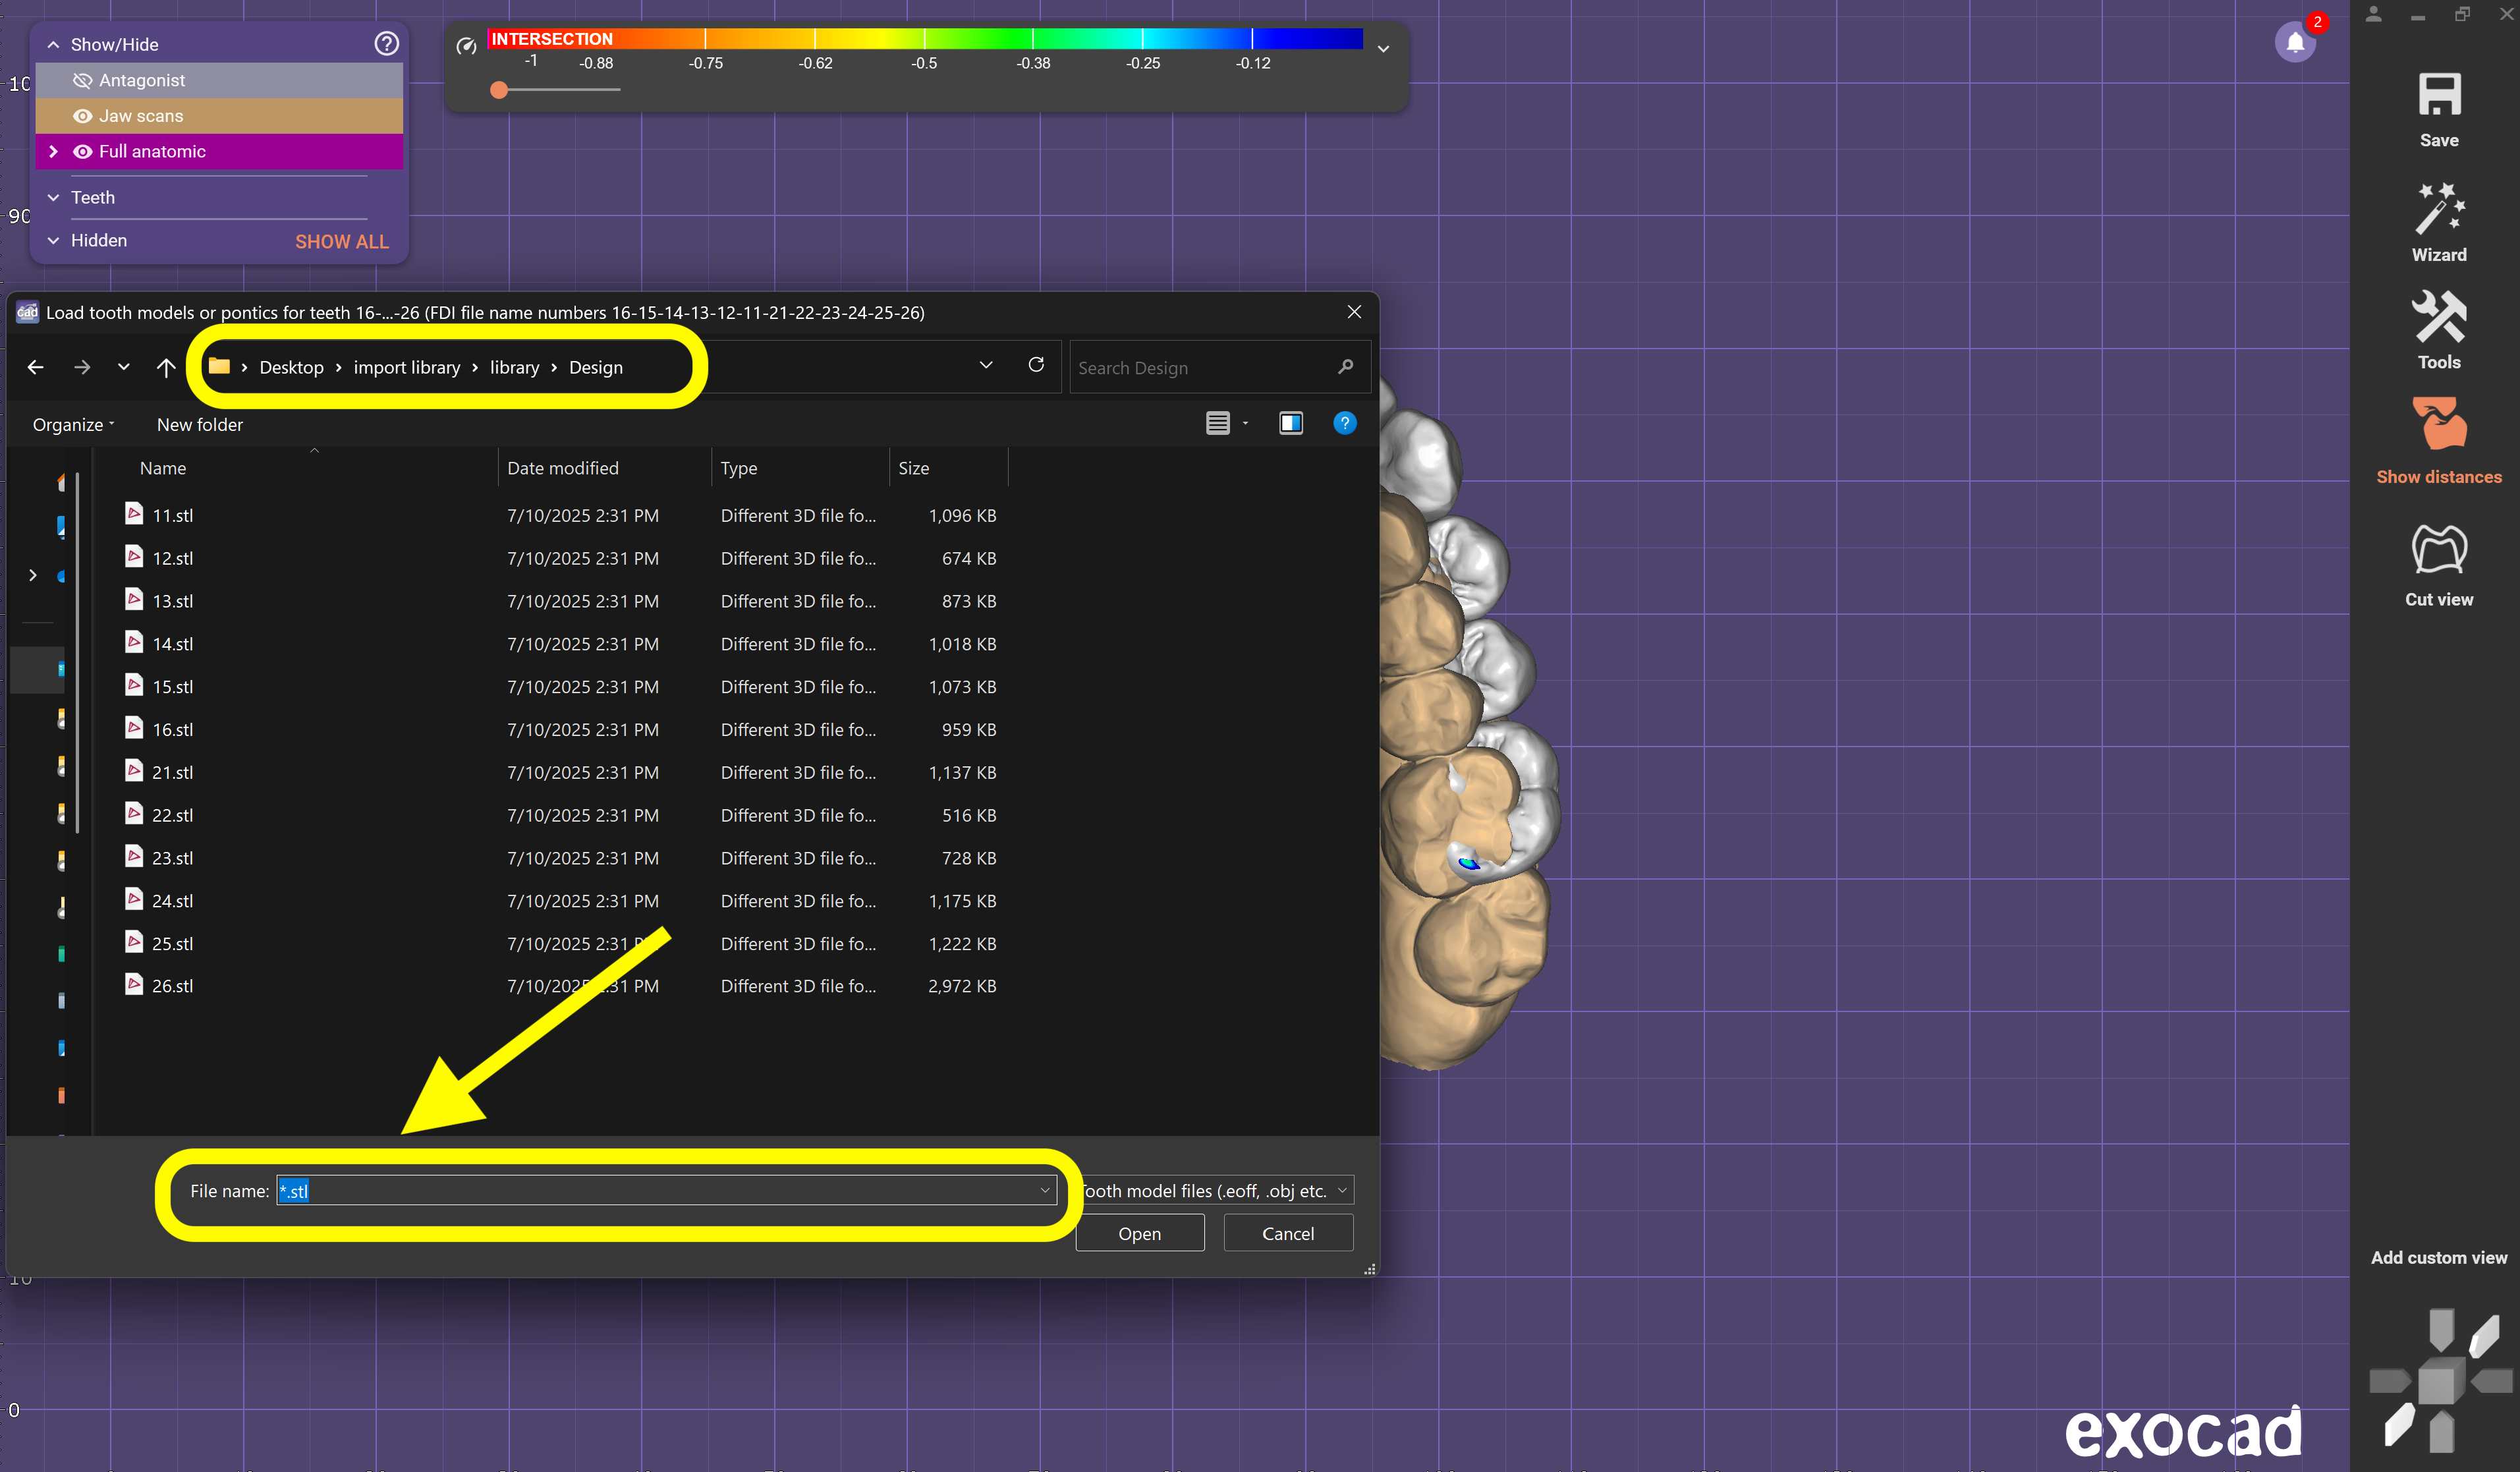
- Navigate to the folder where you unzipped your Smilecloud library.
- To see STL files, type *.stl on your keyboard in the filename field. Exocad defaults to .eoff files, so this forces it to show .stl.
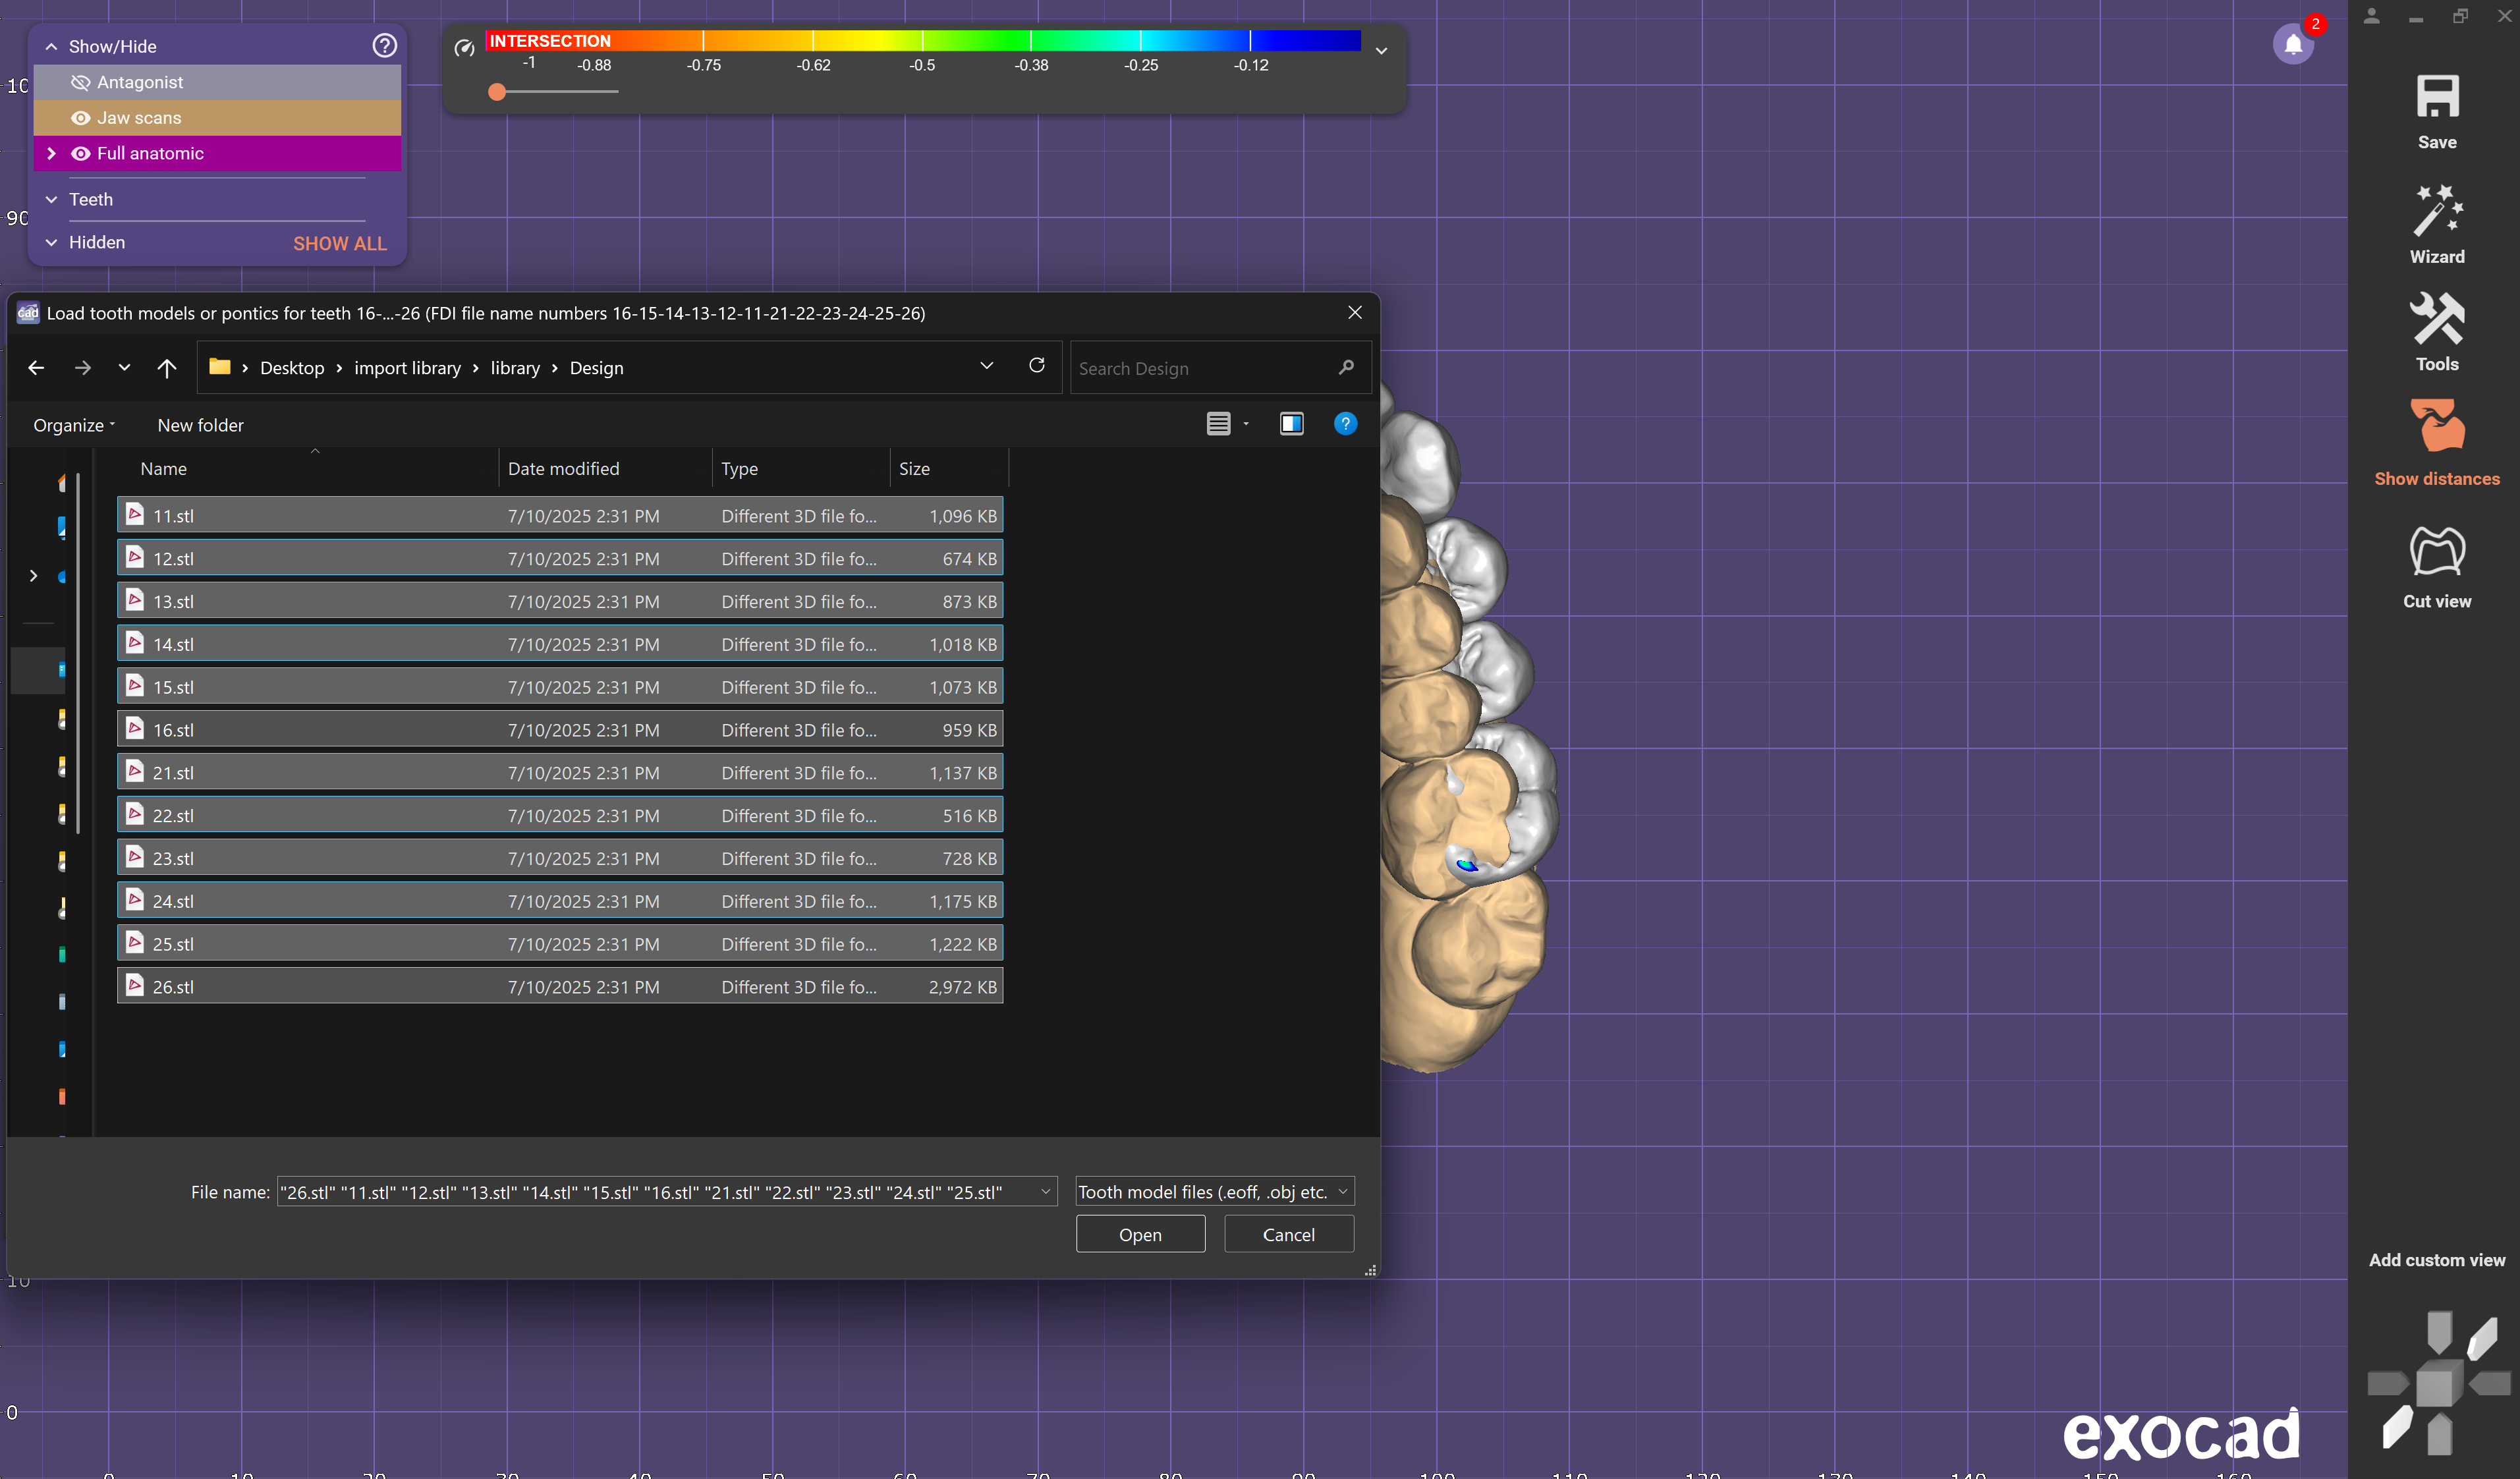
✅Step 6: Import and Arrange the Library Teeth
- Select all the STL files representing individual teeth.
- Click Open.
⚠️ Note: The teeth will likely appear scattered or misaligned at first.
Positioning:
- You will need to manually position each tooth:
- Align them to your scan data.
- Consider biological constraints, function, and occlusion.
Use the tools provided in Expert Mode to rotate, move, and fine-tune the placement.