
How to Connect your Patients
Here’s how you can connect your patients in under 1 minute:
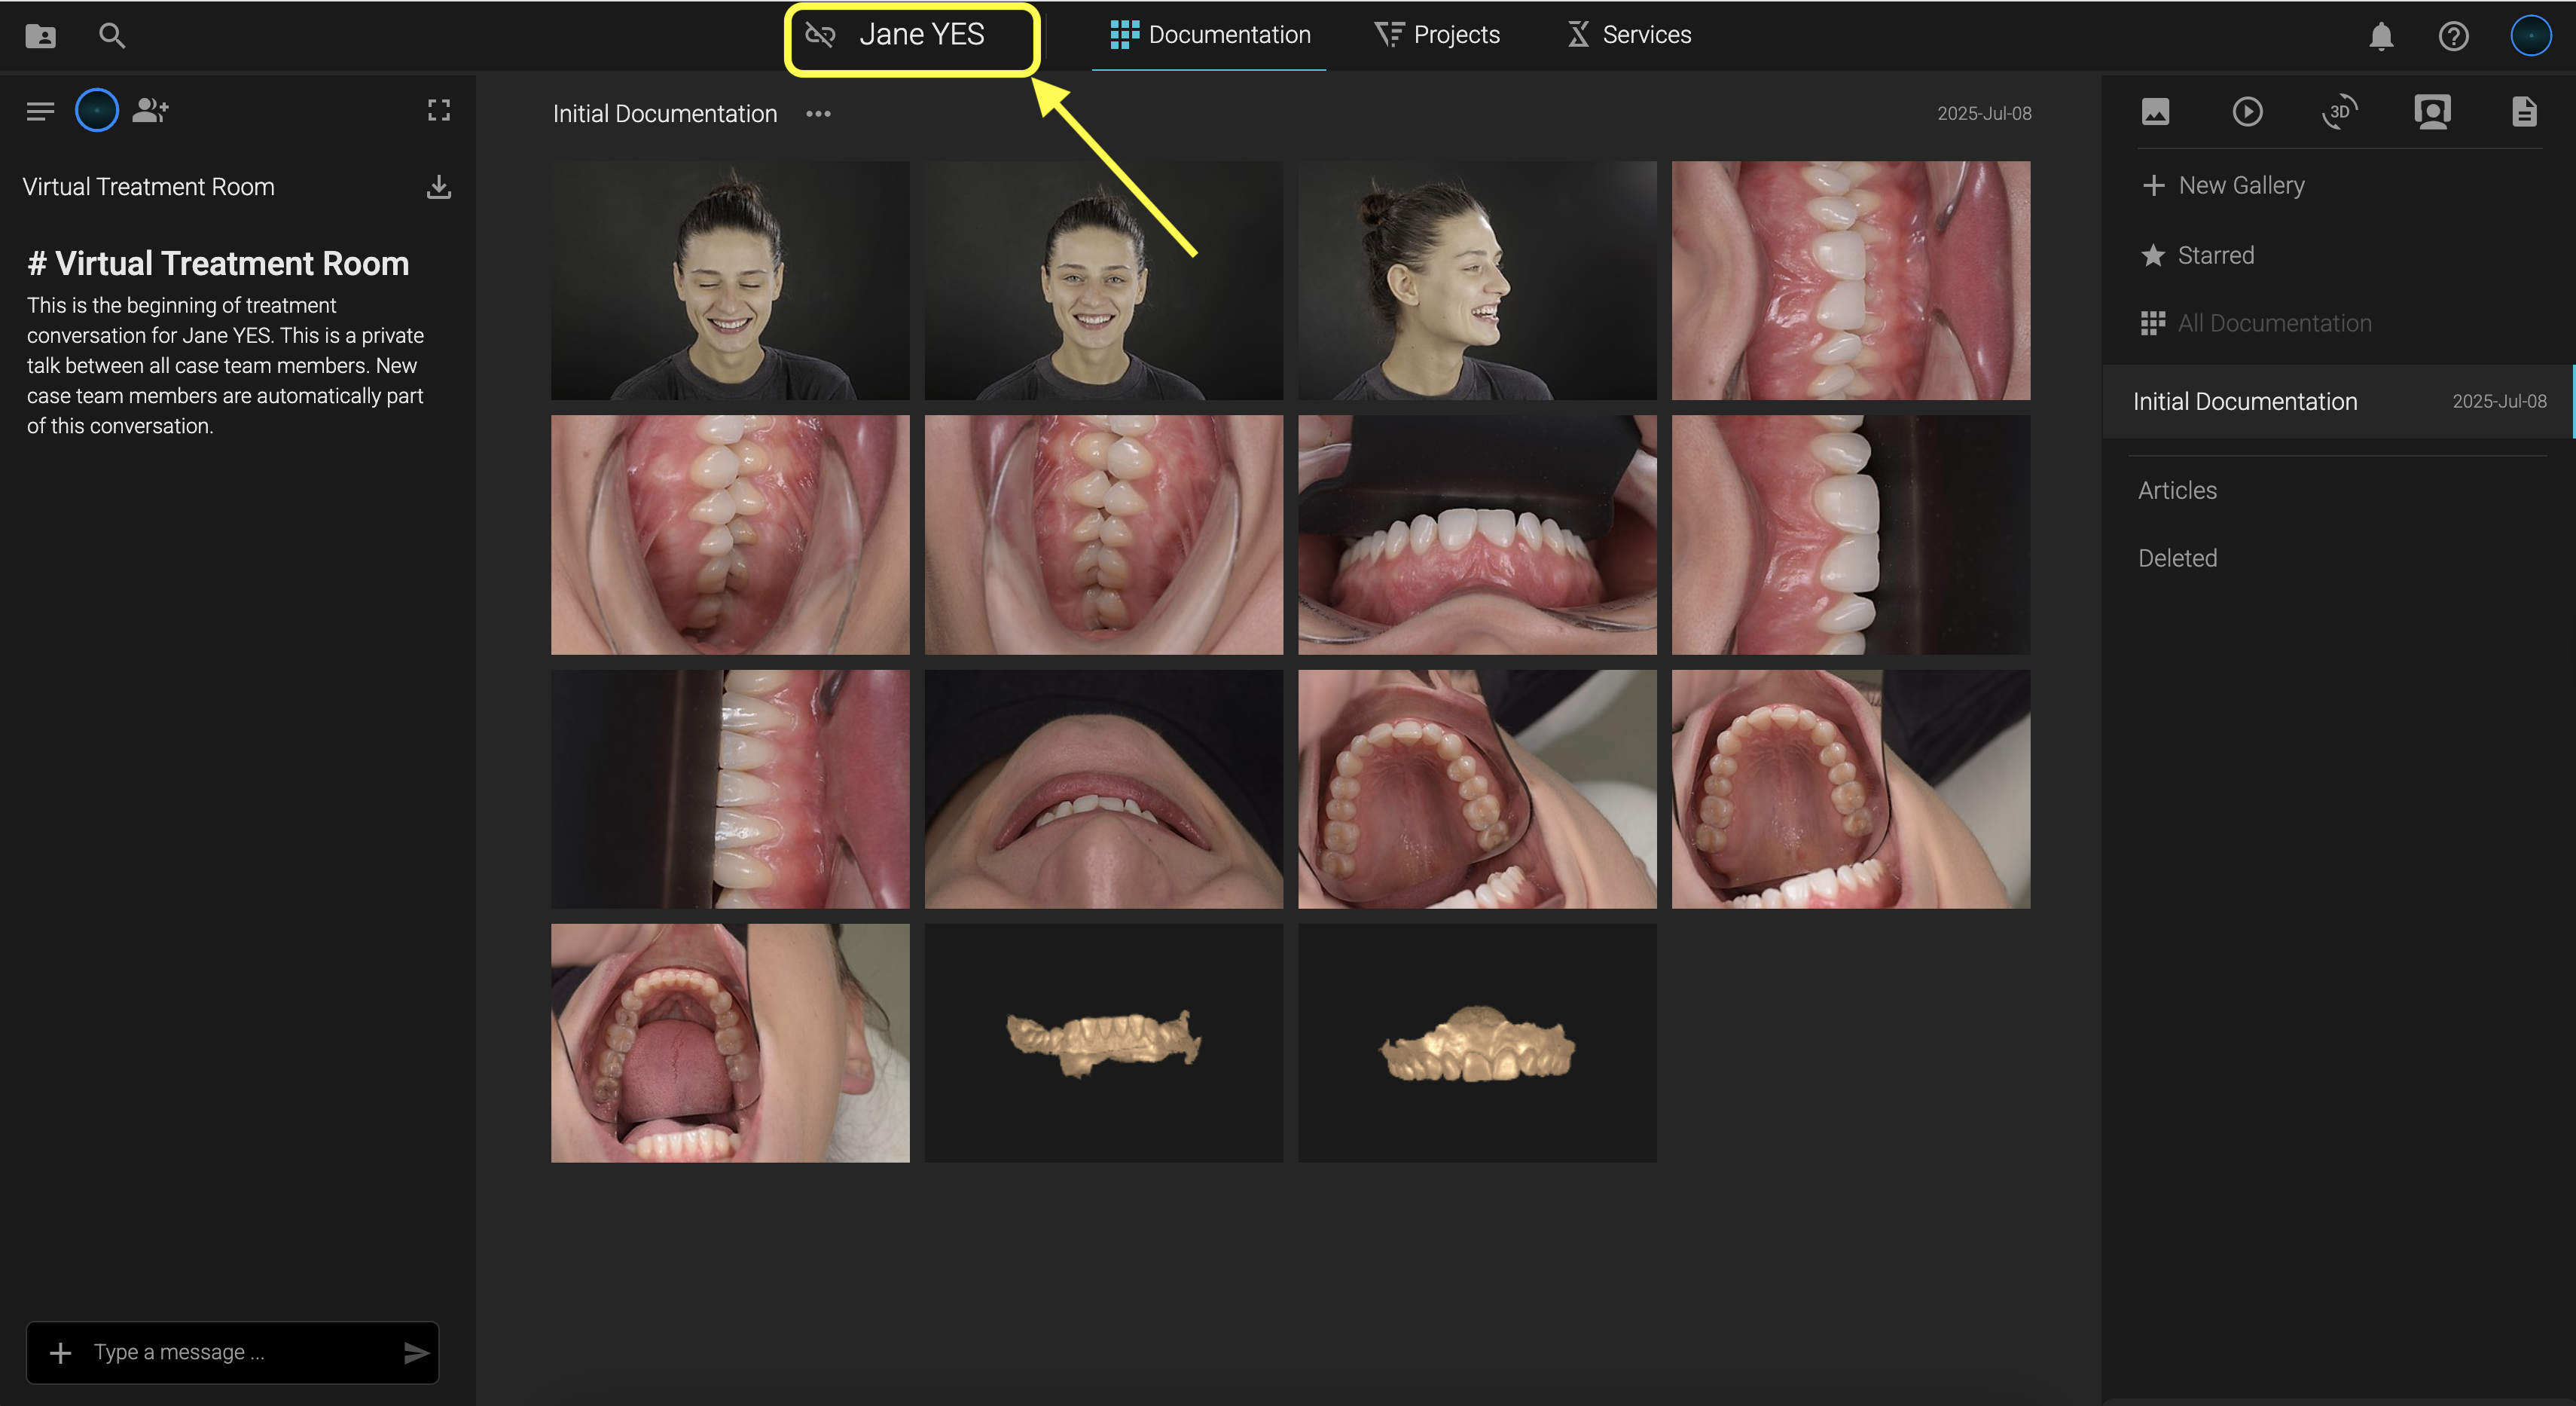
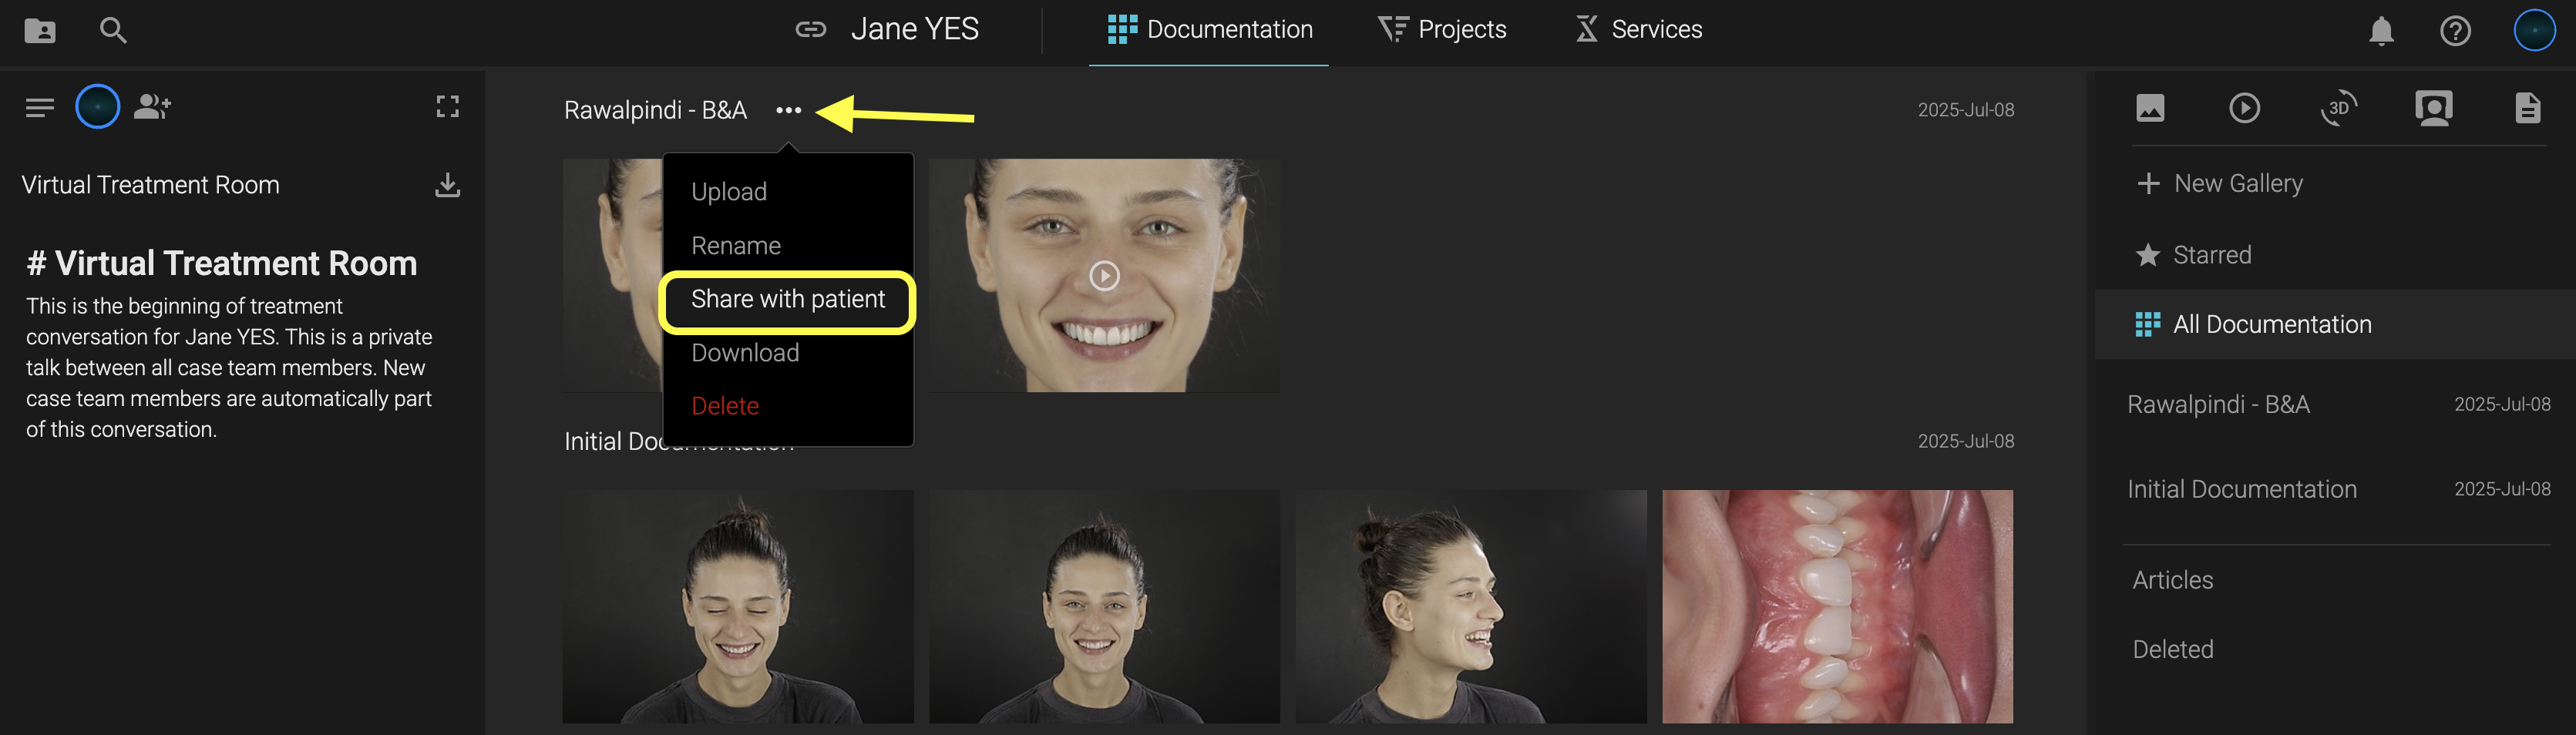
Step 1: Create the Case
Log in to your Smilecloud account and create a new case for your patient.
Upload any relevant files—photos, CBCT, intraoral scans, X-rays, or PDFs.
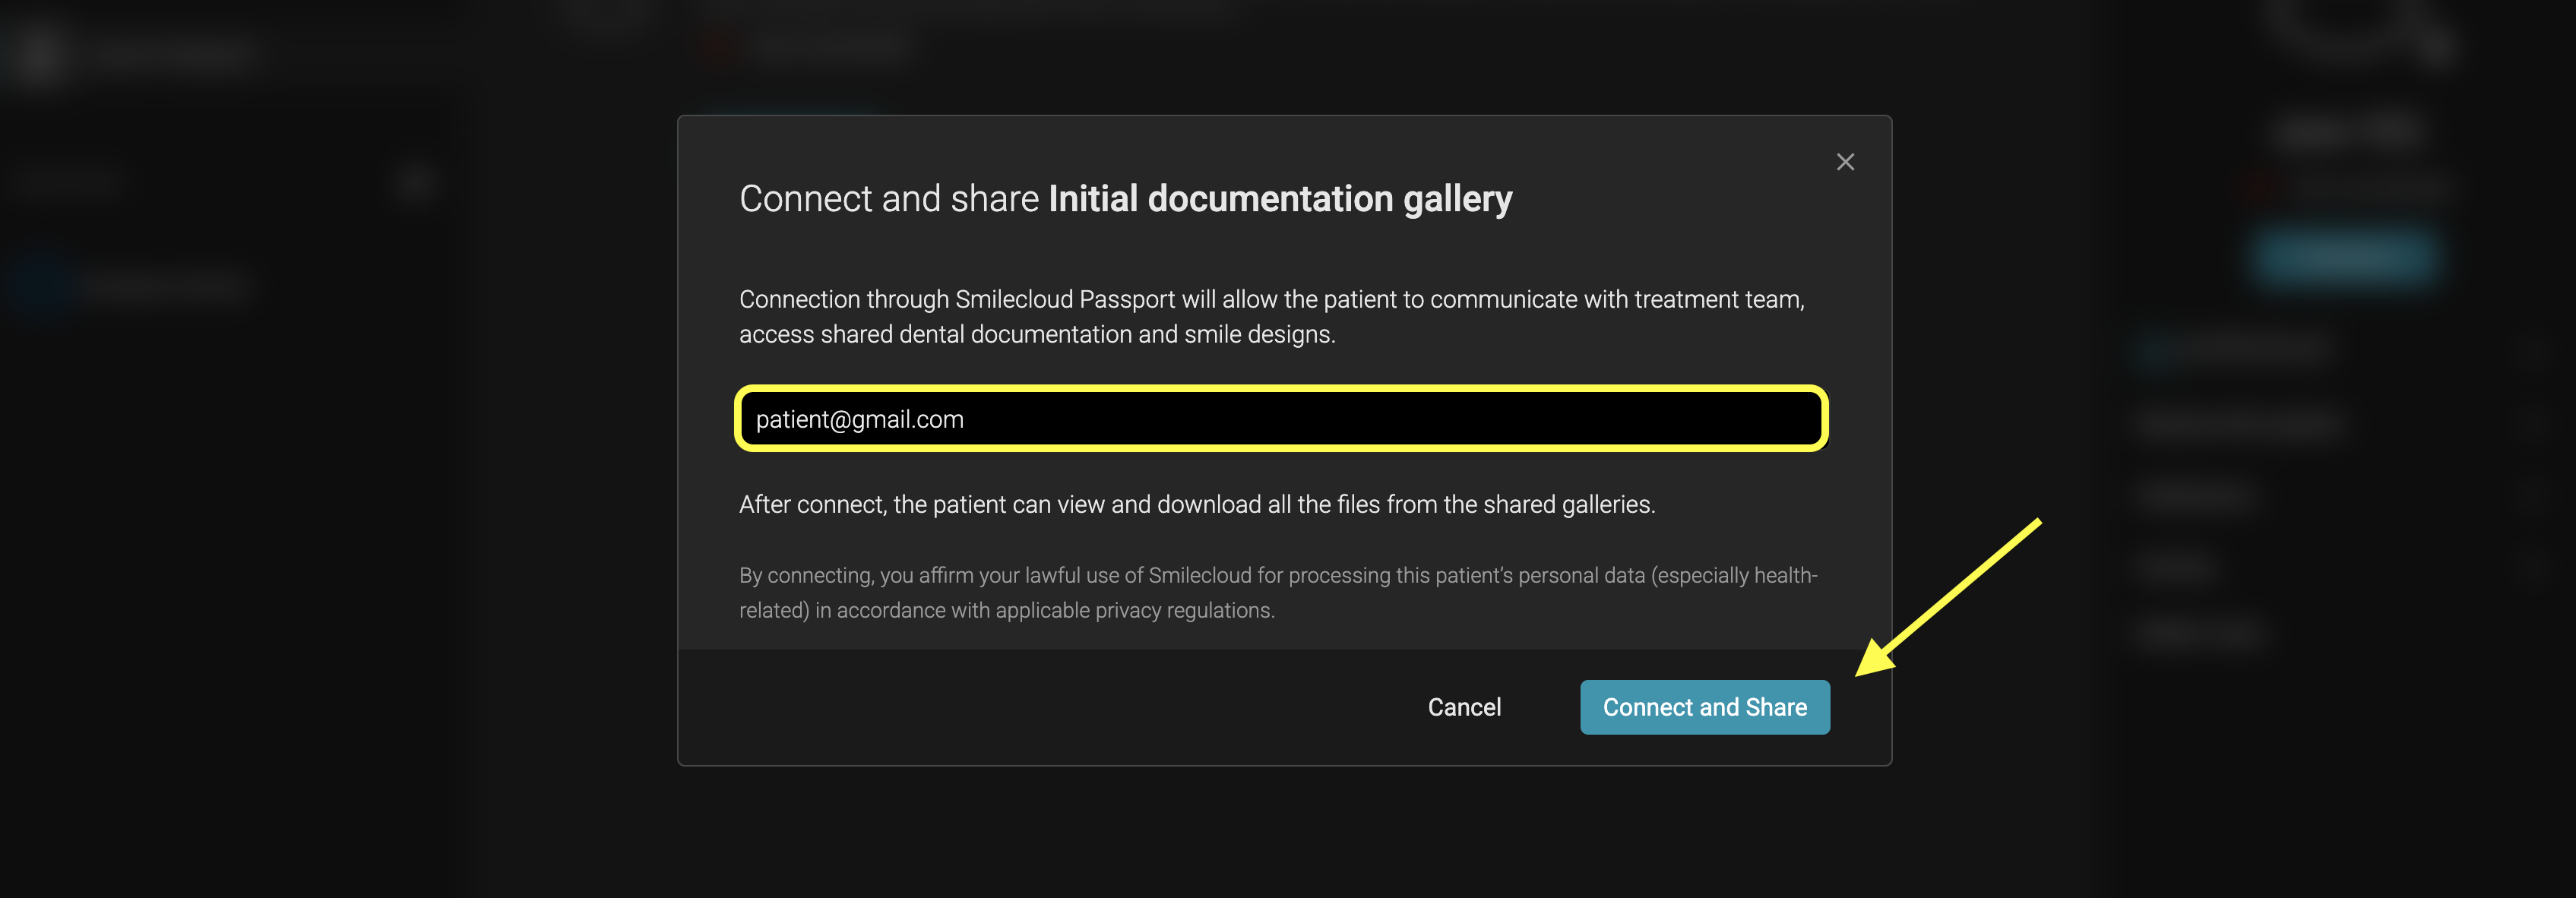
! Initial Documentation: Take note that the Initial Documentation Gallery will be shared automatically when you connect the Passport. So, only add here relevant files for the patient and avoid other clinical documentation such as surgery pictures, etc.
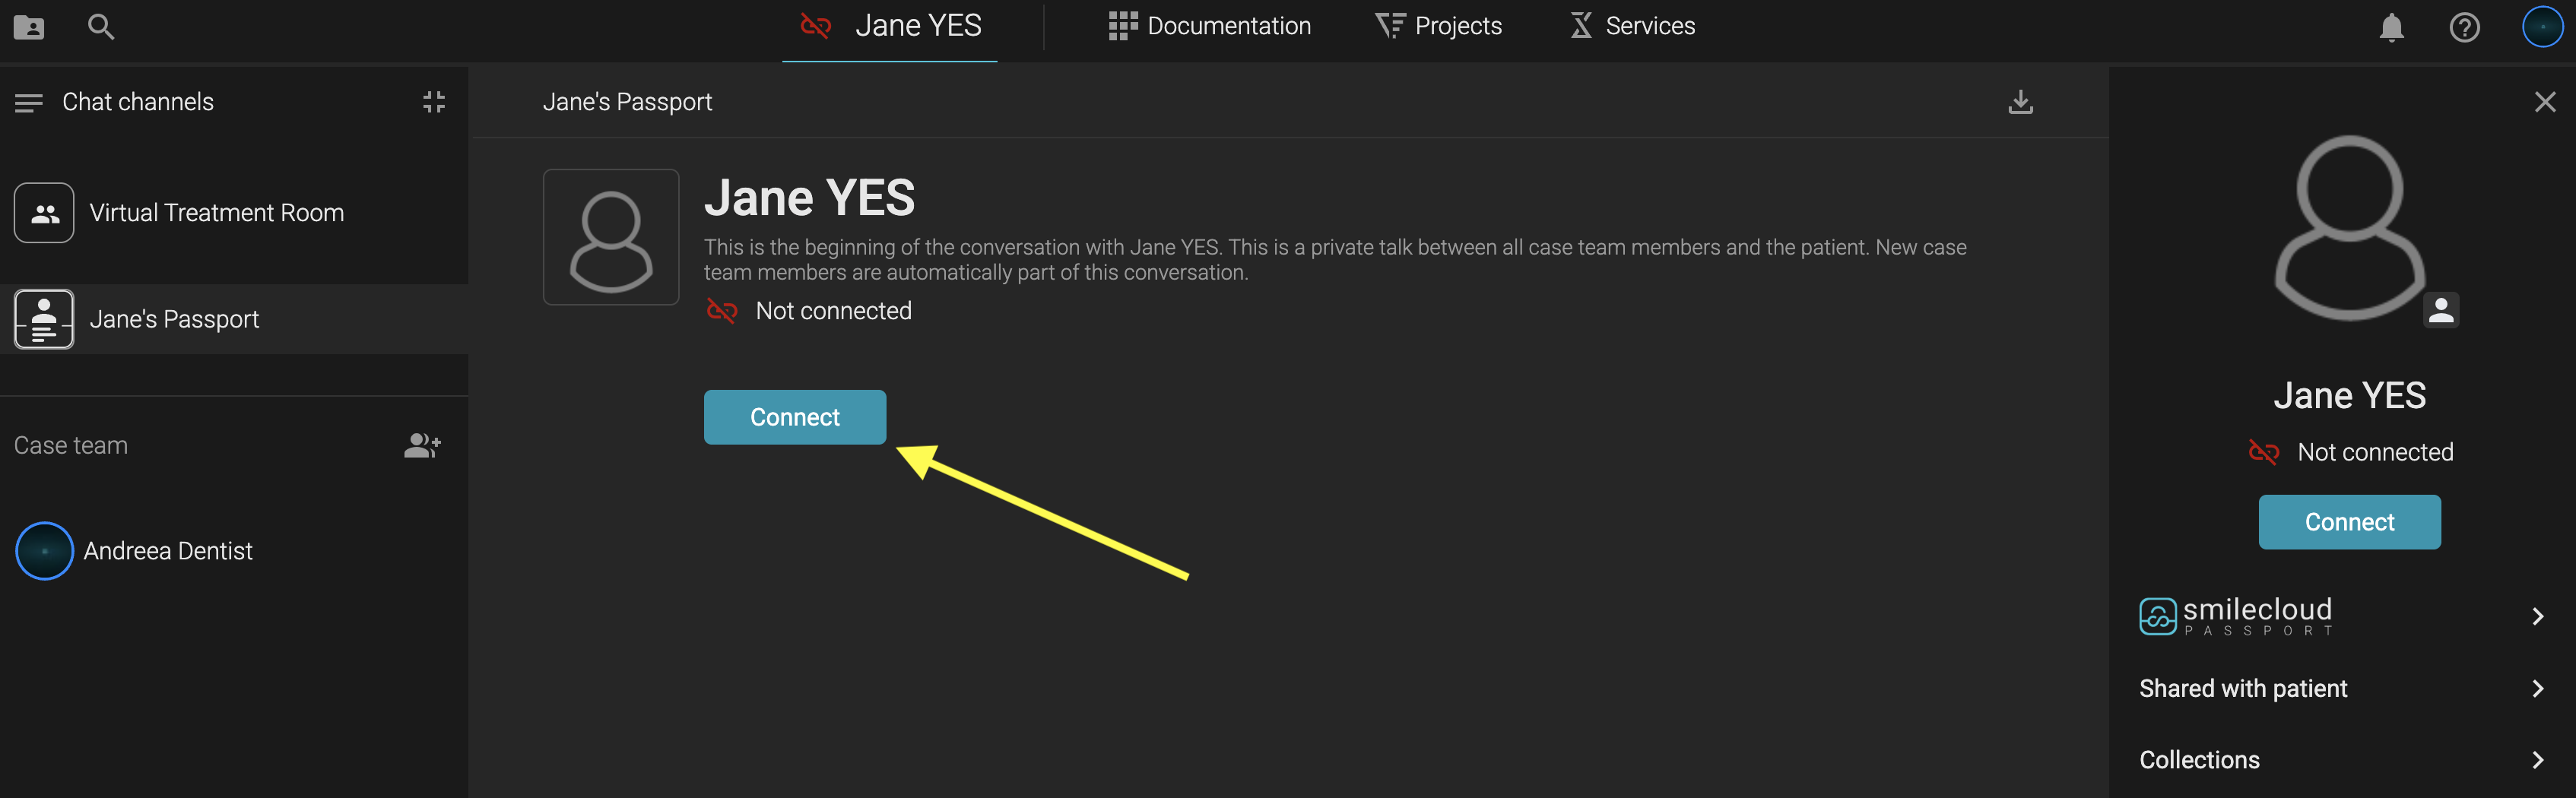
Click on the patient name to open the Passport
Step 2: Connect the Patient
Click the "Connect Patient" button within the case.
Add their email. Smilecloud will send them an invitation to download the Smilecloud Passport app and access their case securely.
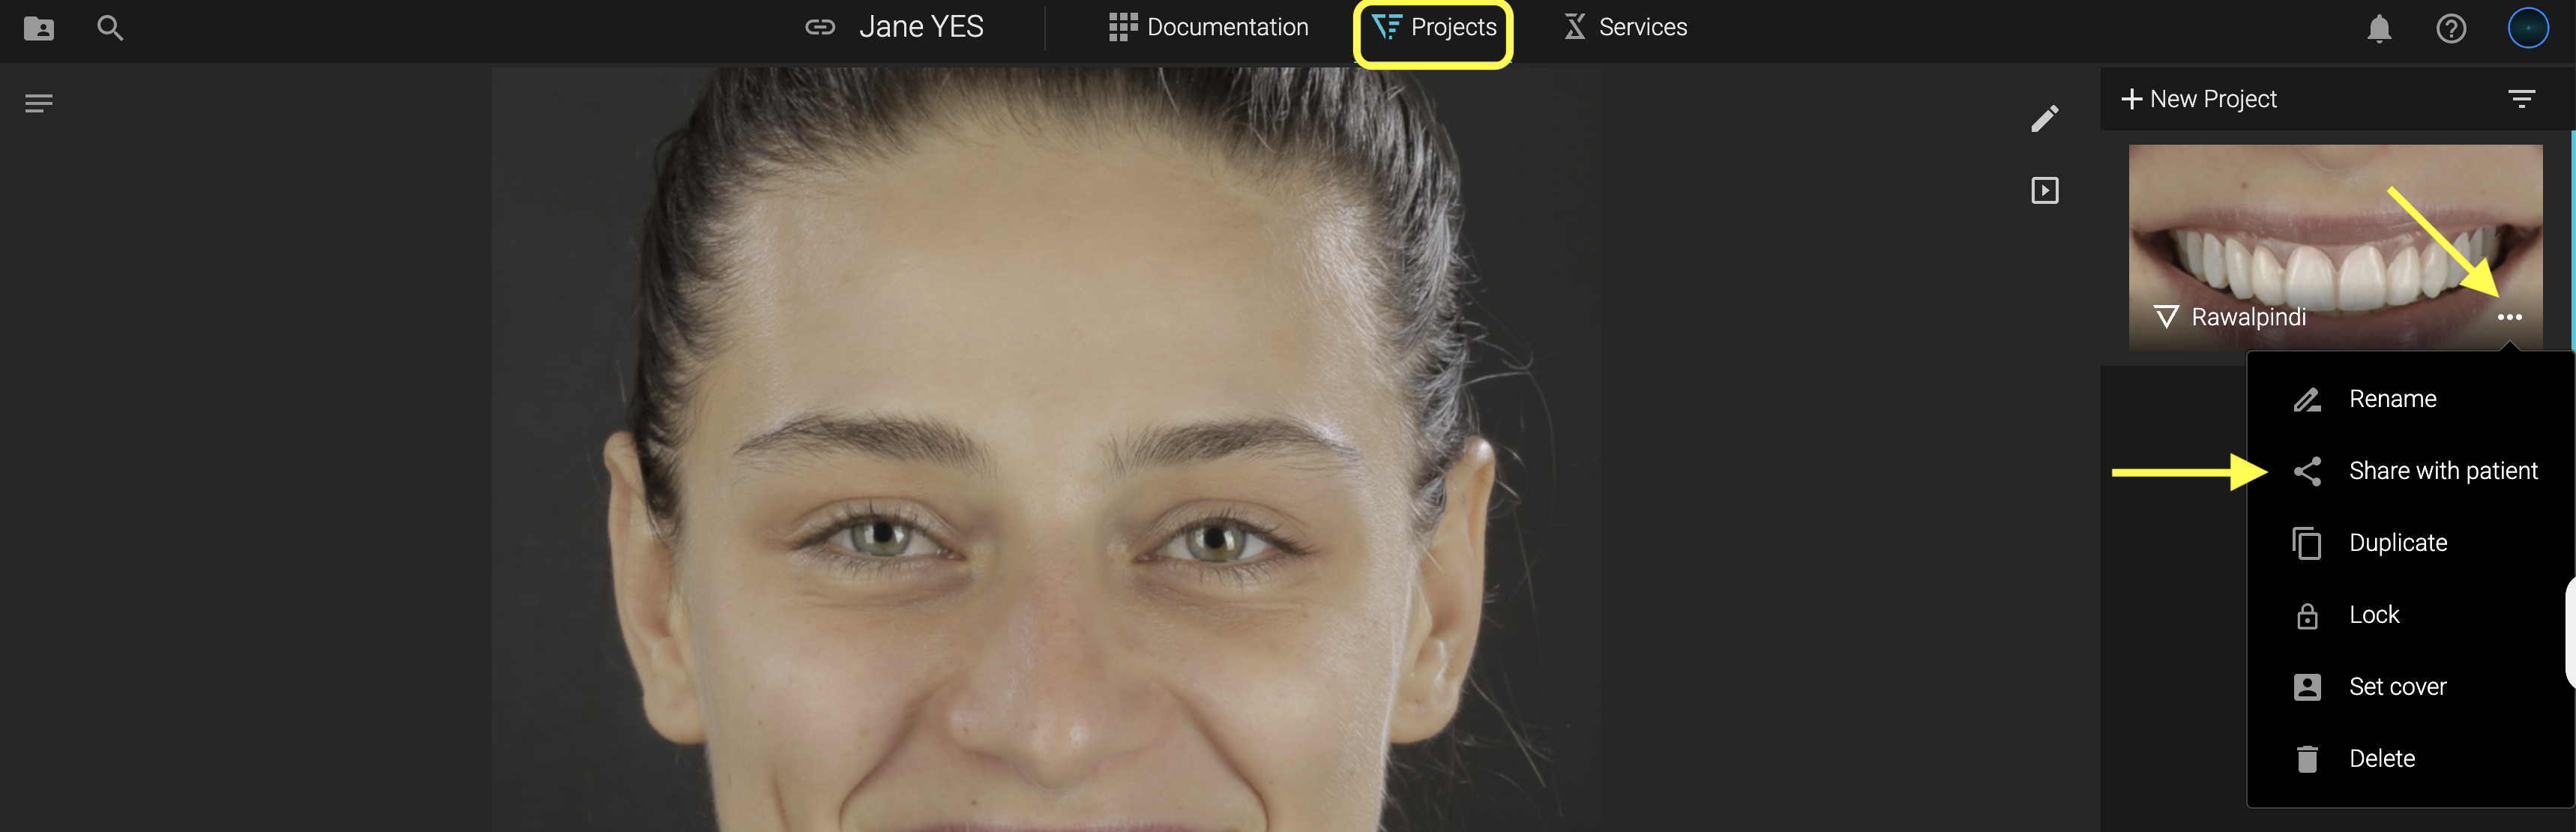
Step 3: Share Files or Designs
Choose which assets you want to share:
✅ Smile Design preview
✅ Video simulation
✅ Aditional galleries
The patient will see a professional, secure interface—giving them ownership of their treatment data.
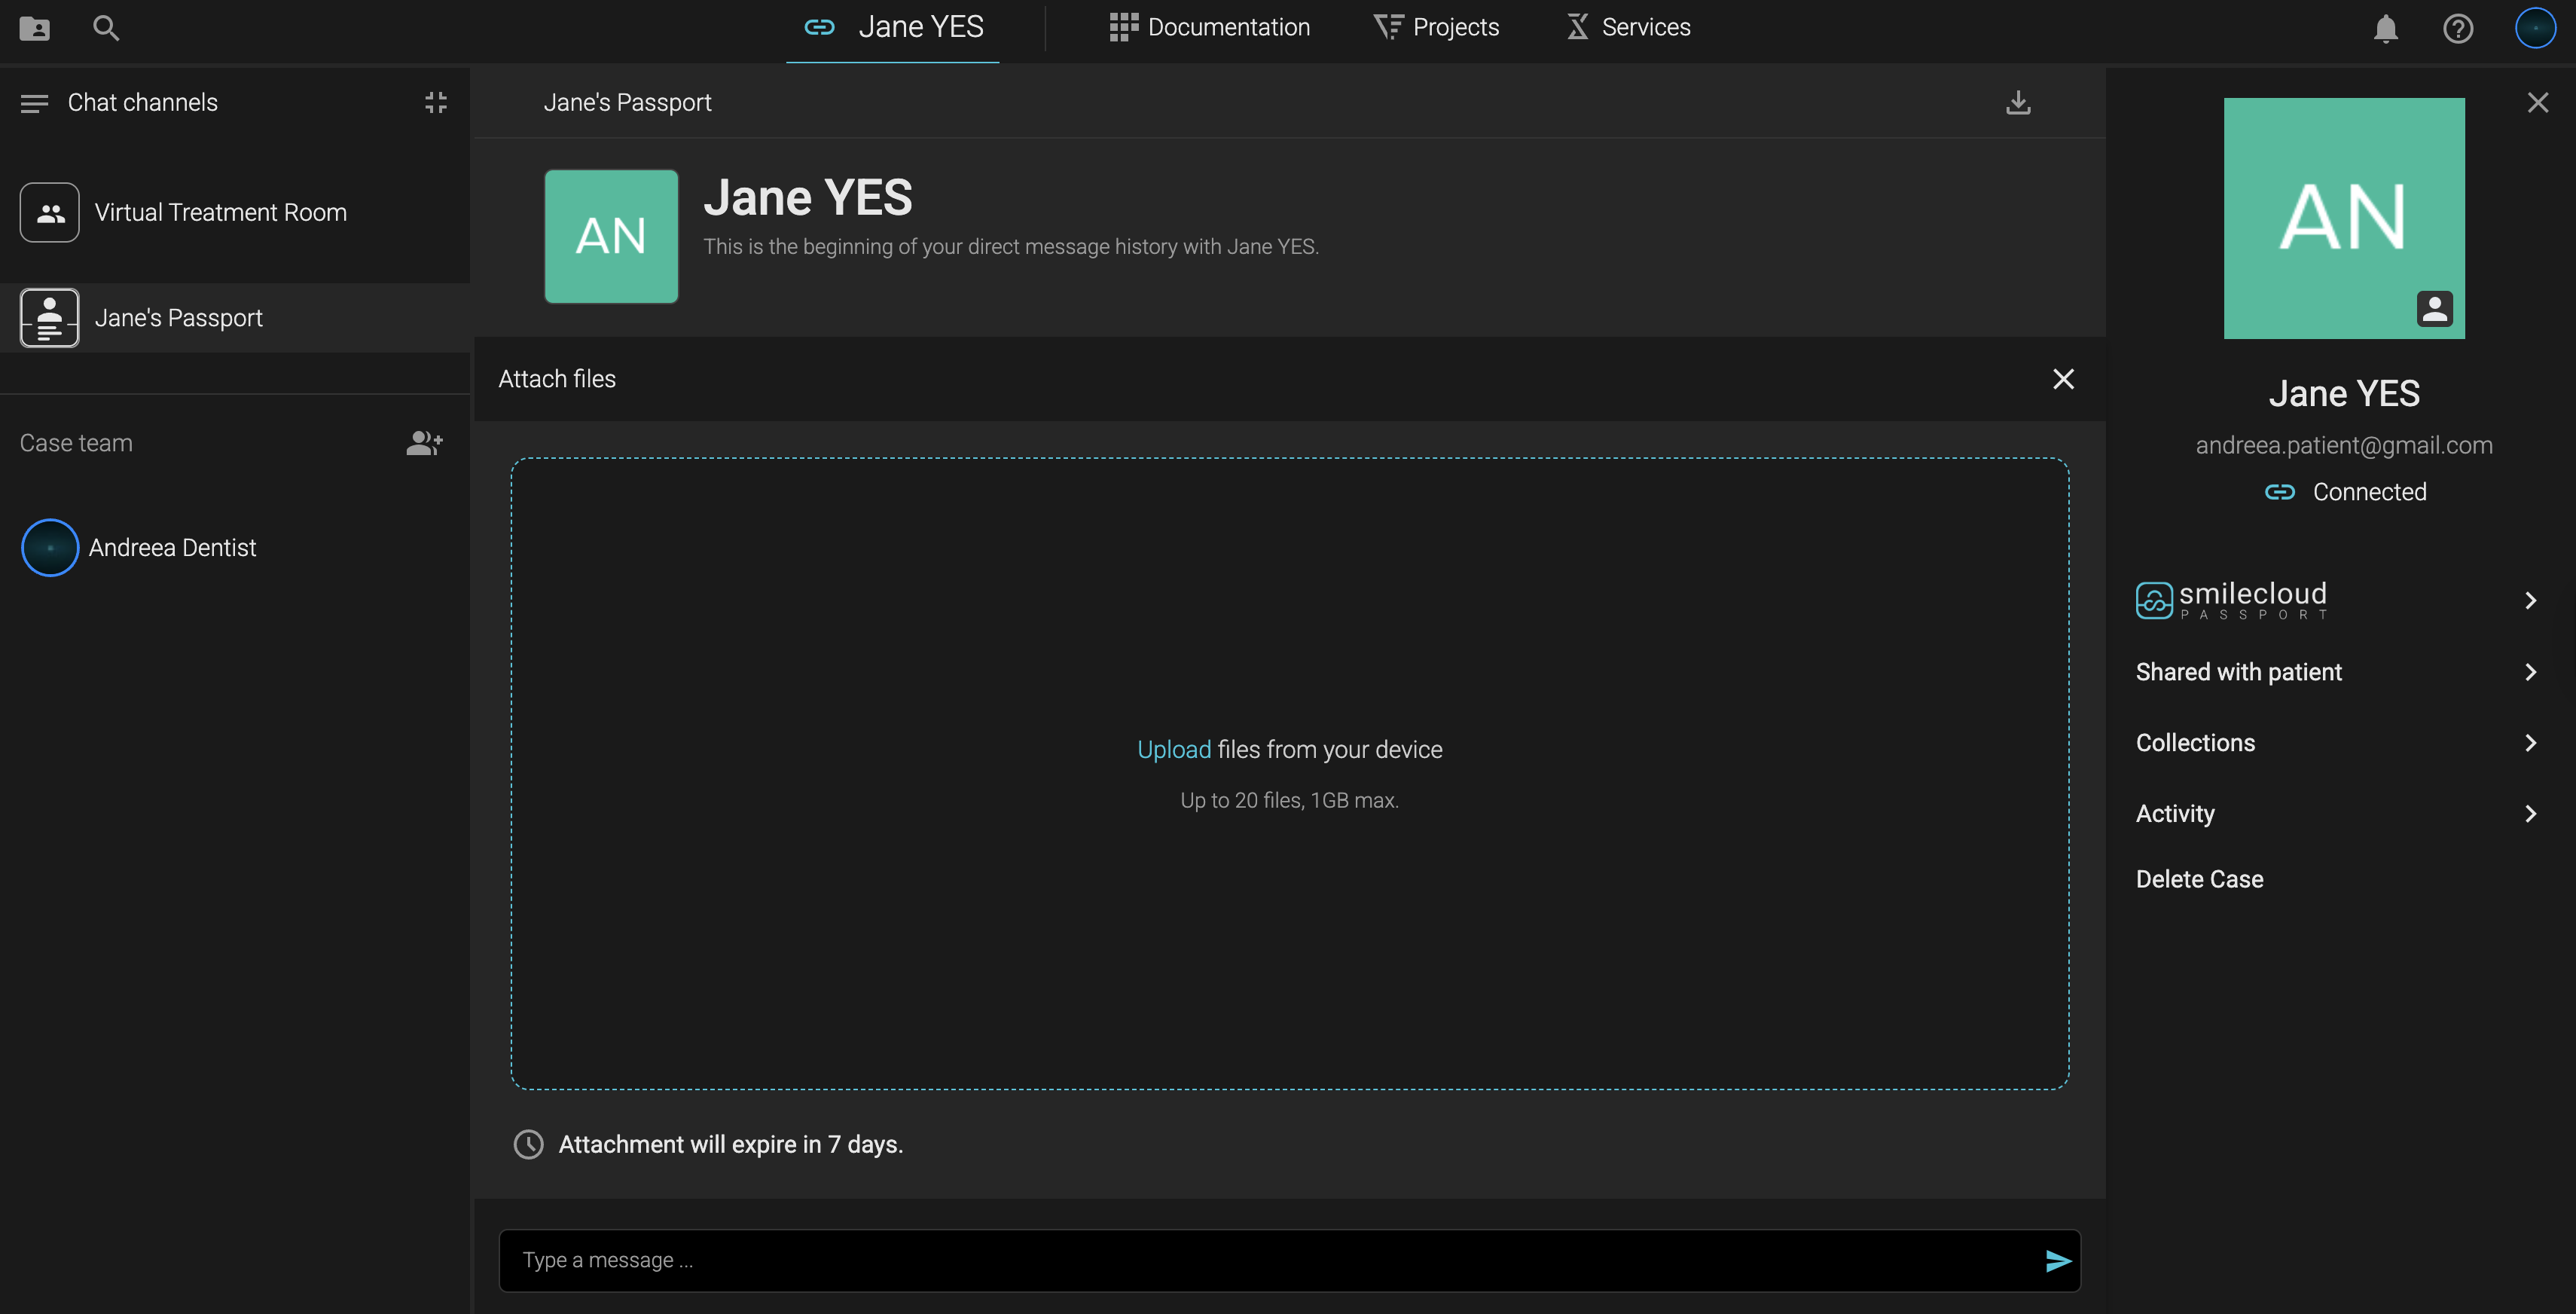
Step 4: Communicate Clearly - Patient Chat
Patients can message you or your team directly from the app.
You’ll get structured, documented communication—without clutter or confusion.
The patient chat is separate from the treatment team chat.
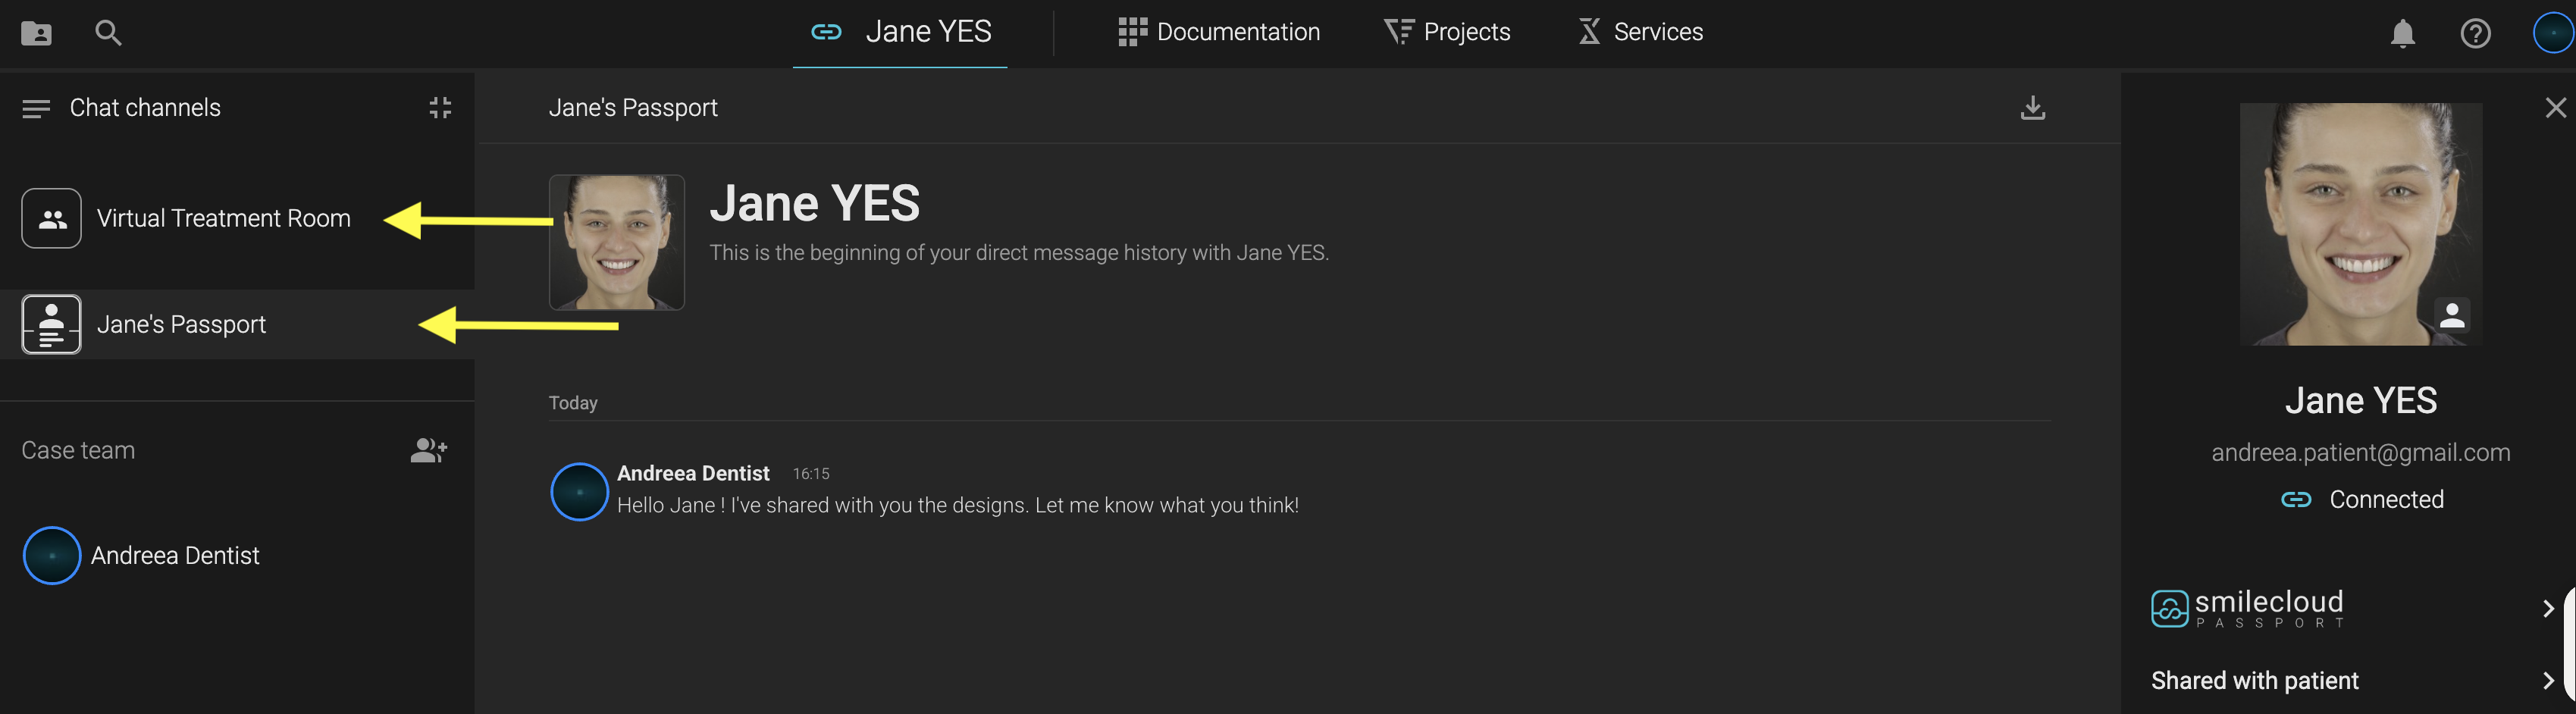
You can also send PDF treatment plans directly in the chat.
💬 Patient Experience, Upgraded
The Passport experience doesn’t just feel modern—it is modern. By offering it, you're not just sending files… you’re creating clarity, professionalism, and confidence in your care.
🔐 Your Data, Your Control
Patients can:
- View and store all shared files
- Revisit designs and simulations during treatment
- Keep their history safe—even years later
- No dependency. Just freedom.
🚀 Ready to Use Smilecloud Passport?
It’s already part of your Smilecloud tools.
Next time you create a case and a Smile Design —connect your patient.
📲 Download links:
Smilecloud Passport on App Store
Smilecloud Passport on Google Play
👨⚕️ For a modern patient experience, Smilecloud Passport makes all the difference.