
Getting Started With Smilecloud
Welcome to Smilecloud.
Your first few minutes are designed to help you set up your workspace, personalize your experience, and get familiar with the tools you’ll use most. This guide walks you through the onboarding flow and shows you where to begin once your account is ready.
1. Review and accept the required consent forms
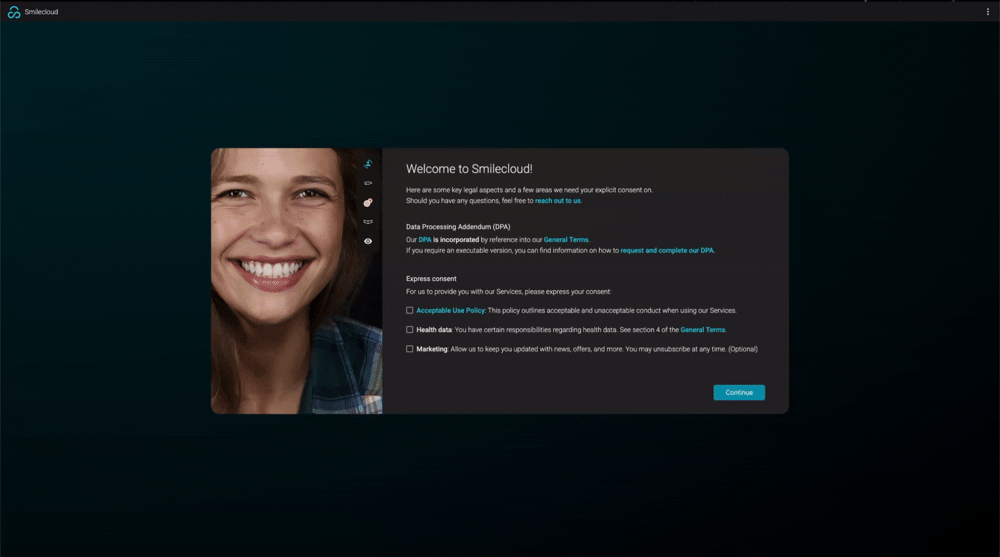
When you first enter Smilecloud, you’ll be asked to review the required legal and consent information.
On this screen, you may see items such as:
- Acceptable Use Policy
- Health Data consent
- Marketing communication preferences
Select the required options to continue. Marketing consent is optional and can be managed based on your communication preferences.
Once everything is set, click Continue.
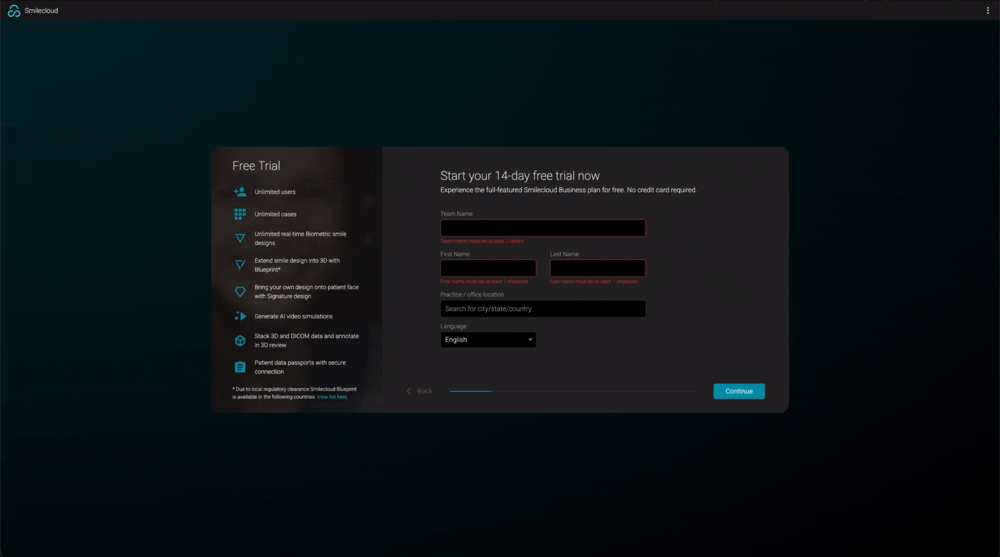
2. Start your 14-day free trial
Next, Smilecloud will ask you to complete a few basic details for your trial account.
You’ll be asked to add:
- Team name
- First name
- Last name
- Practice or office location
- Preferred language
The location field helps Smilecloud personalize your workspace and apply the right regional settings where needed.
Once the information is complete, click Continue.
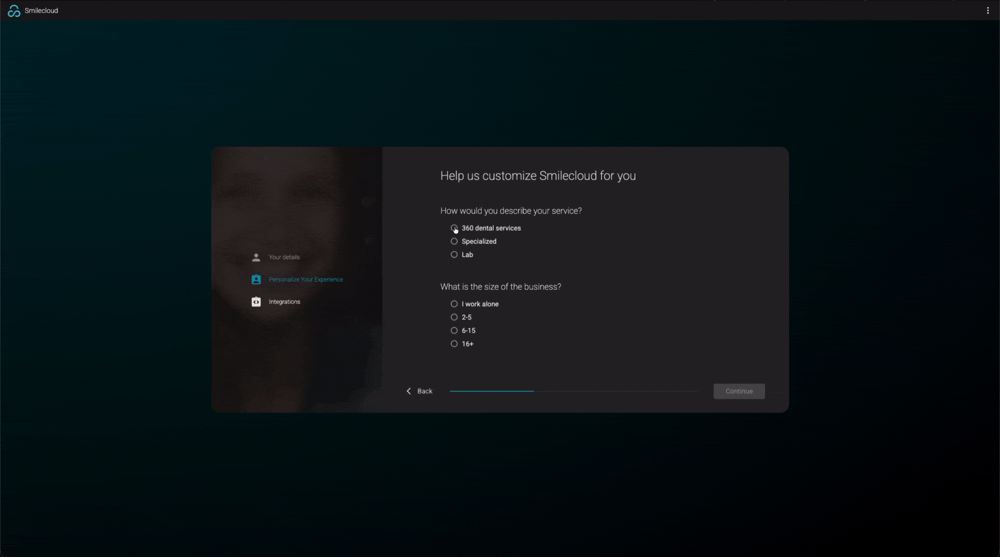
3. Personalize your Smilecloud experience
Smilecloud will then ask a few short questions about your practice and workflow. These help tailor the platform experience to your needs.
You may be asked to select:
- How you describe your services, such as 360 dental services, specialized practice, or lab
- The size of your business
- Your role in the business
- Your primary expertise
- What you’re looking to improve with Smilecloud
For example, you can choose goals such as using Smile Design to engage more patients, organizing patient files, collaborating more effectively, or extending smile design into 3D with Blueprint where available.
There may also be a question about whether you’re interested in Straumann integrated solutions. Select the option that best applies to you, then click Start Your Free Trial.
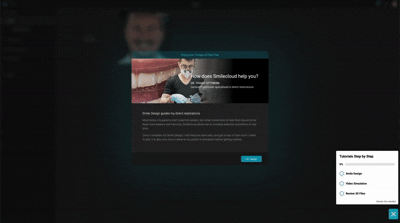
4. Explore the welcome message
When you first open your workspace, you may see a short welcome card showing how Smilecloud can help in a clinical workflow.
Click I’m ready to close the message and start exploring.
This is also where you’ll notice the Tutorials Step by Step button in the lower-right corner. This guide stays available as you move through the platform, helping you complete your first key actions.
5 Meet your Smilecloud workspace
Once your trial is active, you’ll arrive in your Smilecloud workspace.
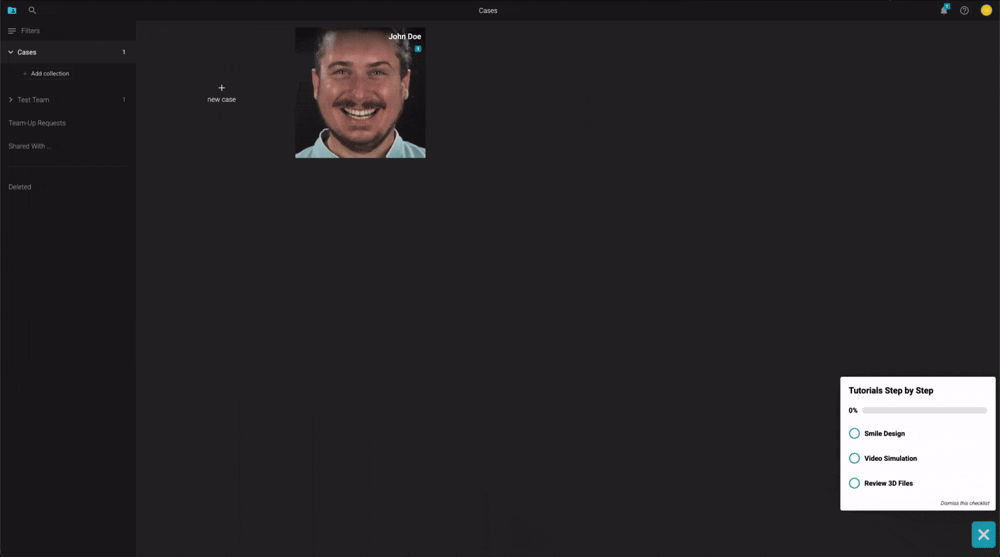
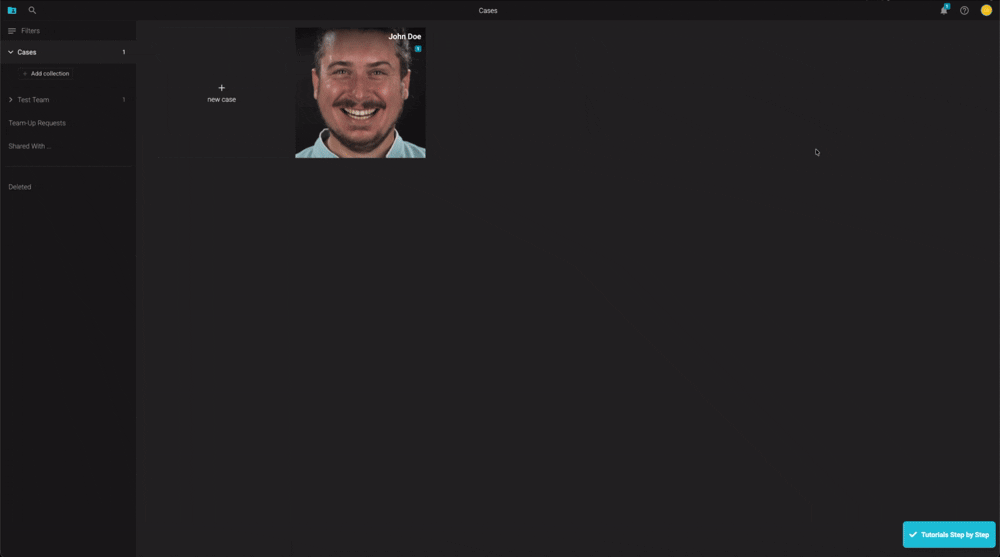
You’ll see the Cases page, where your patient cases are organized. On this page, you’ll usually find:
- A New Case tile, used to create a new patient case
- A sample case, such as John Doe, which you can explore to understand how Smilecloud works
- Collections and filters on the left side
- Notifications, Help, and your account menu in the upper-right corner
The sample case is a great place to begin. It lets you explore the structure of a real Smilecloud case without needing to upload your own patient files right away.
6. Open the sample case
Click the sample case to enter it.
Inside the case, you’ll see the main case navigation at the top, including areas such as:
- Chat
- Documentation
- Projects
- Metalab
The case opens in Team Chat, where you can communicate with collaborators and keep case-related discussions in one place. Messages in this chat are visible to current and future case team members.
On the left side, you’ll see available chat channels and the case team. On the right side, you’ll see the patient profile panel, where you can access patient connection options, shared case information, activity, collections, and case actions.
You can type a message directly in the chat field and send it from there.

7. Follow the step-by-step tutorials
The Tutorials Step by Step button in the lower-left corner gives you a simple checklist to help you complete your first key workflows.
The checklist may include:
- Smile Design
- Video Simulation
- Review 3D Files
As you complete each step, the checklist updates automatically. You can also use it as a quick way to jump into the relevant learning material.
This is a helpful place to start if you want to learn by doing.

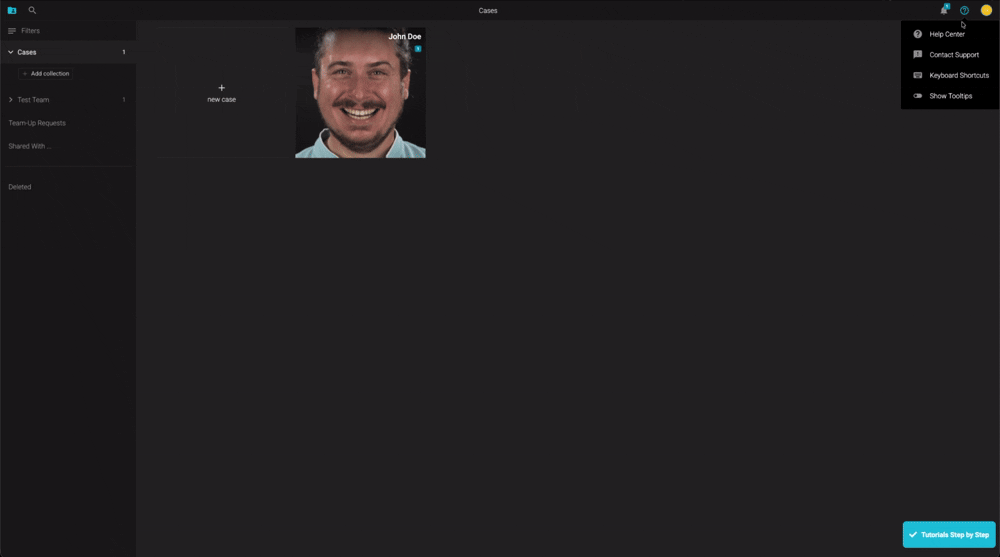
8. Use the Learning Center
Smilecloud gives you quick access to the Learning Center from inside the app.
Click the Help icon in the upper-right corner and choose Help Center. You can also open the Learning Center widget from the lower-right corner when available.
From there, you can:
- Search for guides by keyword
- Open step-by-step tutorials
- Browse recommended articles
- Check product news
- Return to the application when you’re done
For example, you can search for topics like Smile Design, Video Simulation, Blueprint, CBCT, STL, or Subscription and immediately access related guides.
9. Contact Smilecloud Support
Support is always close by.
Click the Help icon in the upper-right corner, then select Contact Support.
A support form will open inside the app. Choose the type of request that best matches your question, such as:
- Technical Issue
- Account Access
- Billing & Subscription
- General Questions
Your name and email may be filled in automatically. Complete the remaining fields, including country, subject, and description.
You can also:
- Take a screenshot directly from the support form
- Upload files if needed
- Send the request to our support team
Once submitted, you’ll see a confirmation message letting you know your ticket has been received.
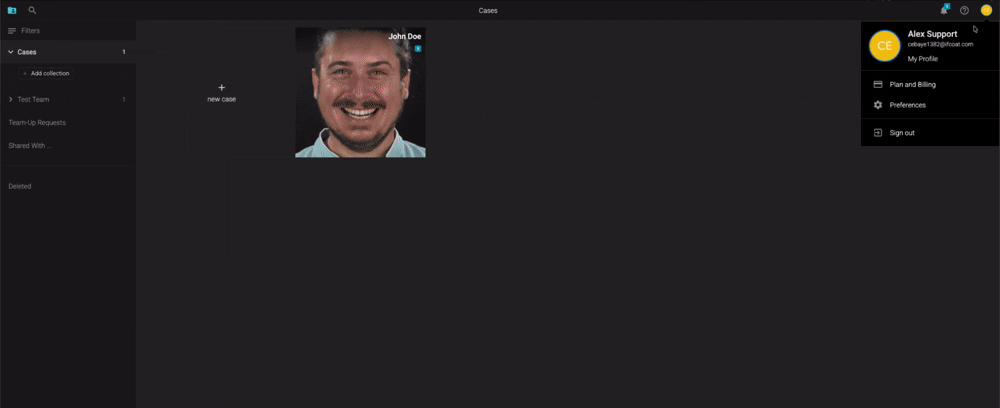
10. Manage your account and billing
Your account menu is located in the upper-right corner of the workspace.
From there, you can access:
- My Profile
- Plan and Billing
- Preferences
- Sign out
In Plan and Billing, you can review your current plan, trial end date, team members, case usage, video simulation usage, and available subscription options.
This is also where you can compare plans and choose the subscription that best fits your workflow once your free trial is coming to an end.
11. Create your first case
When you’re ready to begin with your own patient, return to the Cases page and click New Case.
From there, you can start building your case by adding the documentation you need for your workflow. Once your files are in place, you can begin exploring Smile Design, video simulations, 3D review, collaboration, and the other tools available in your workspace.

You’re ready to begin
Your Smilecloud account is now set up, your workspace is ready, and your first learning tools are right where you need them.
Start with the sample case, follow the step-by-step tutorials, and use the Learning Center whenever you want more guidance. And if you need help along the way, Smilecloud Support is only a few clicks away.