
Introducing Motion in Blueprint
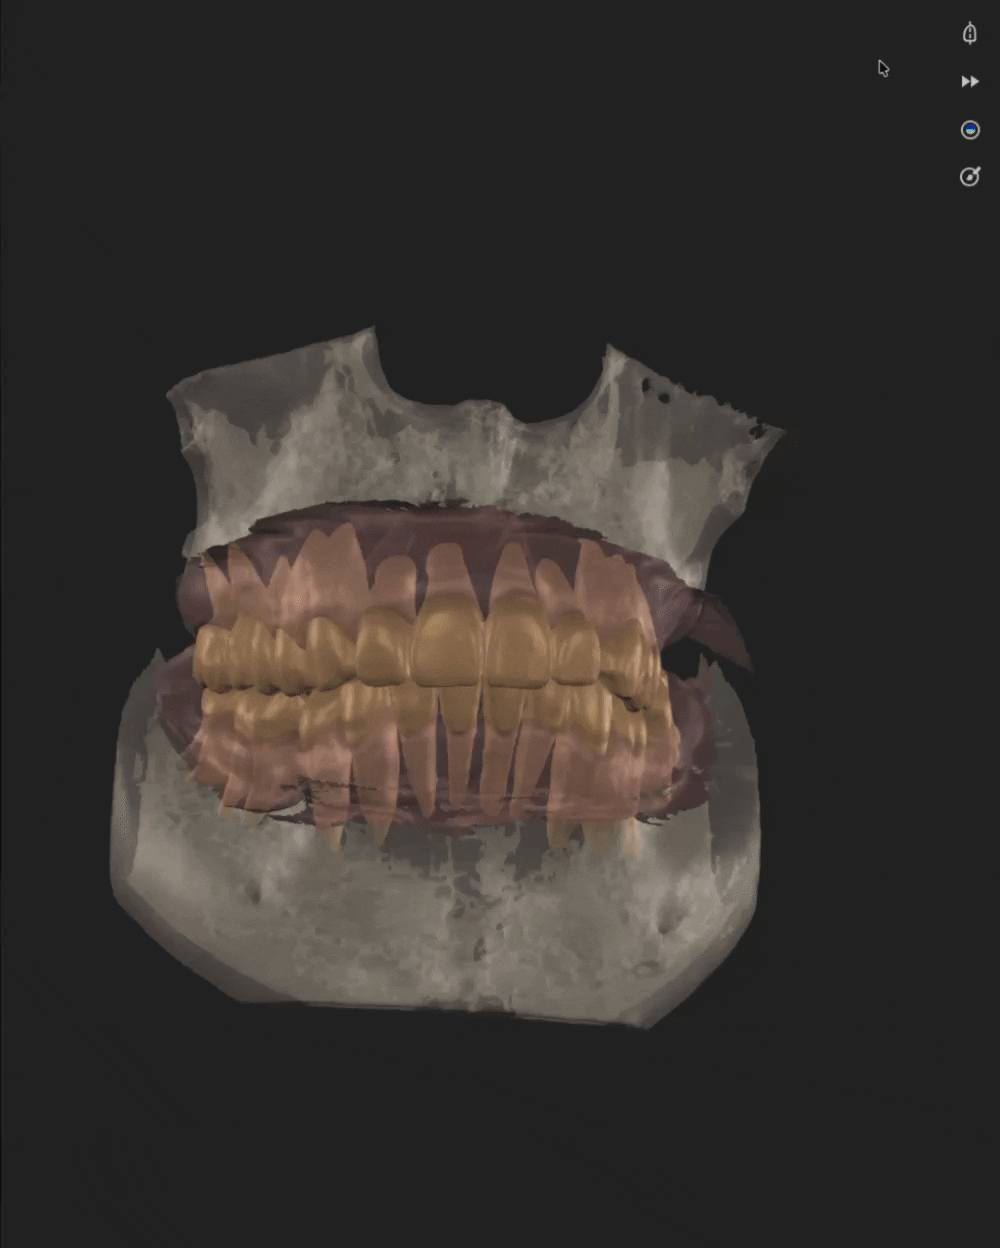
Movement visualization can support how dental professionals review and communicate the relationship between the upper and lower arches in an illustrative case. It is also one of the easiest parts of a case visualization to overlook.
In Blueprint, Motion provides an additional illustrative view of how the upper and lower segmented scans interact over time, helping you visually review modeled movement, contacts, and potential interferences in the context of the case visualization.
Until recently, Motion in Blueprint was available only when a compatible recorded motion file had been uploaded. If recorded motion data was available in the project, Blueprint could display it. If not, Motion was not part of the workflow.
That changes with Biometric Motion.
Biometric Motion allows you to generate a mechanically generated illustrative movement animation based on default or user-adjusted parameters, including condylar angle, Bennett angle, and, where available, condyle-position settings, which you can visualize in Blueprint. It provides a modeled visual reference when a recorded motion file is not available, without representing, measuring, or predicting the patient’s actual mandibular movement.
Recorded Motion and Biometric Motion, now in one place
When creating a new Blueprint project, you can add your initial scans, CBCT, and, when available, a compatible recorded motion XML file. Motion tools require both an upper and a lower segmented scan in the project.
Upload and process only data that you are authorized to use and share in accordance with applicable law, your clinic’s policies, the Smilecloud terms, and the current Instructions for Use.
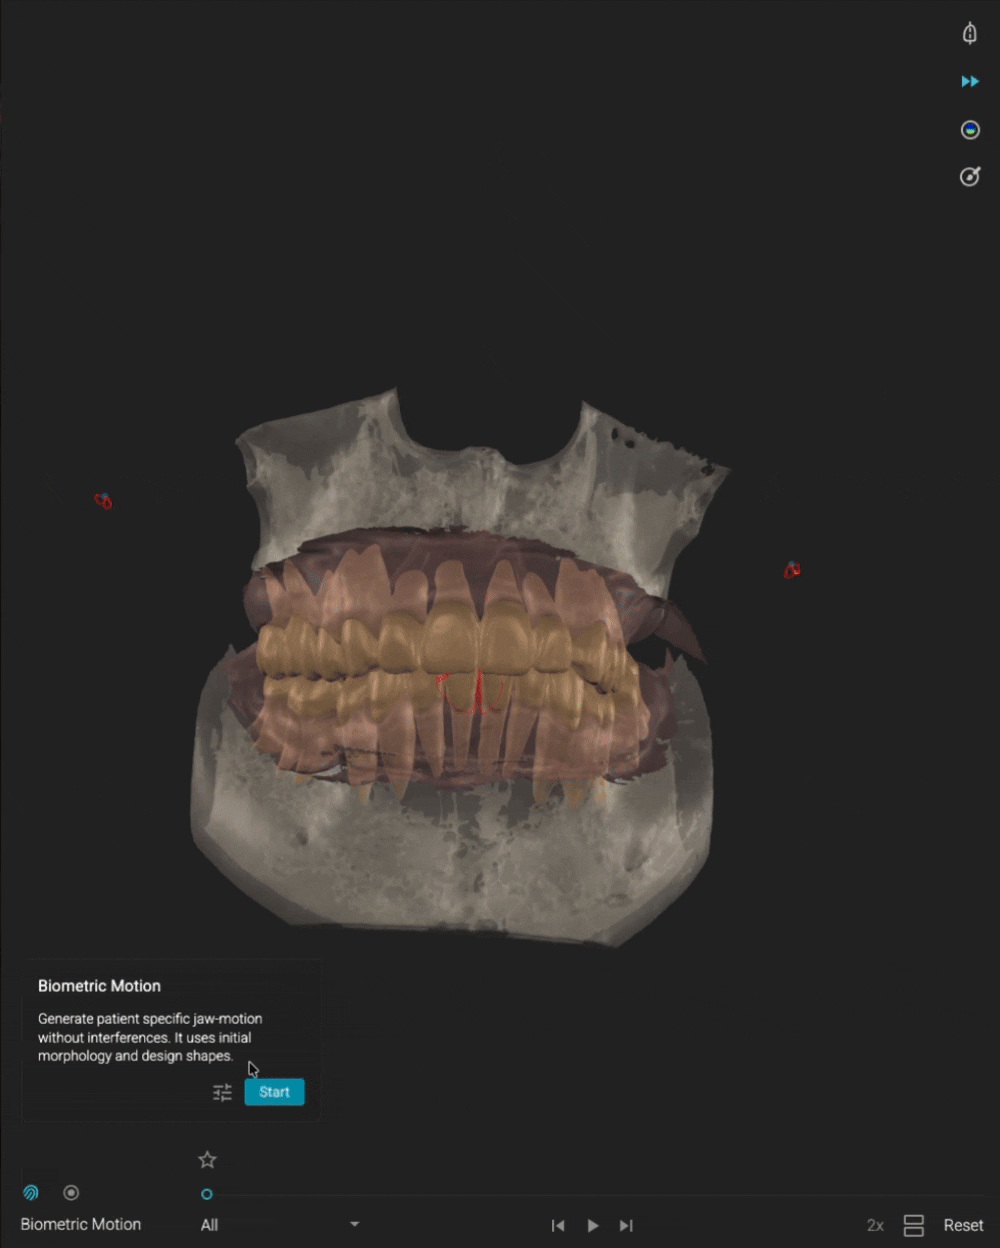
Once the data has been added and segmentation has been reviewed and accepted by the user, you can open the case stack and access Motion through the two-triangle Motion button.
When you click the Motion button, Blueprint displays the Motion video player. The player groups animations into two selectable sets: Biometric Motion and Recorded Motion.
If recorded motion has been uploaded and no Biometric Motion animation has been generated, Blueprint displays Recorded Motion by default. Otherwise, Blueprint displays Biometric Motion by default, with available motion sets selectable in the player.
This makes Motion a natural part of the Blueprint workflow: available when the required data is present, easy to open, and ready to support visual review and communication within Blueprint’s intended use.
Generate Biometric Motion in a few clicks
To create a mechanically generated illustrative movement animation, click Biometric Motion.
From there, you can review or adjust the parameters used by the animation. You can customize values such as:
- Condylar angle
- Bennett angle
- Condyle-position settings, where available
You can adjust these values by clicking the slider control, or by dragging the arrows displayed on either side of the segmented CBCT.
The Adjust options for custom patient-specific settings are available when a CBCT is present in the project. If no custom settings are defined, Biometric Motion uses the default parameter values.
Once you have reviewed the values, click Start.
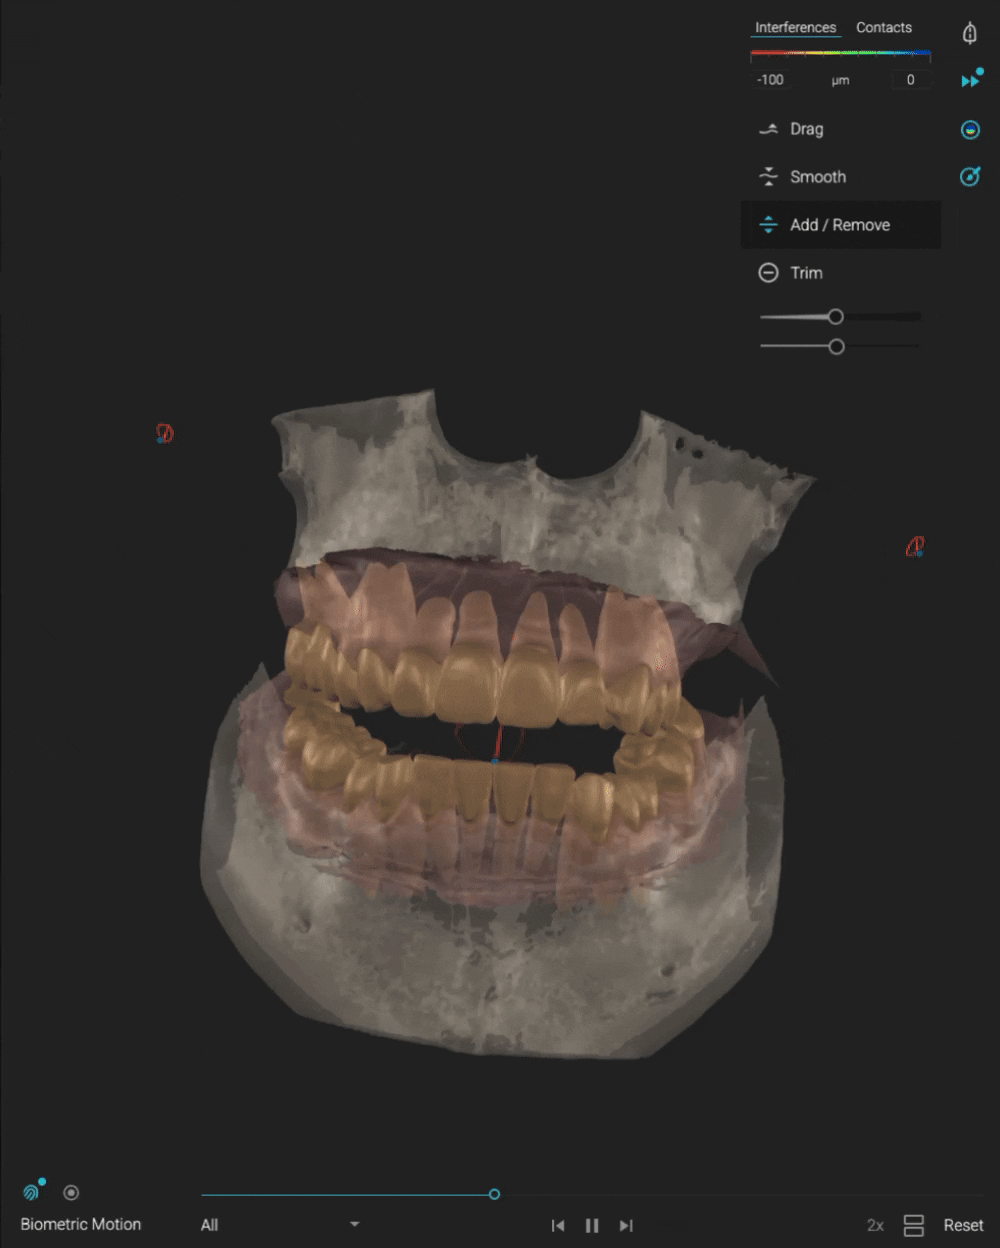
The illustrative movement animation will begin to generate.
The fidelity and representativeness of the visualization depend on the quality, completeness, relevance, alignment, and segmentation of the user-provided input data.
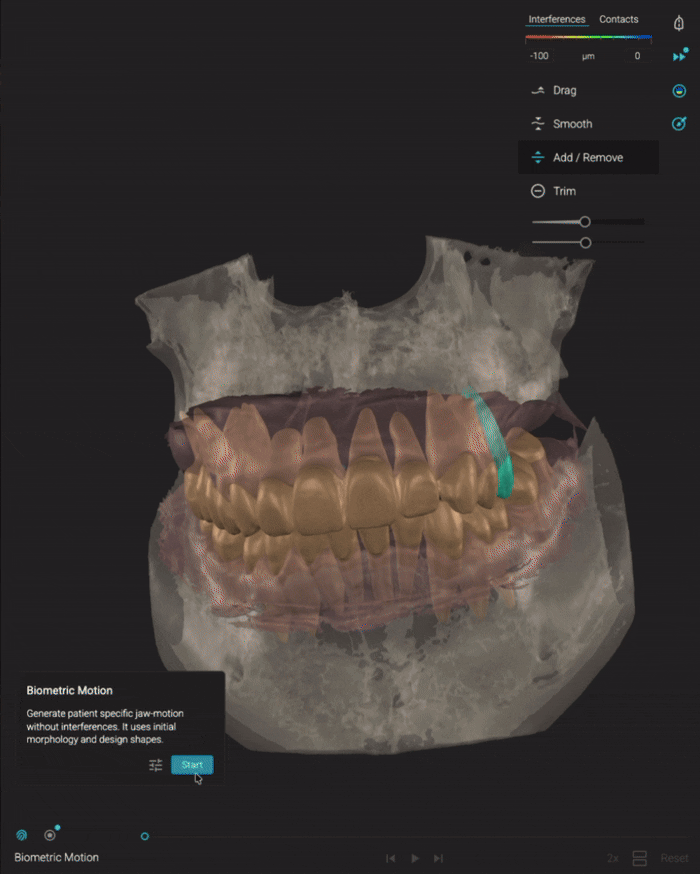
Review potential interferences before finalizing the movement
If potential interferences between the scans are flagged during the generation process, you will be notified.
From there, you can click Show Interferences to inspect them directly.
Interference visualization is for professional review and communication only. It should not be treated as a diagnostic finding, a comprehensive detection result, or a substitute for reviewing the original clinical data.
Where appropriate, you can review the original scans and use the Sculpt Brush to adjust the illustrative geometry before regenerating Biometric Motion. This can help create a cleaner visual animation for review and provide a more suitable visualization context for the case.
Define an alternative starting point for the generated animation
Biometric Motion gives you control not only over the movement values, but also over where the generated animation begins.
For a selected movement animation, such as protrusion or right or left laterotrusion, you can mark one frame as a starting position for resimulation. Only one starred frame can be active at a time.
To do this, move the slider along the movement timeline and click the star button at the frame you want to use as the new starting point.
Blueprint maintains the starred lower-jaw position after the Motion tool is closed. Pressing Start while a starred frame is active resimulates the Biometric Motion set from that starred position.
This gives you more flexibility when reviewing different modeled movement animations and helps you create an additional illustrative view of the case.
Review motion your way
Once the Biometric Motion sequence is ready, you can choose how you want to view it.
Use the dropdown menu to select a specific movement, or view all available movements together. You can scrub through the timeline frame by frame, adjust the playback speed, and inspect the animation at your own pace.
When a frame has been starred, Blueprint displays a blue dot to help you stay aware of the animation that contains the starred frame.
The result is a motion review experience that feels controlled, visual, and easy to navigate.
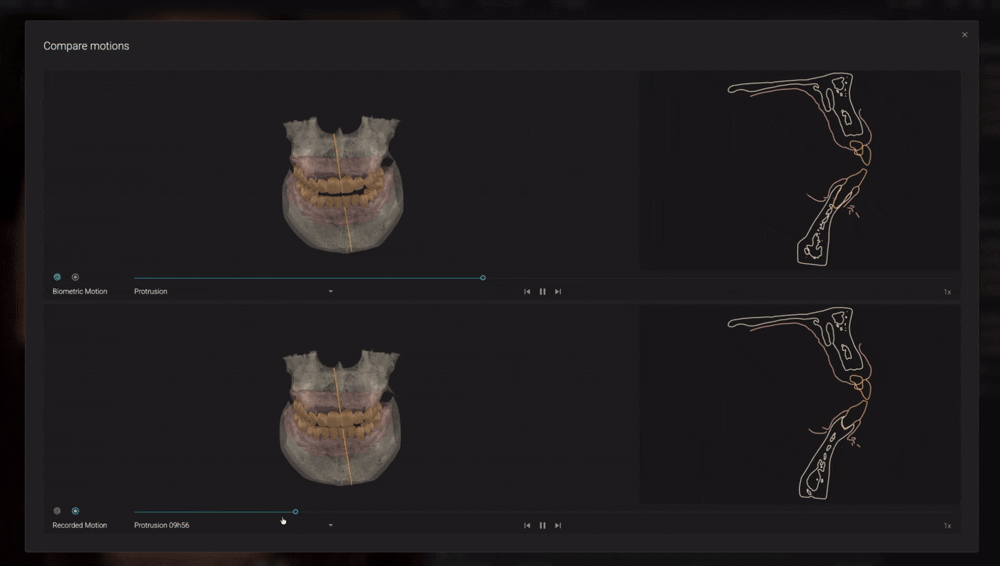
Compare recorded and biometric movement
When both Recorded Motion and Biometric Motion are available in the same project, you can use Compare mode.
This allows you to view both movements side by side in a split view, giving you a visual way to compare the uploaded recorded-motion animation with the mechanically generated Biometric Motion animation.
For specialists, this comparison can be especially useful. It offers a way to review visual differences between the available motion animations and the selected or default Biometric Motion parameters.
Compare mode does not validate either motion set, establish clinical accuracy, or determine which movement should be used for diagnosis, treatment planning, or clinical decision-making.
Inspect movement tooth by tooth
Motion in Blueprint also gives you a closer look at how the animation relates visually to selected teeth or areas of interest.
Using Section View, you can inspect the relationship between the displayed movement animation and a selected tooth. To change the section view, simply click the tooth you want to analyze.
This makes it easier to review visual contacts, potential interferences, or tooth-level animation effects at a more specific level.
Start fresh at any time
If you want to try a different approach, you can reset your Biometric Motion sequence at any time.
Click Reset inside Biometric Motion to begin again. Reset deletes the Biometric Motion set and may optionally reset the custom settings from the Adjust menu. The user is asked to confirm this action before proceeding.
You can also choose whether or not to remove all custom jaw settings, giving you the flexibility to restart completely or preserve the values you want to keep.
It is a simple way to explore different visualization scenarios while maintaining control of the workflow.
An additional way to review movement in Blueprint
Motion in Blueprint brings movement visualization closer to the center of the case communication and illustration workflow.
Recorded Motion remains available when compatible user-uploaded recorded motion data is available. Biometric Motion adds a mechanically generated illustrative animation based on default or user-adjusted parameters, helping you visually review modeled movement when recorded motion is not part of the case.
Together, they make Blueprint more flexible and more visual for professional case review and communication.
Motion in Blueprint gives specialists an illustrative way to view movement animations alongside design representations.
*Smilecloud Blueprint is intended for use by dental professionals in professional settings to create and review illustrative visualizations of potential aesthetic outcomes and anatomical context for communication with patients and interdisciplinary teams. Blueprint outputs, including Motion and Biometric Motion, are not intended for diagnosis, clinical assessment, treatment planning, prediction, measurement of mandibular function, or automated treatment recommendations. All visualizations must be reviewed together with the original clinical data and the user’s professional judgment, and use remains subject to the current Instructions for Use, applicable terms, and local regulatory requirements.